This is the third post this year in a series on basic sewing and mending skills. In January, it was all about getting started (threading a needle, making a knot) here and in February I explained how to sew on a button here. This month I am tackling the problem of a broken zip on a backpack
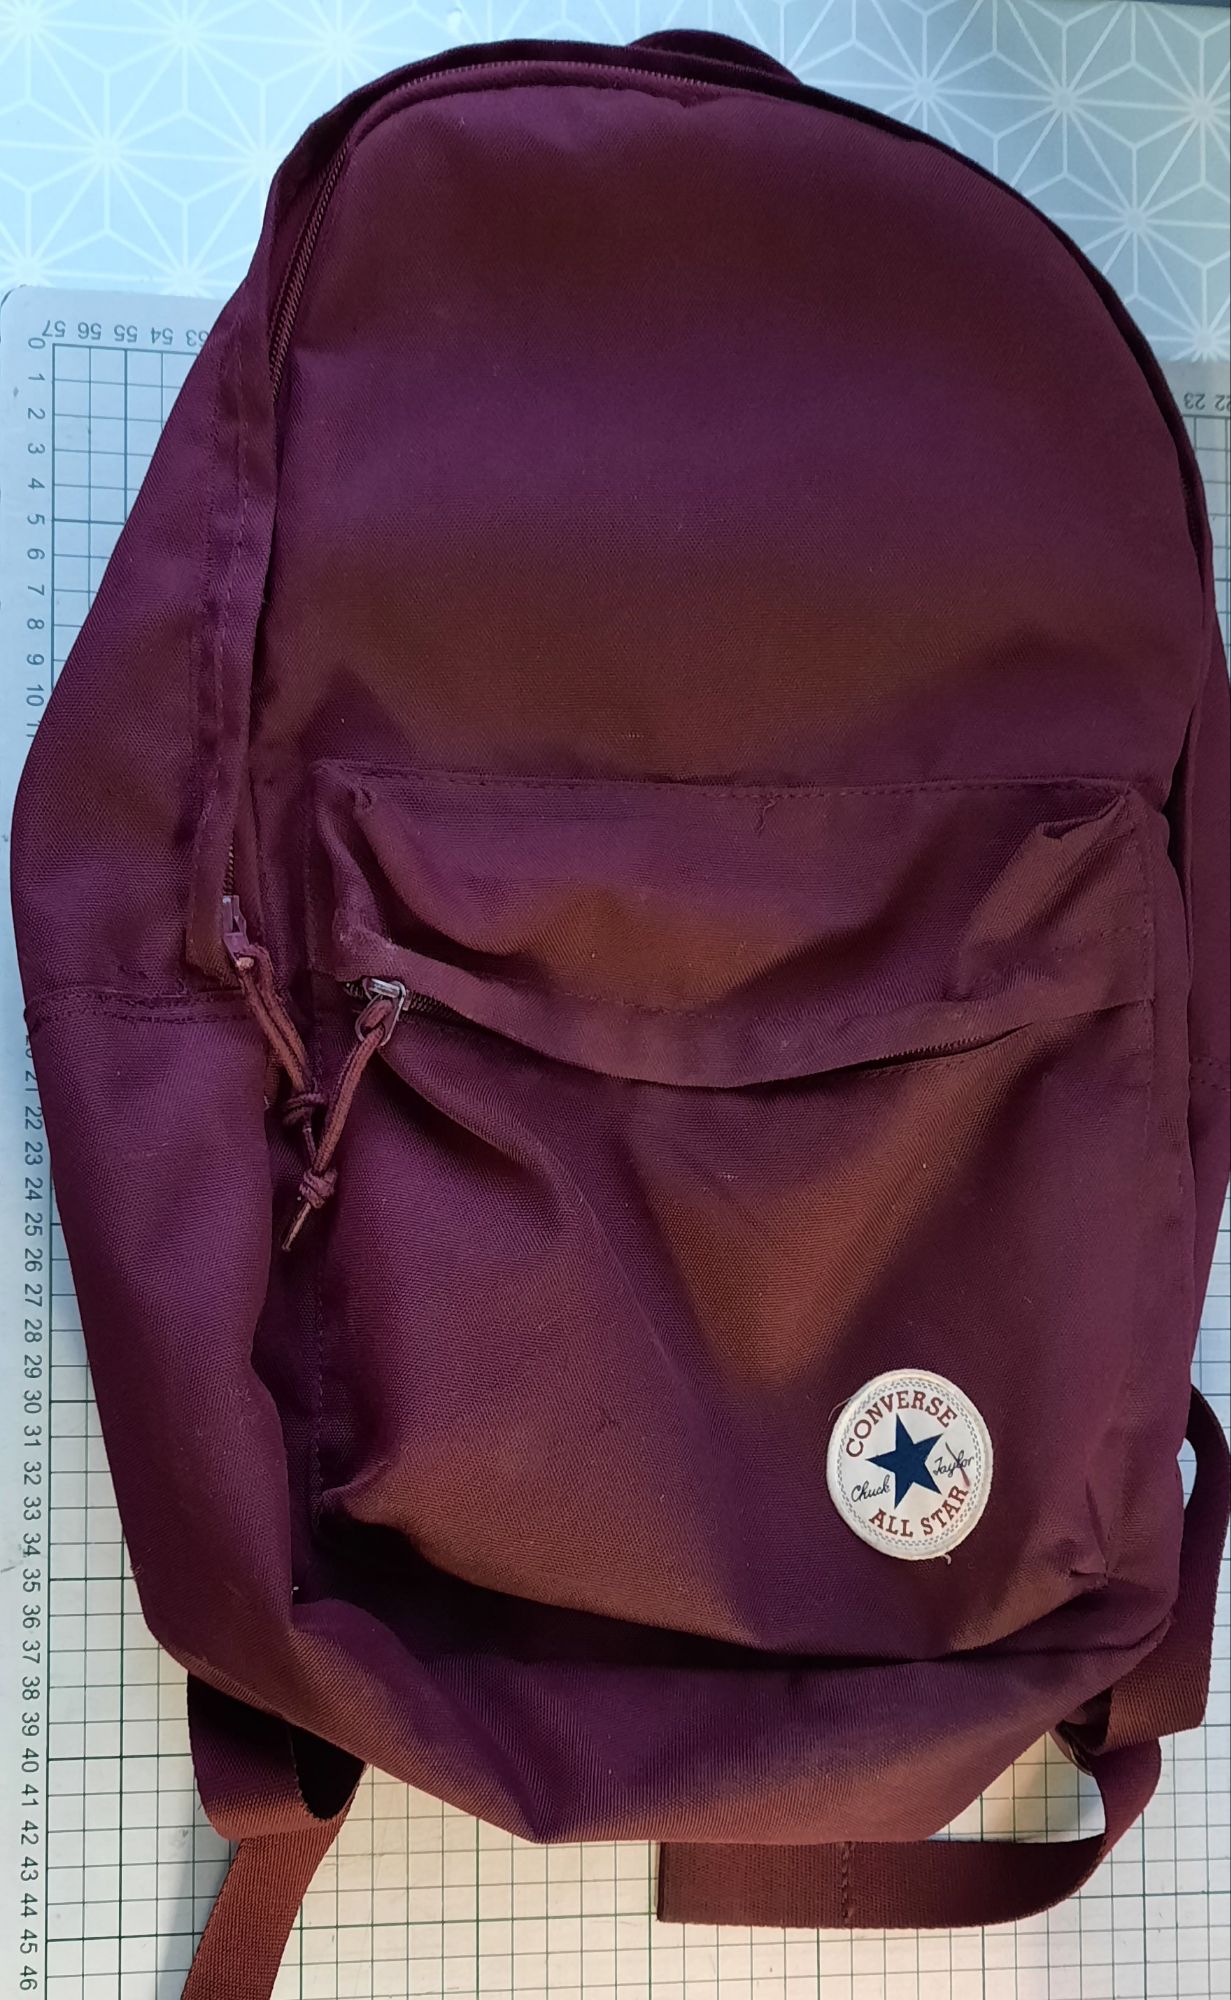
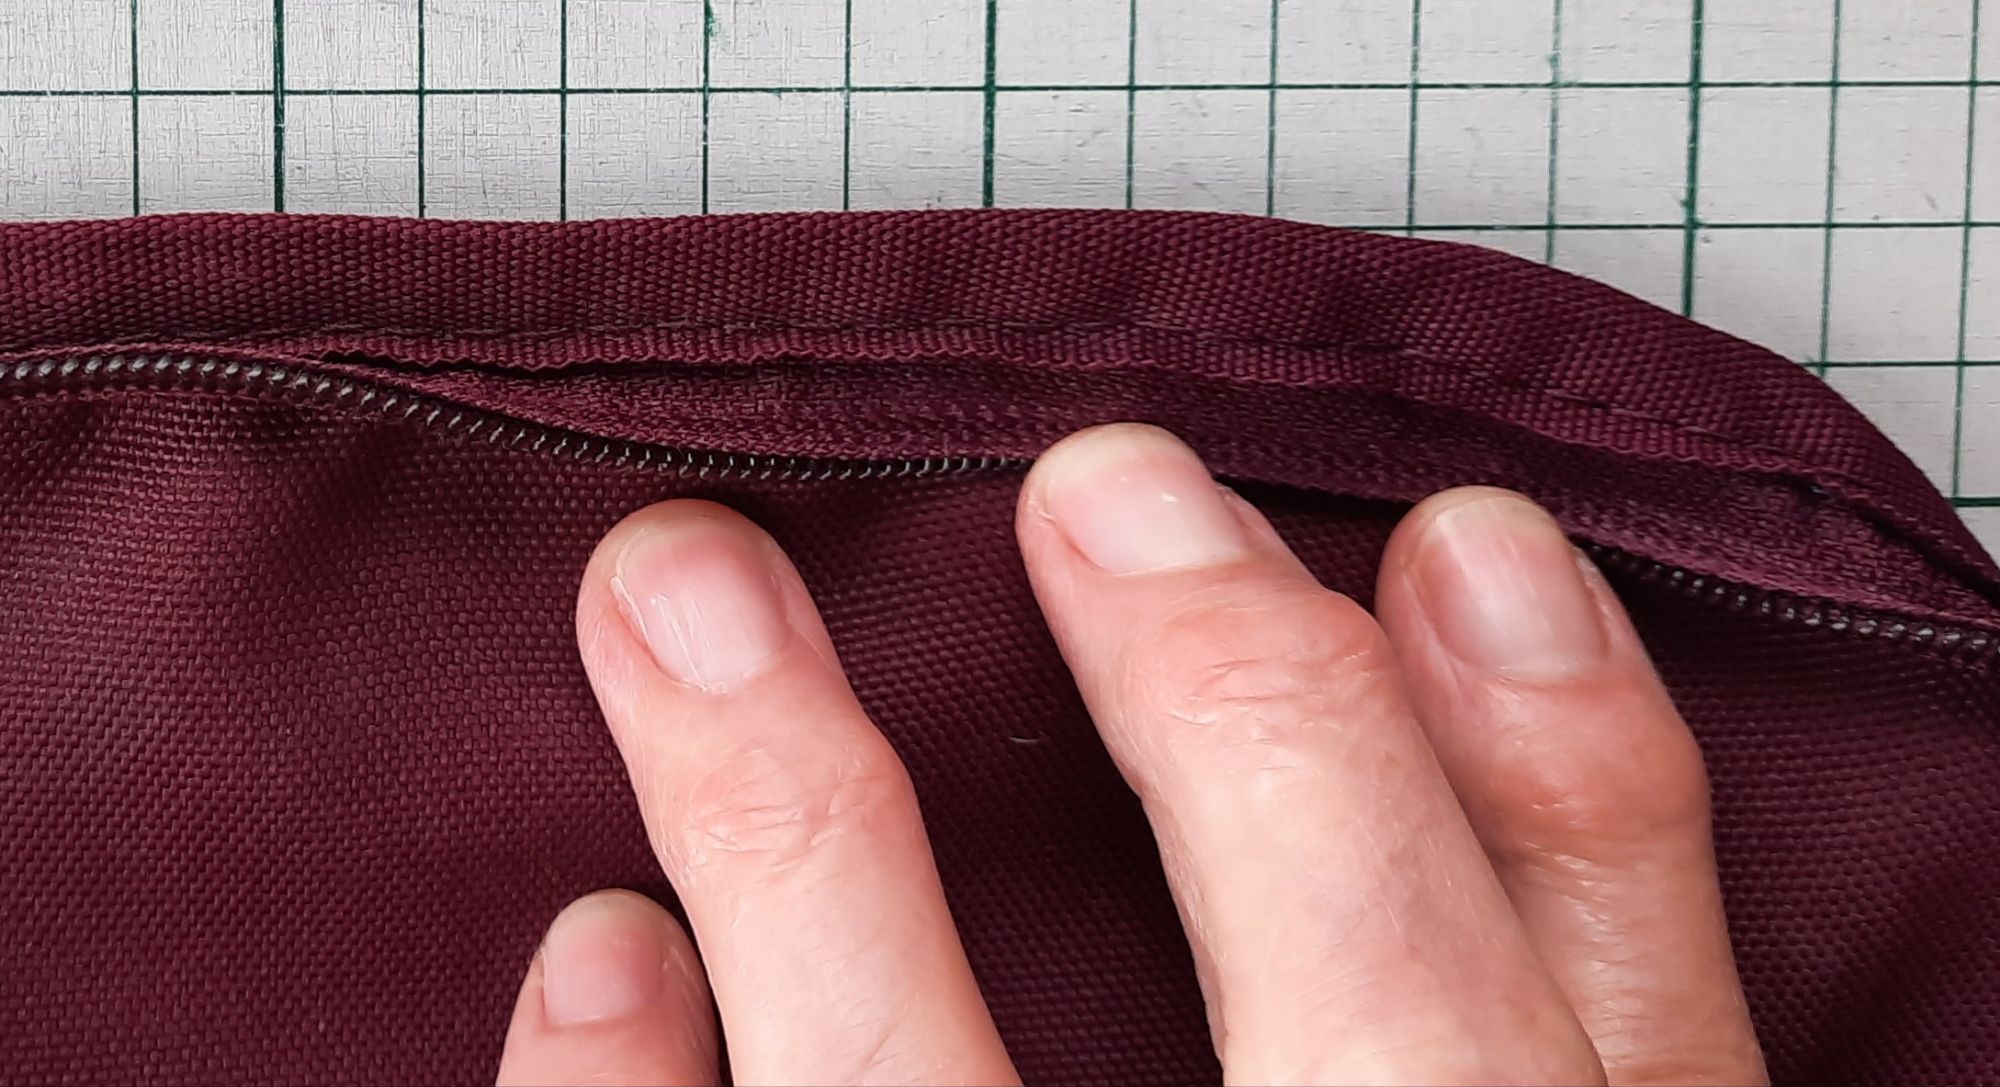
This rucksack has a worn zip which opens on occasions when it is actually zipped up. So it needs to be replaced.
When a zip is put in at the time of manufacture, it is inserted into flat pieces of fabric before the bag is constructed. It is slightly awkward to change the zip but it can be done – and this will lengthen the life of your bag and save it from going to landfill!
In order to replace the zip without taking your whole bag to pieces, you will need to do some detective work to see how the zip in your particular bag has been put in.
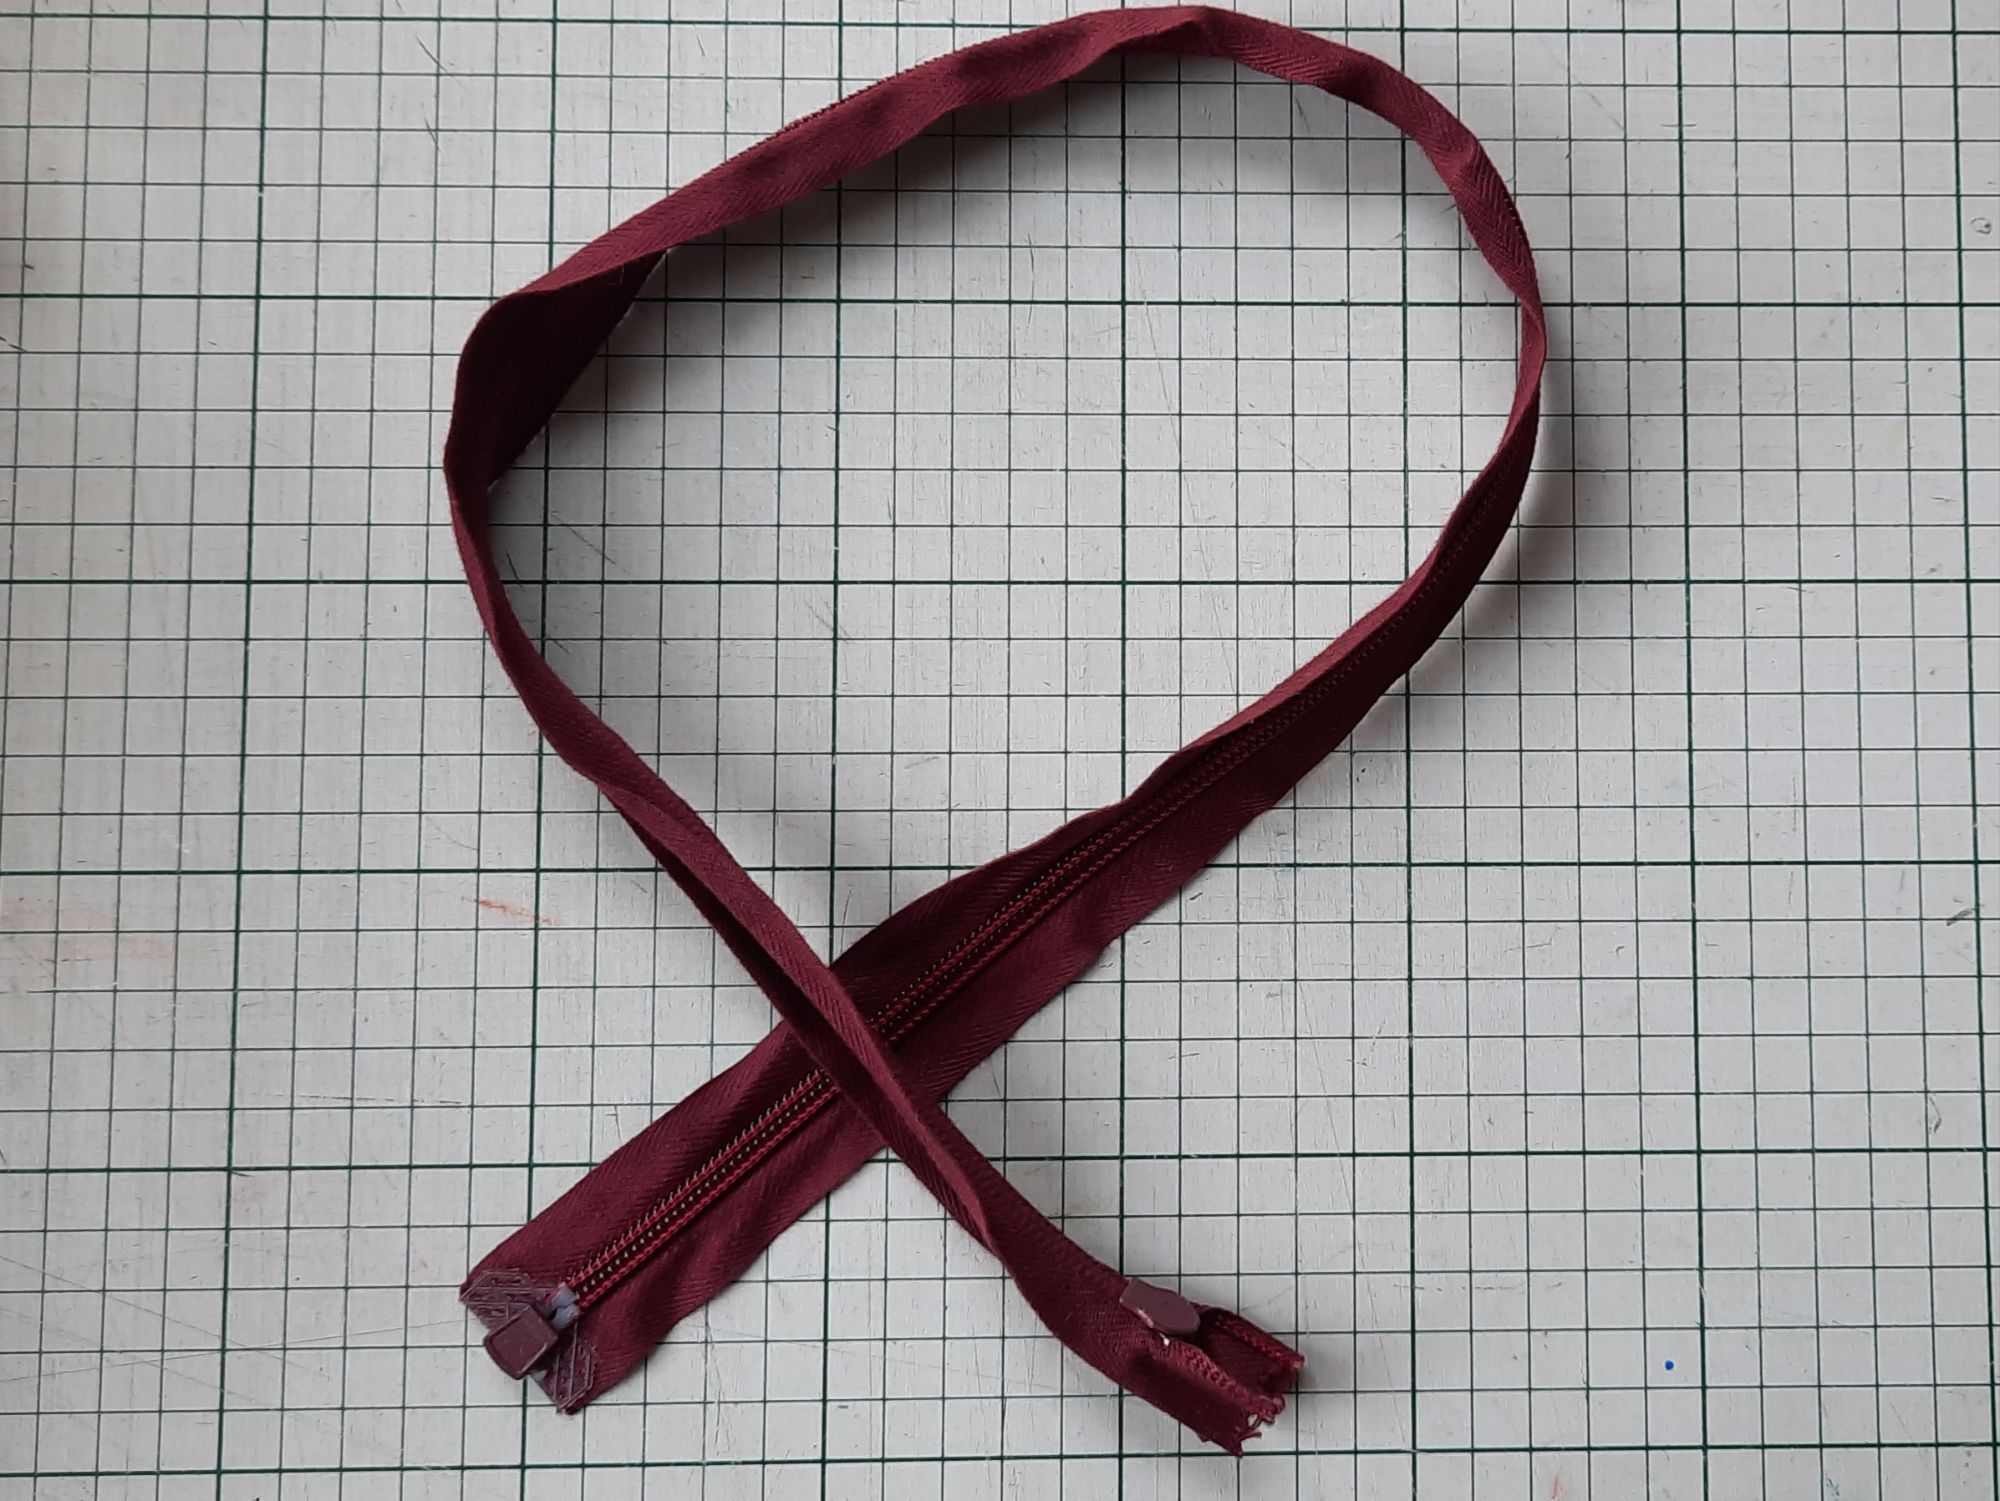
1 First measure the length of the zip so you can buy a replacement zip of the right length. My zip was 27”. I chose a new zip that was sufficiently sturdy for the task and which was close in colour to the old one. This is an open-ended zip but the final section can be discarded.
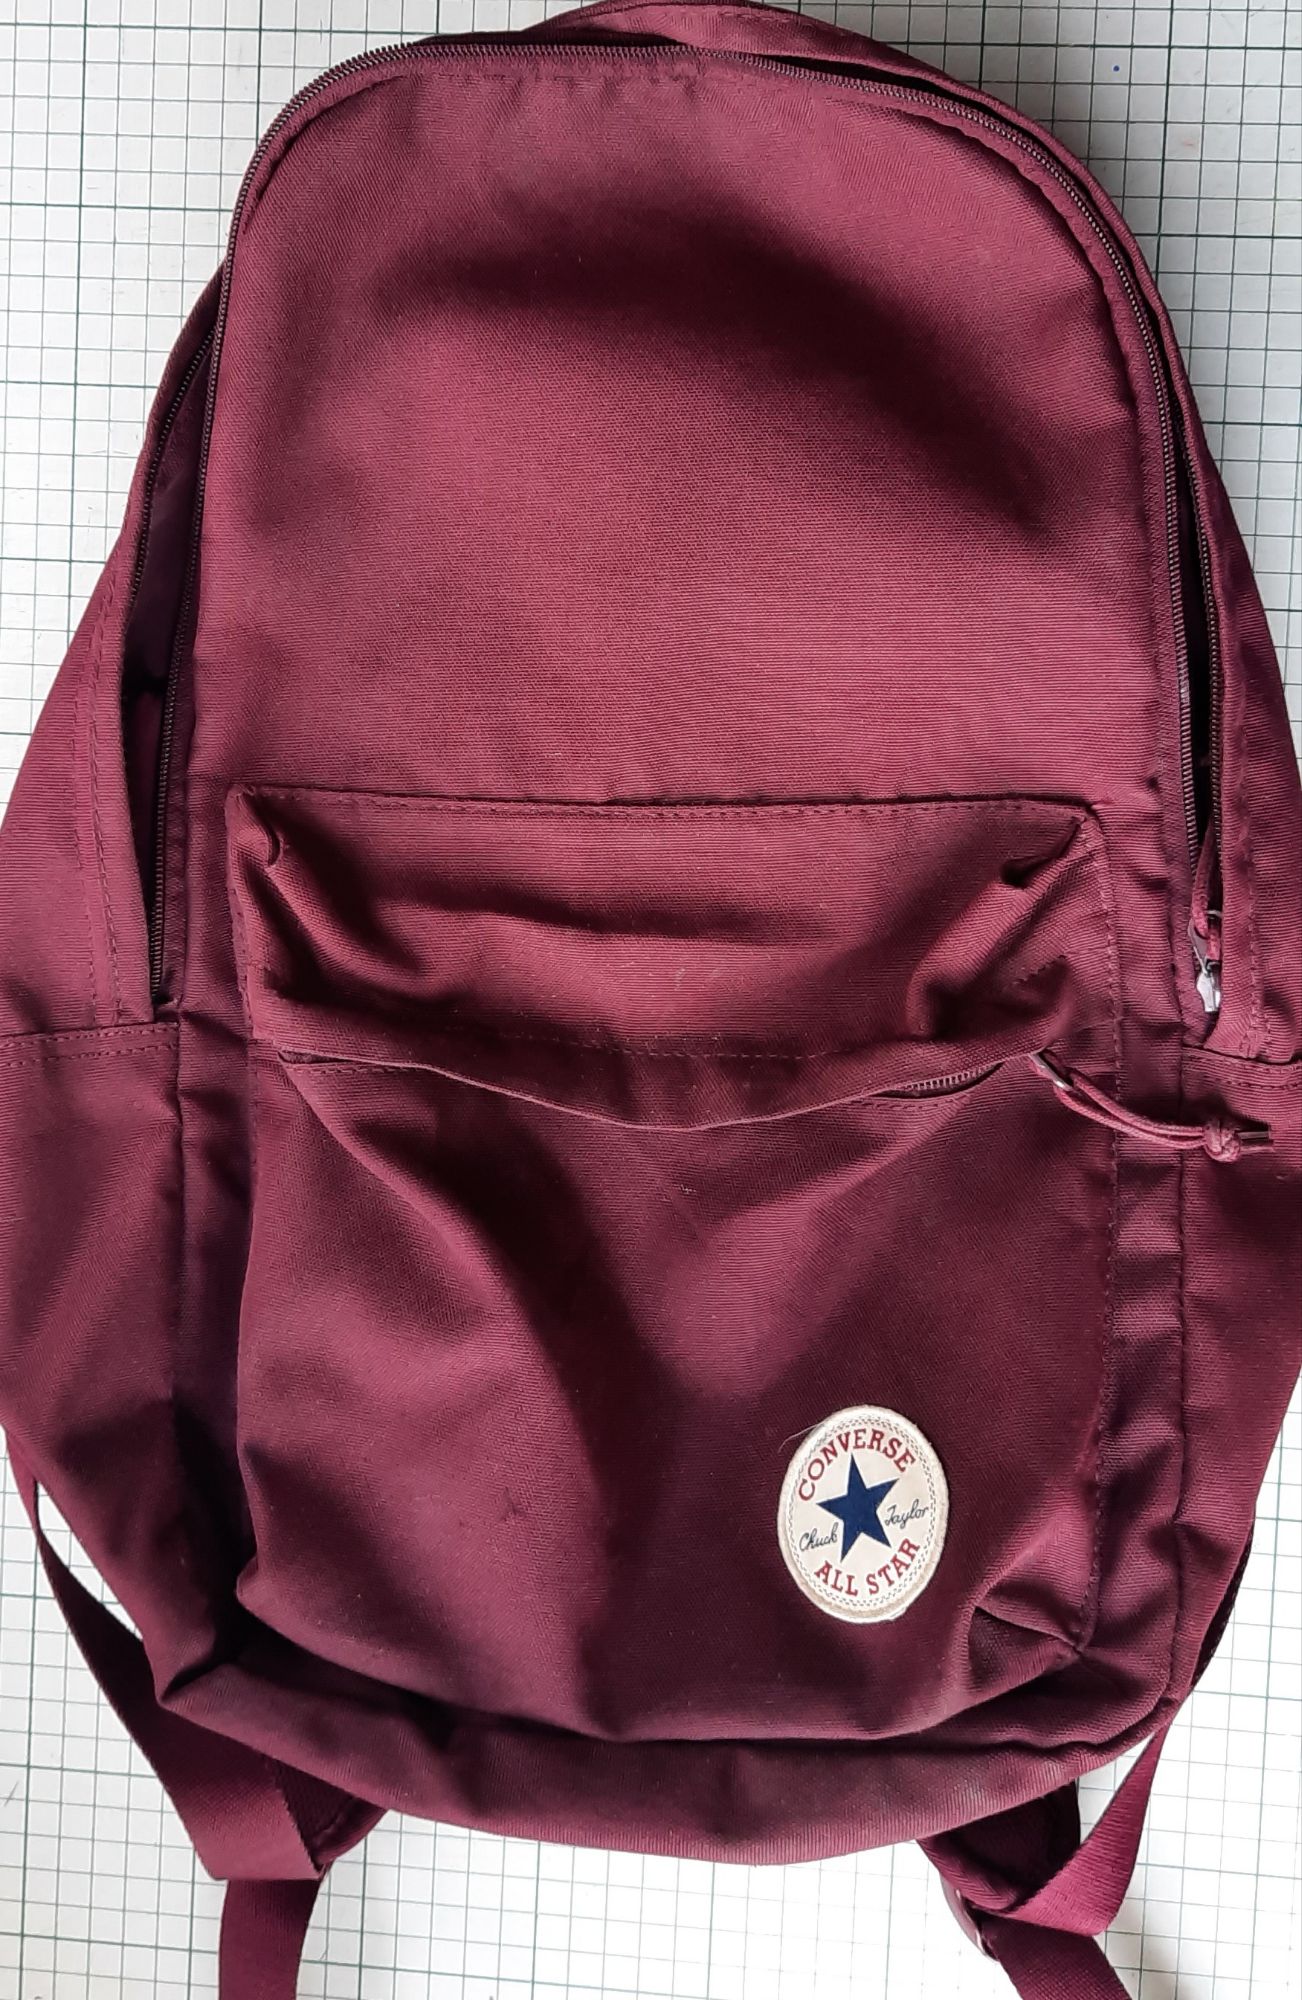
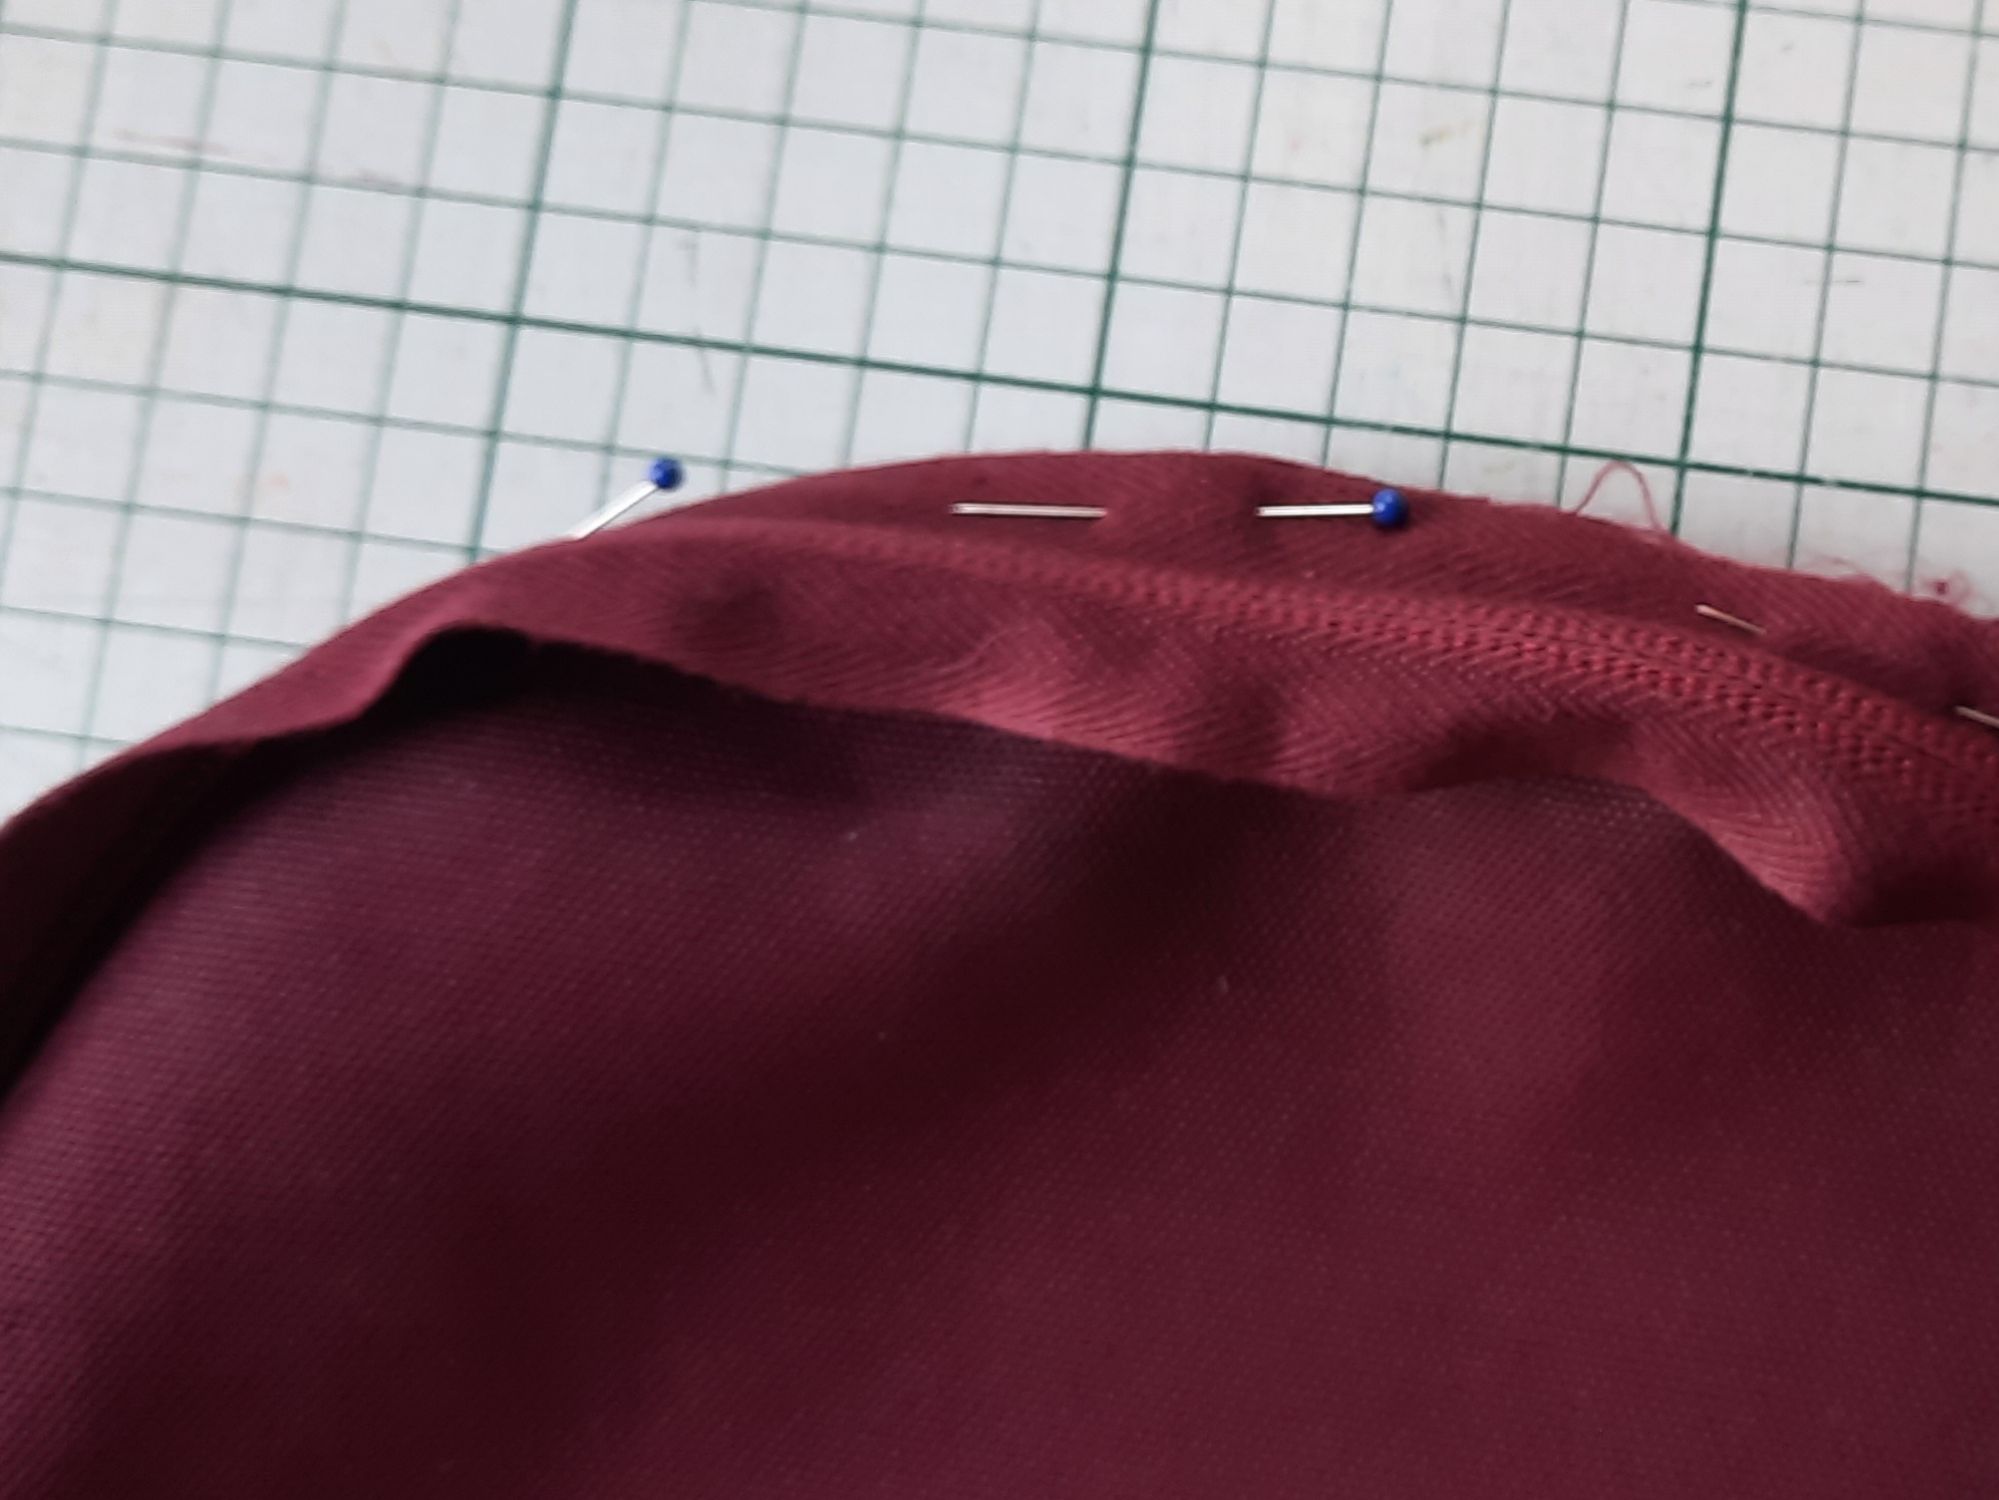
2 Check how the old zip is attached. On my bag, the part of the zip around the front section that opens. is inserted right sides together with the front flap, which is edged with a binding strip – see below.
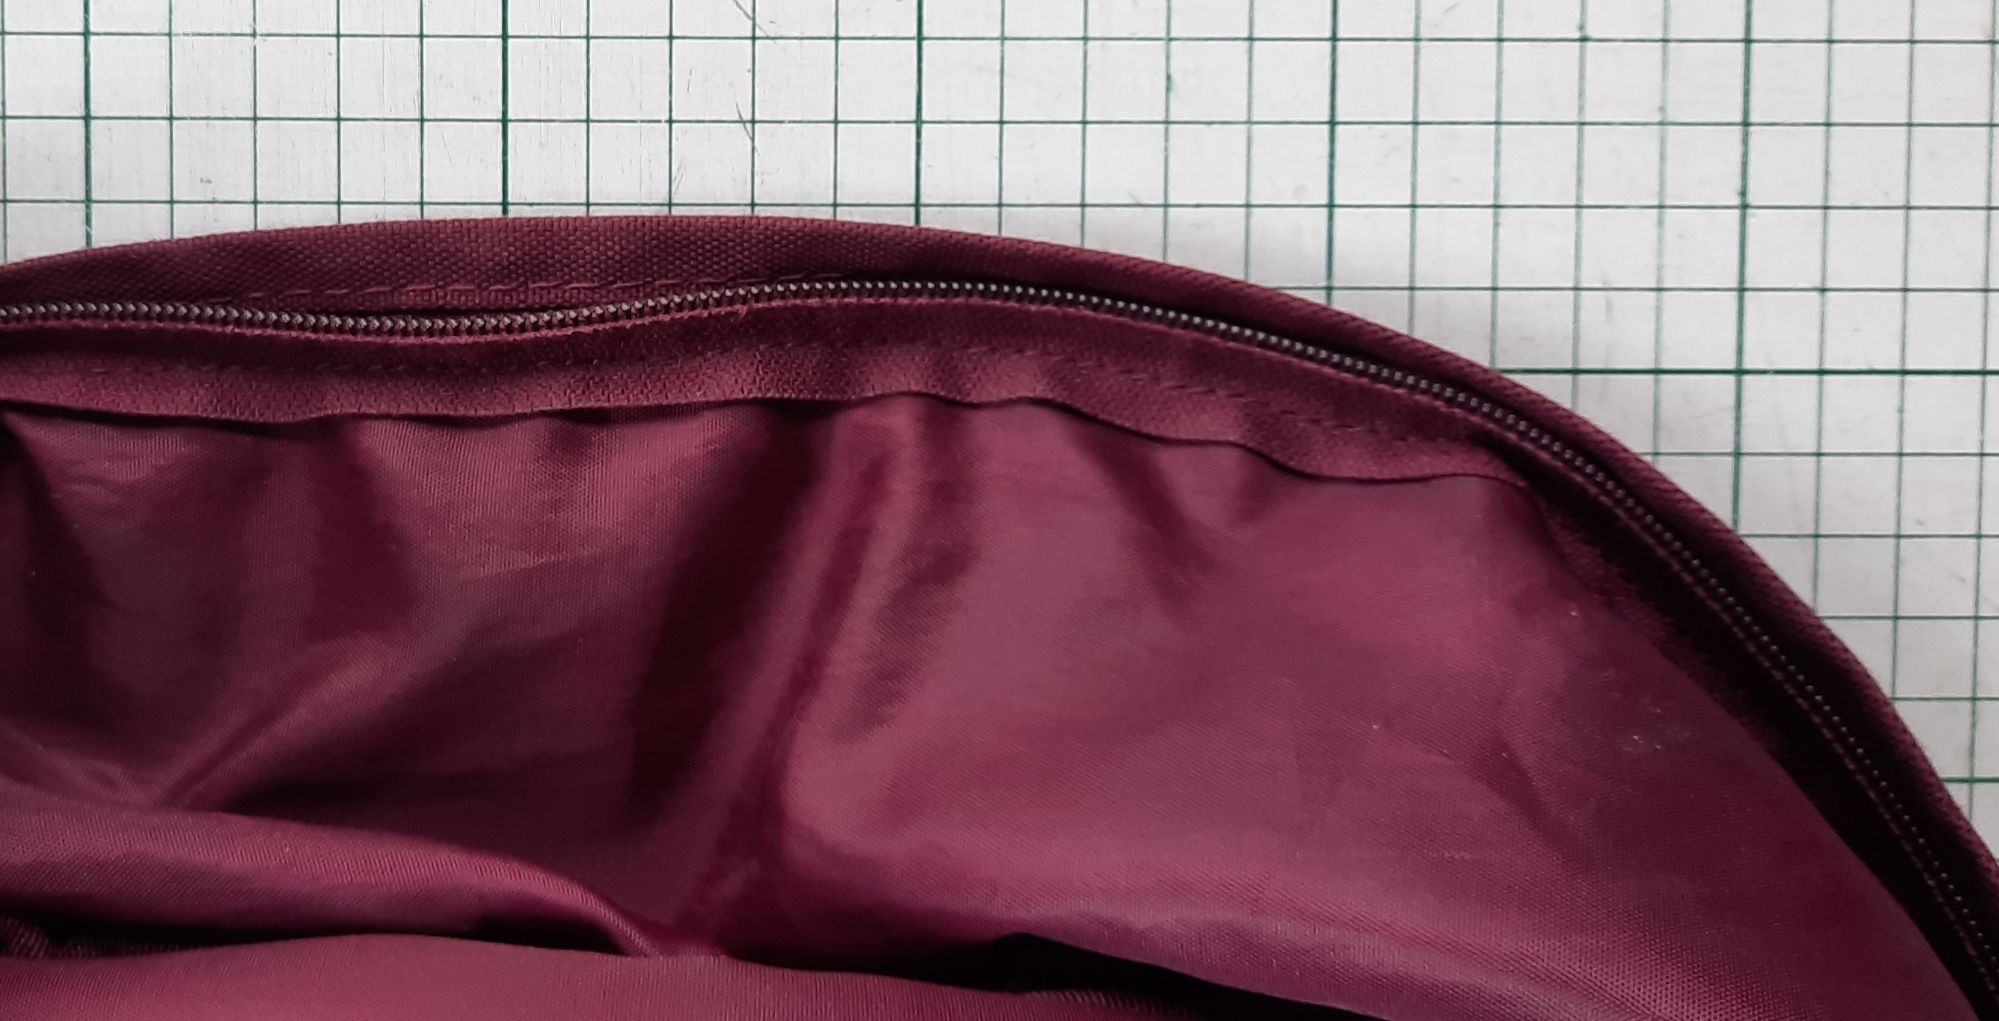
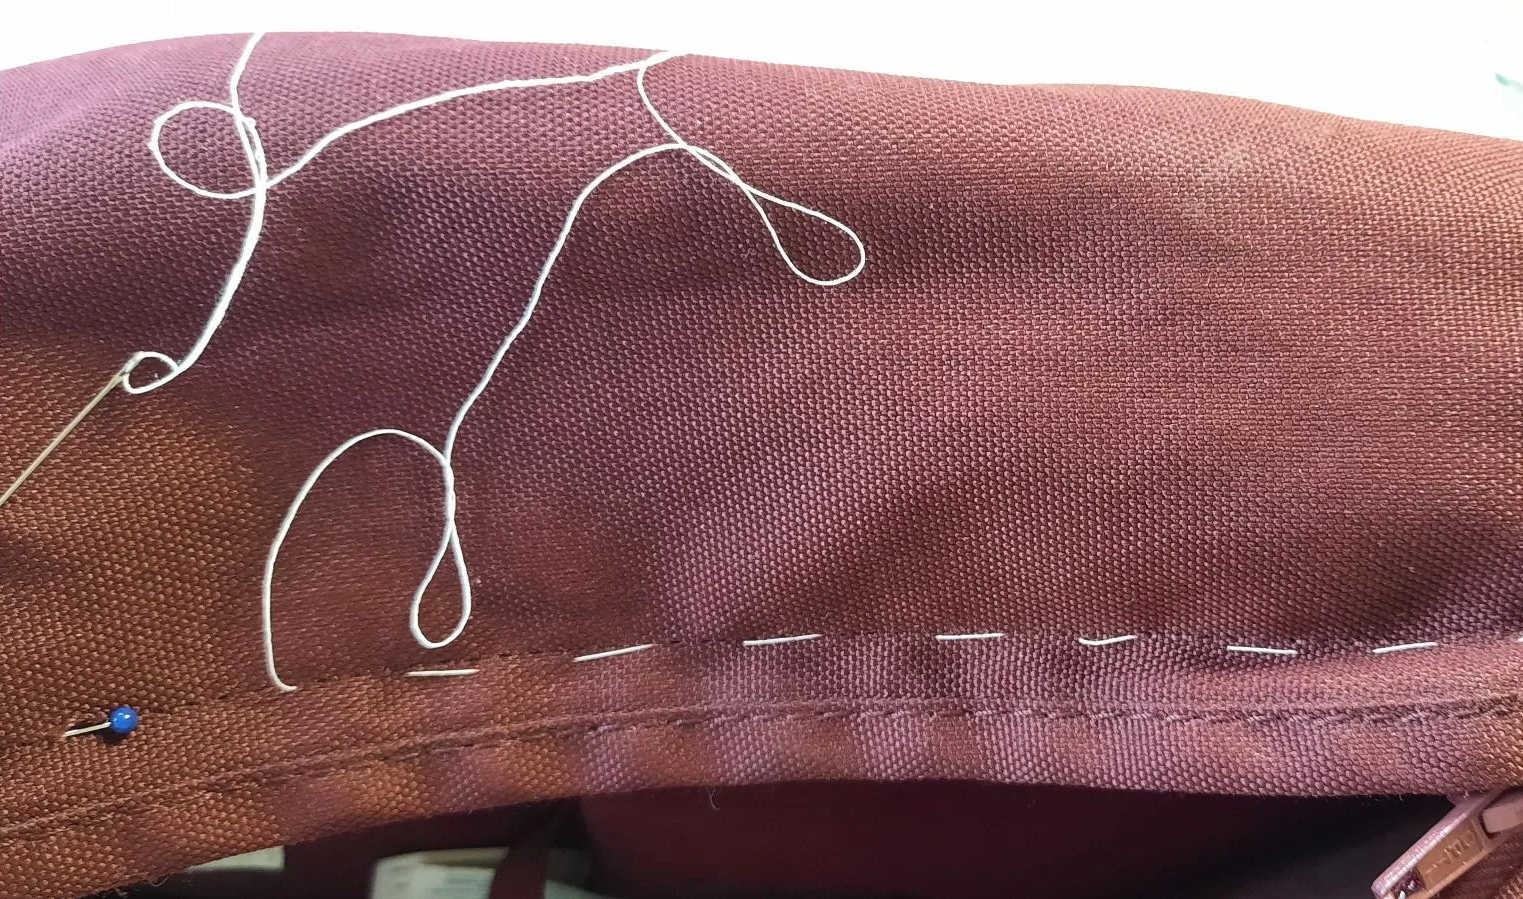
The zip around the top of the bag is inserted with the right side of the zip to the lining – see below. It is well worth taking a photo before starting to unpick!
3 Unpick the binding around the flap and then unpick the zip from the flap.
4 Cut off the end of the zip if it is a divided zip.
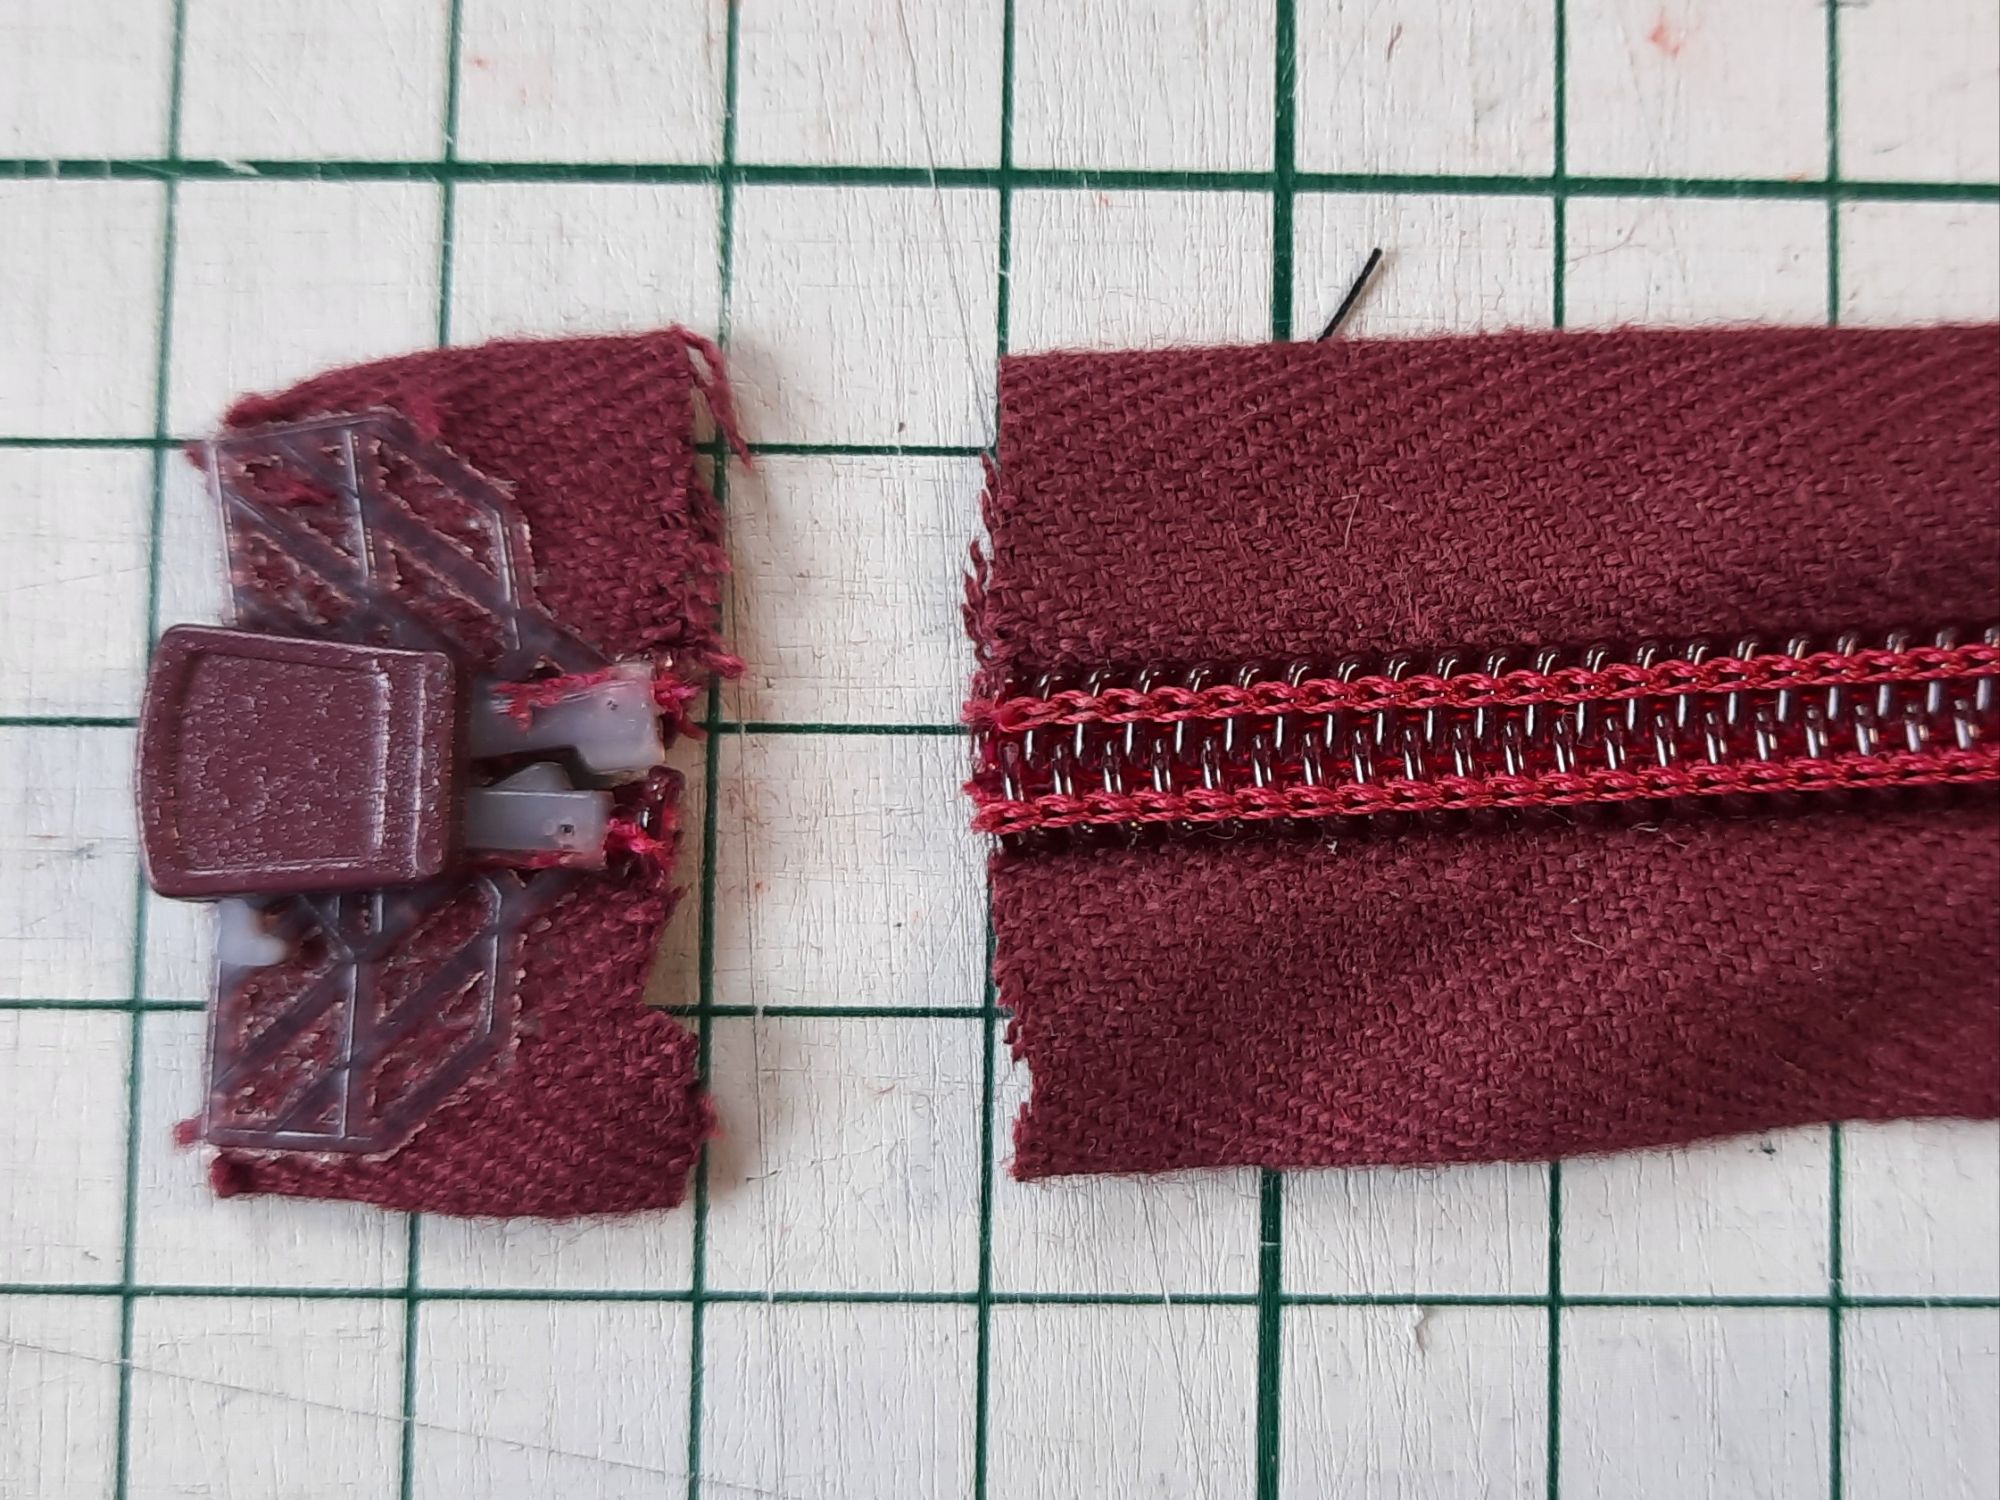
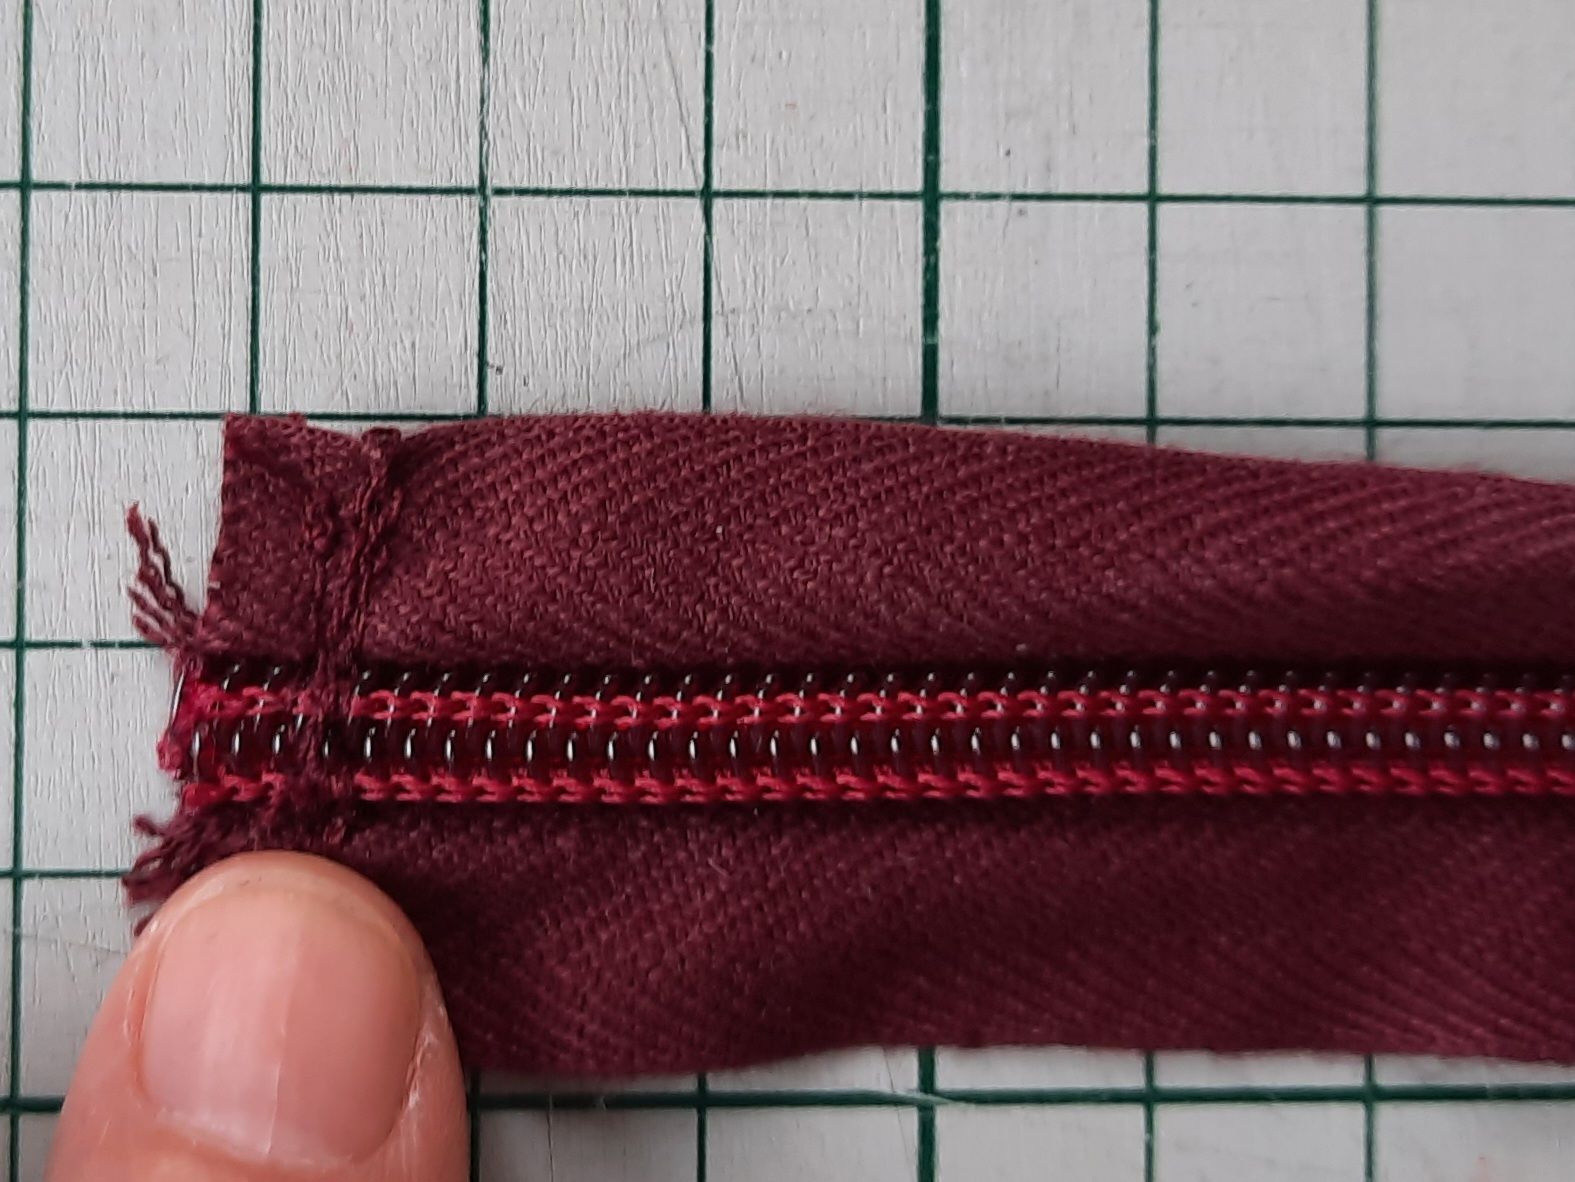
5 Put a strong needle into the sewing machine (I used a 100/16 Jeans needle). Stitch to and fro across the end of the zip to ensure that the zip pull will stop there.
6 Pin the zip in place onto the flap, right sides together.
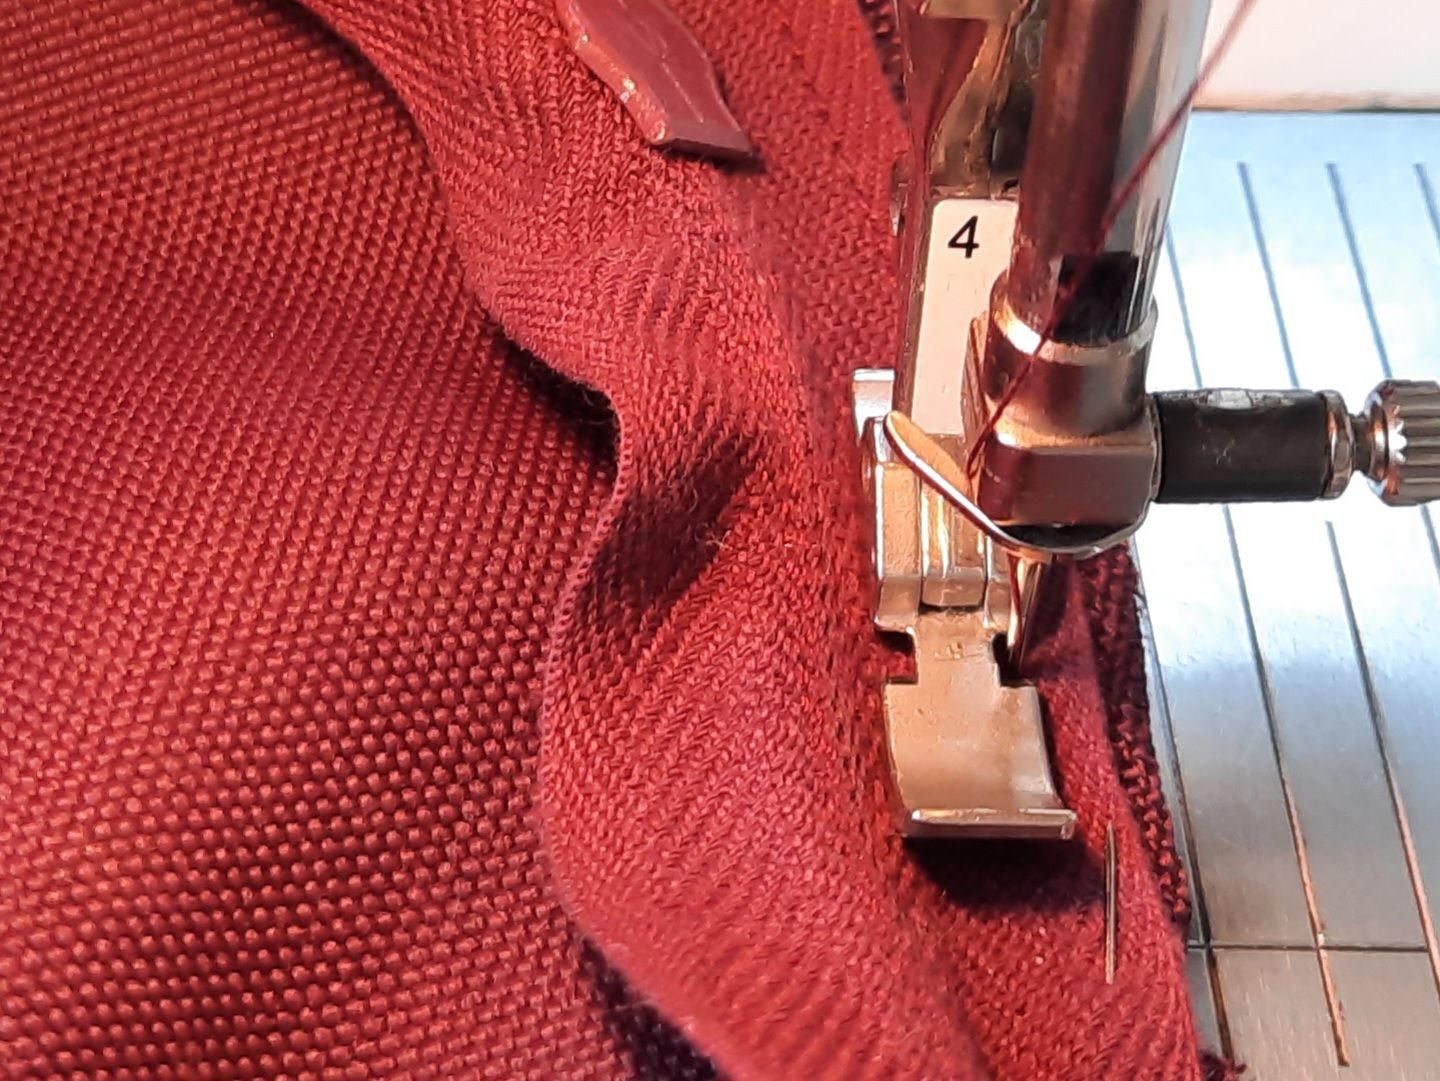
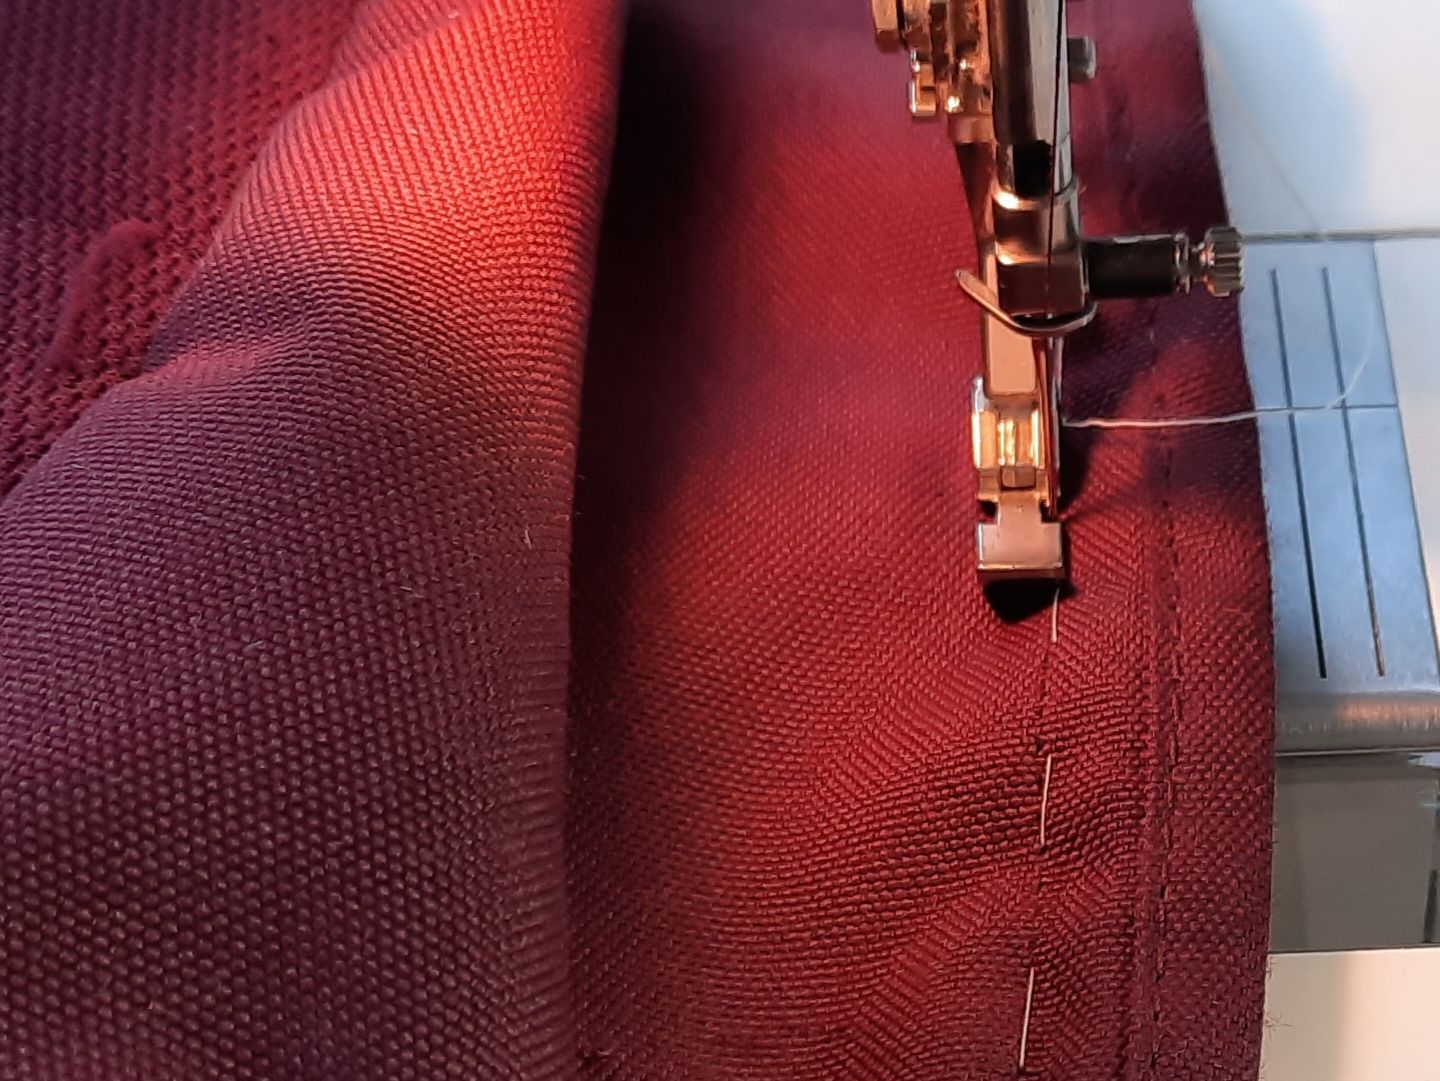
7 Put a zipper foot on the sewing machine and increase the stitch length (to say, 3), un-zip the zip part way and begin to stitch the zip to the flap. NB don’t stitch over pins! Take out the pin at this point, before the presser foot reaches it.
8 When you have stitched a few inches, insert the needle, lift up the presser foot and gently move the zip-pull back to just beyond the presser foot. Then lower the presser foot again and continue to sew.
9 Pin the second side of the zip right sides together with the top of the bag.
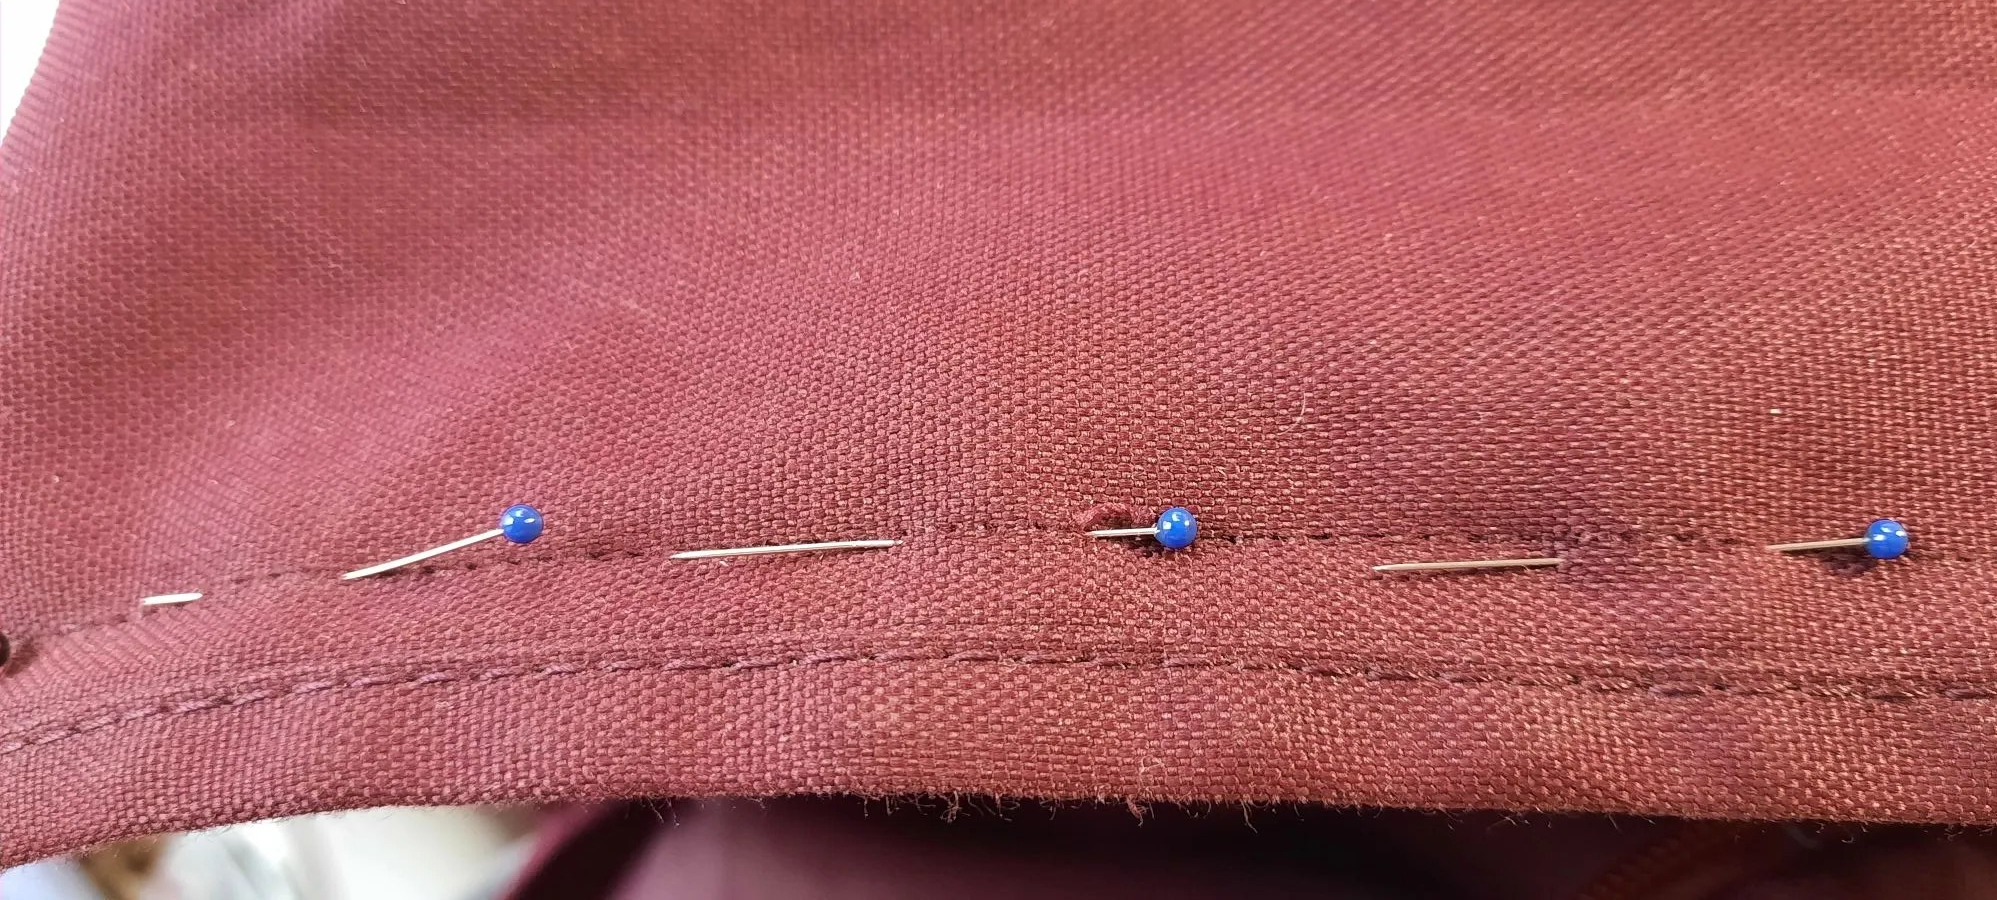
10 Now, take the time to tack along the line of pins. It will be much easier to stitch if you do!
11 Machine stitch the second side of the zip in place.
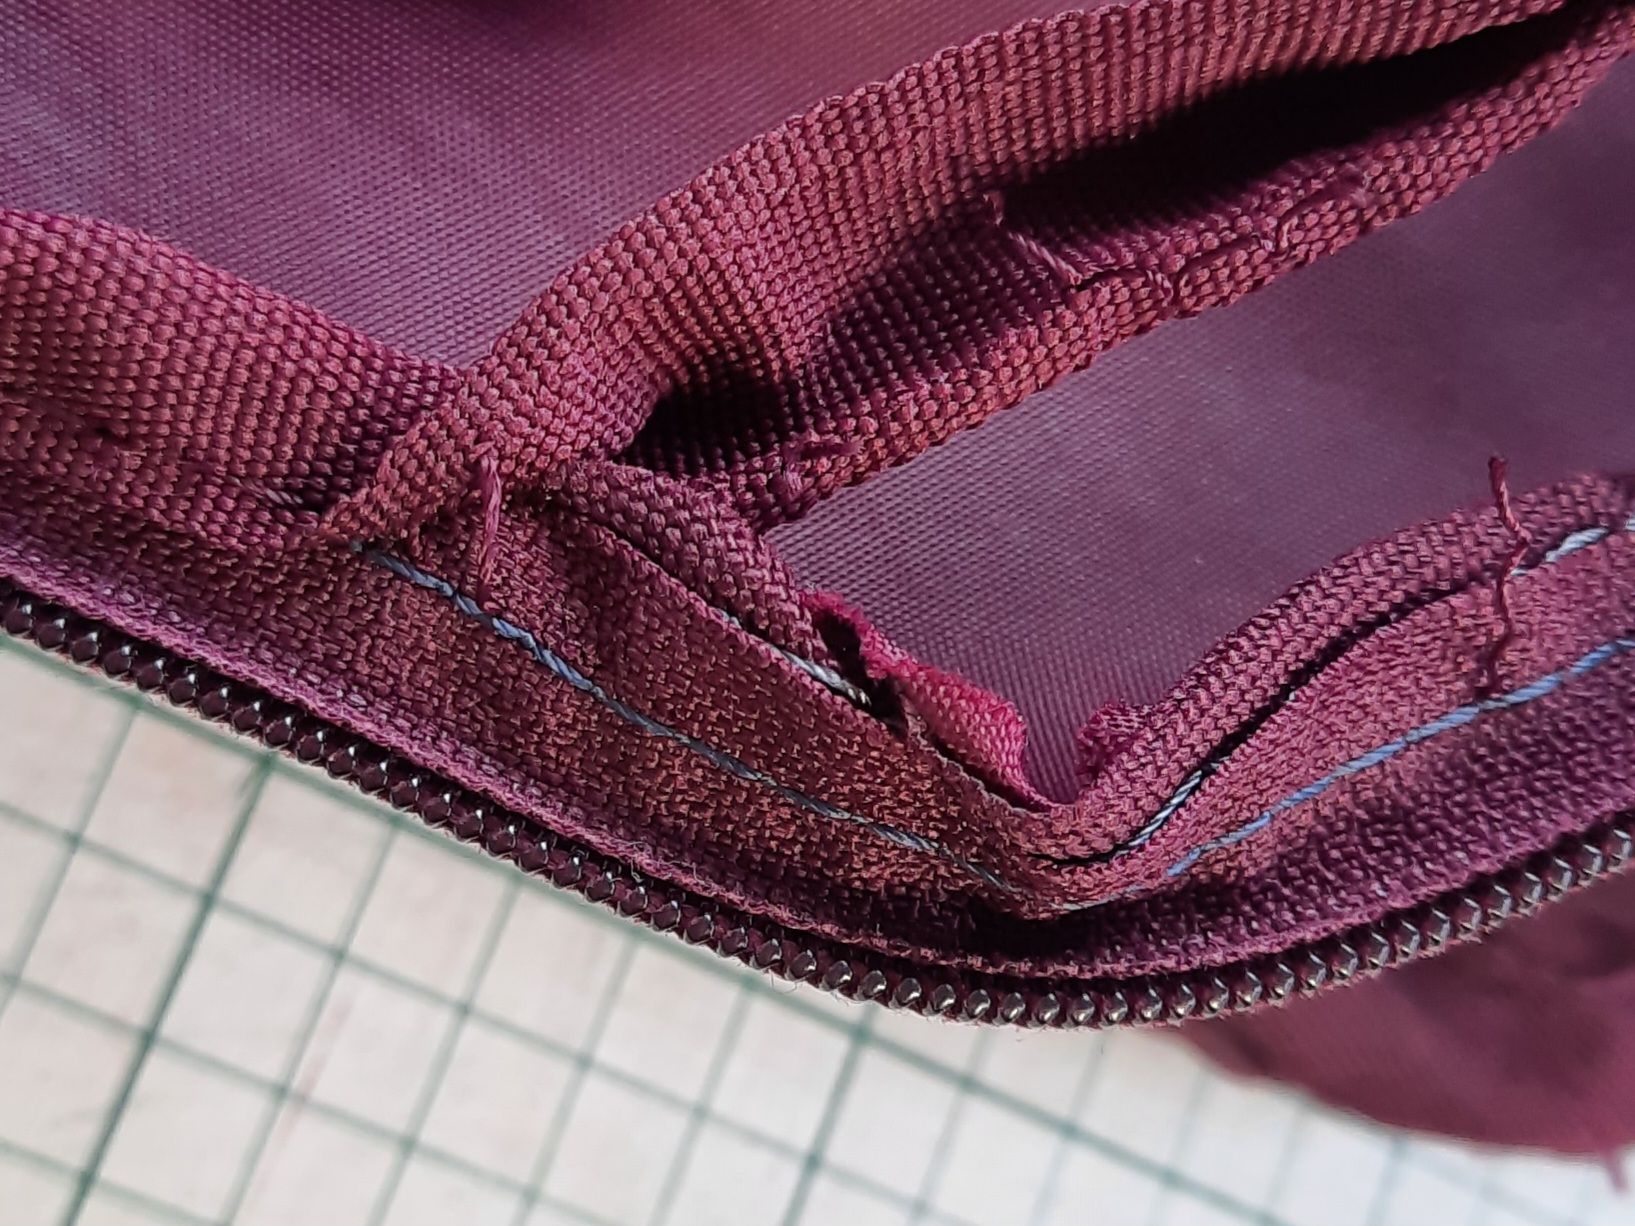
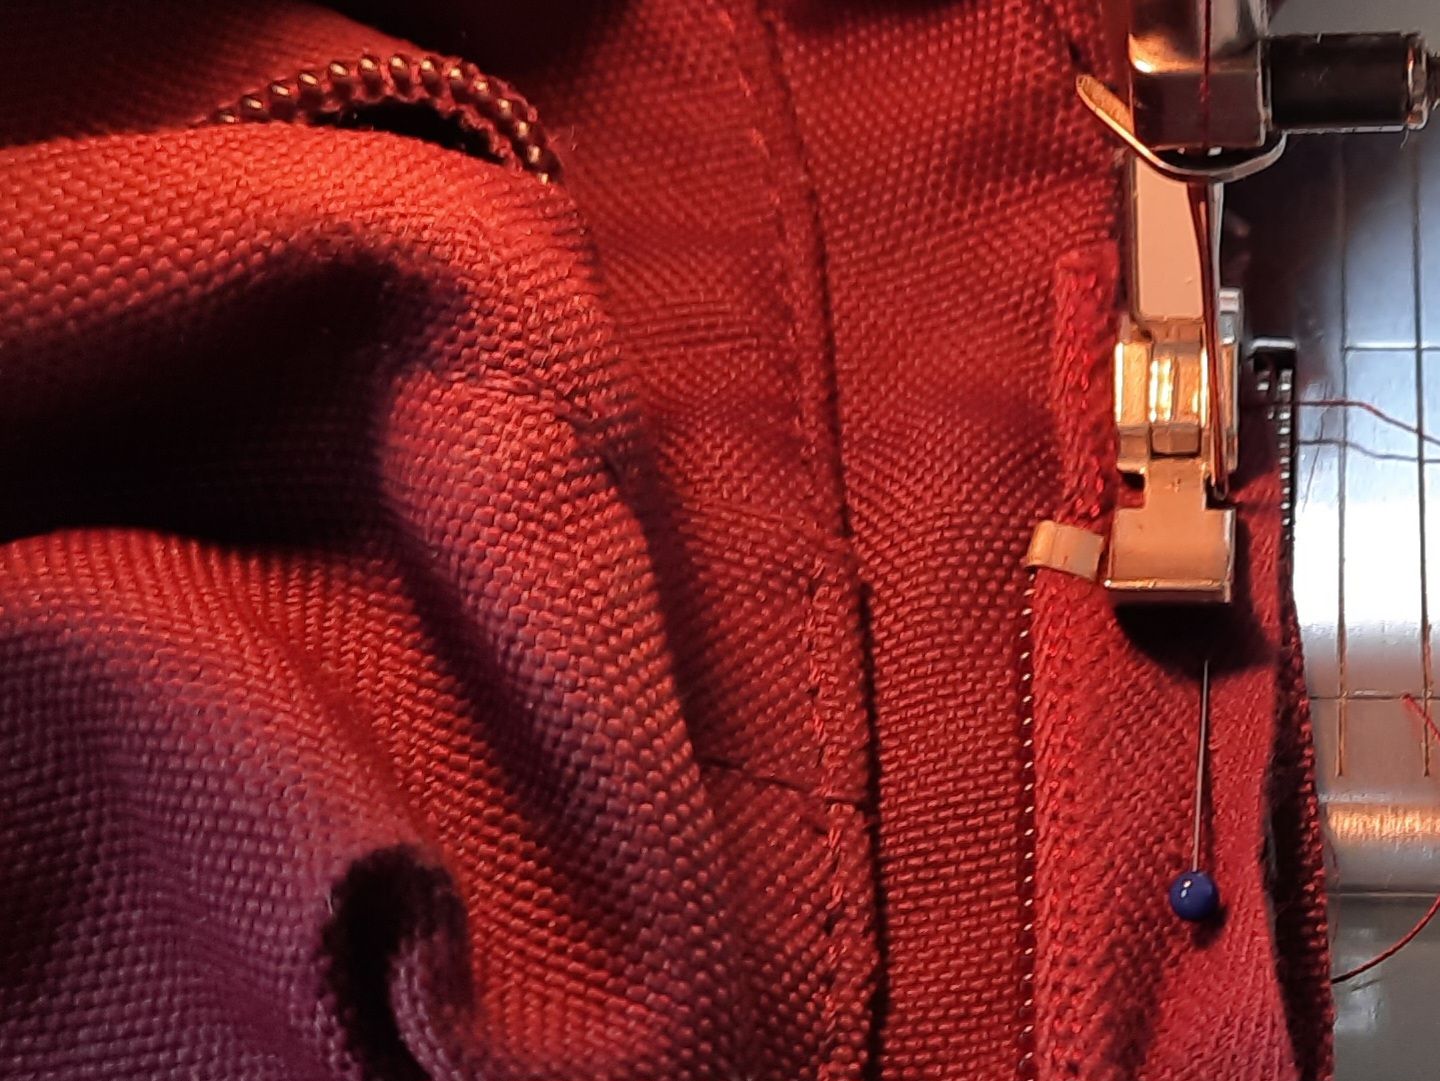
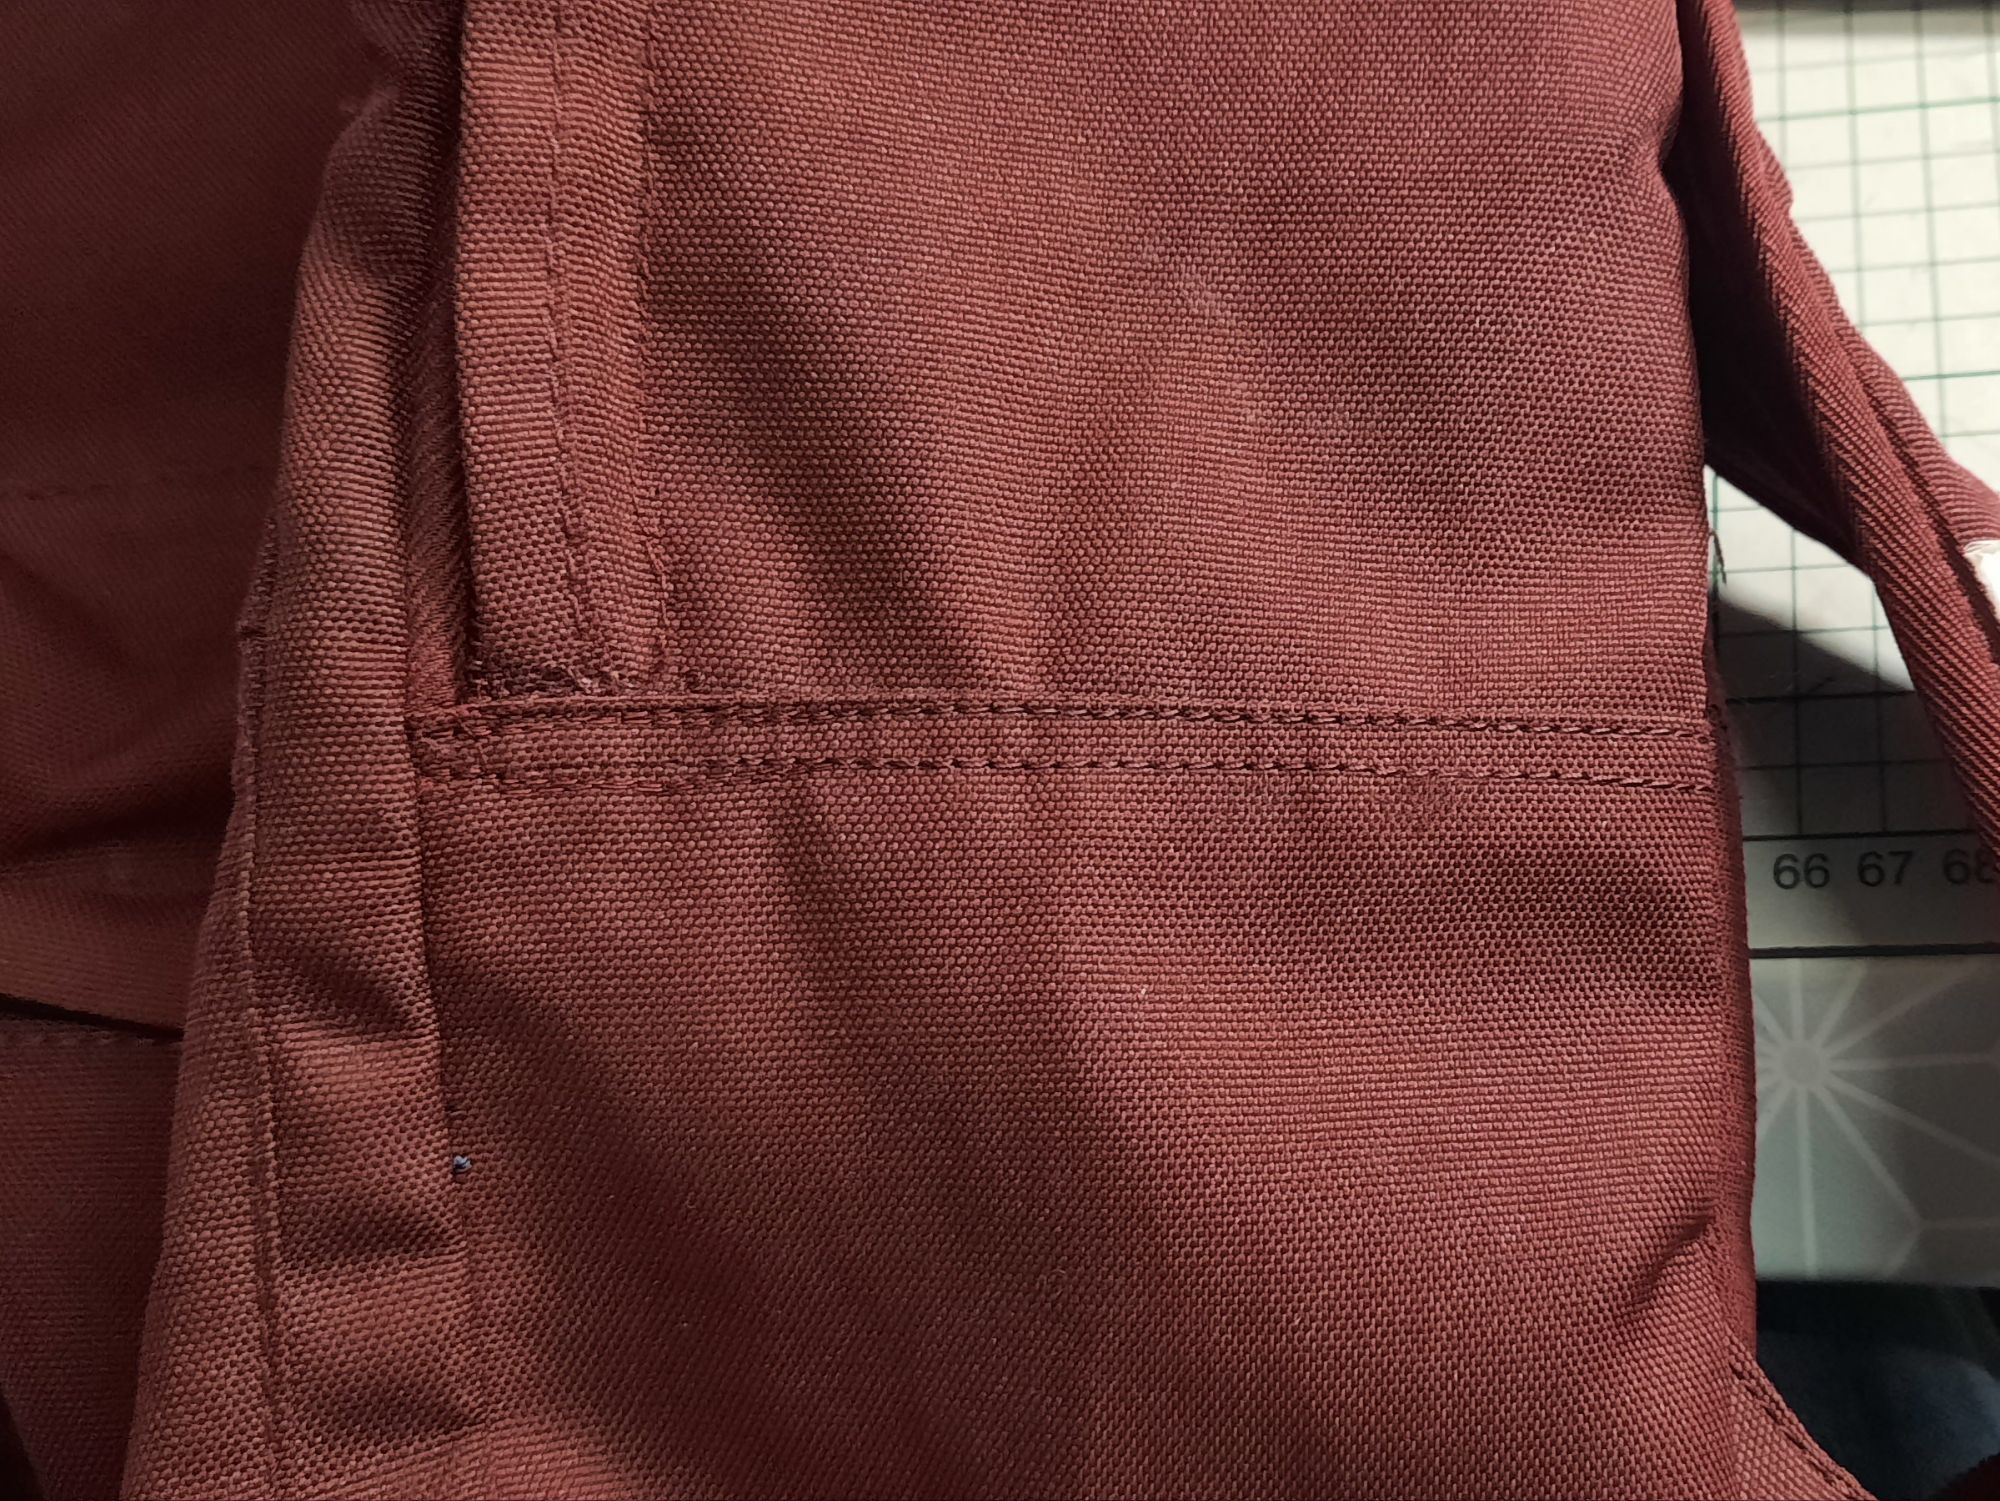
12 At the ends of the new zip, there will be an area where you unpicked the side seam slightly to free the old zip (see the V-shaped area in the photo below). First repair the side seam.

13 Then make sure that the new zip is lying behind the side gusset (seen on the left in the photo above) so the ends of the zip are covered. Pin in place. Stitch horizontally across the gusset to hold the sides of the bag together, just as they were at the start.
14 The final stage is to re-tie the pull-tag from the old zip onto the newly-inserted zip.

The March issue of ‘We Like Quilting’ has just been published and inside you’ll find two projects designed by me (one of them is bottom left on the front cover).
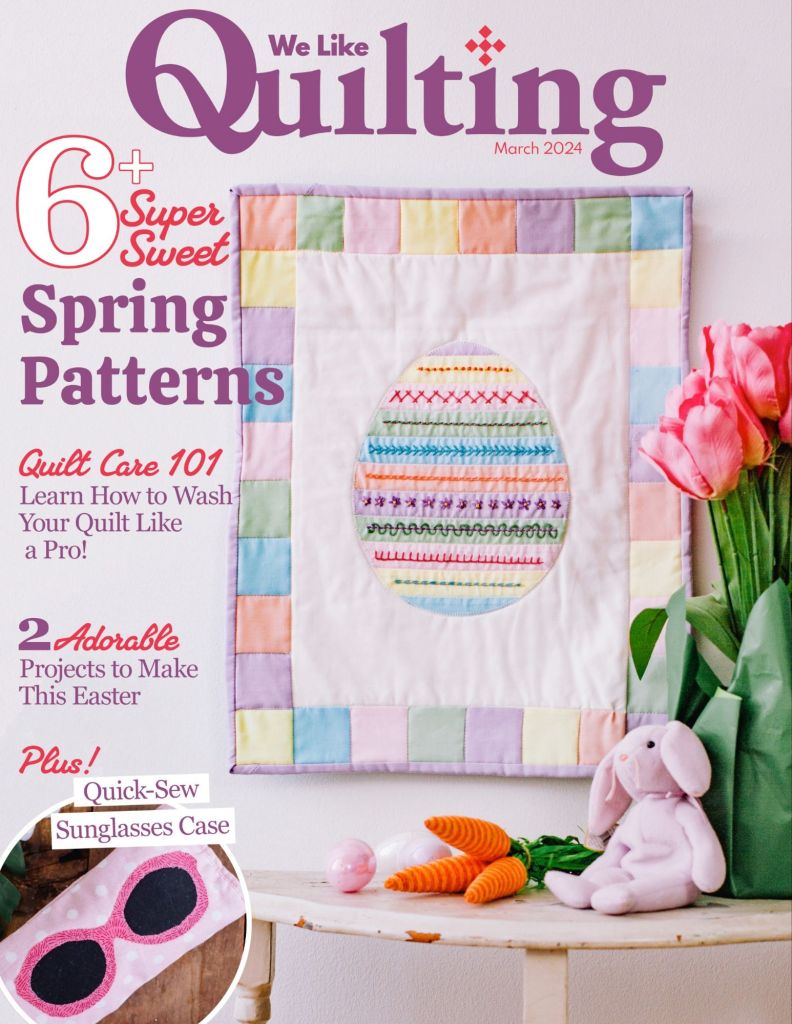
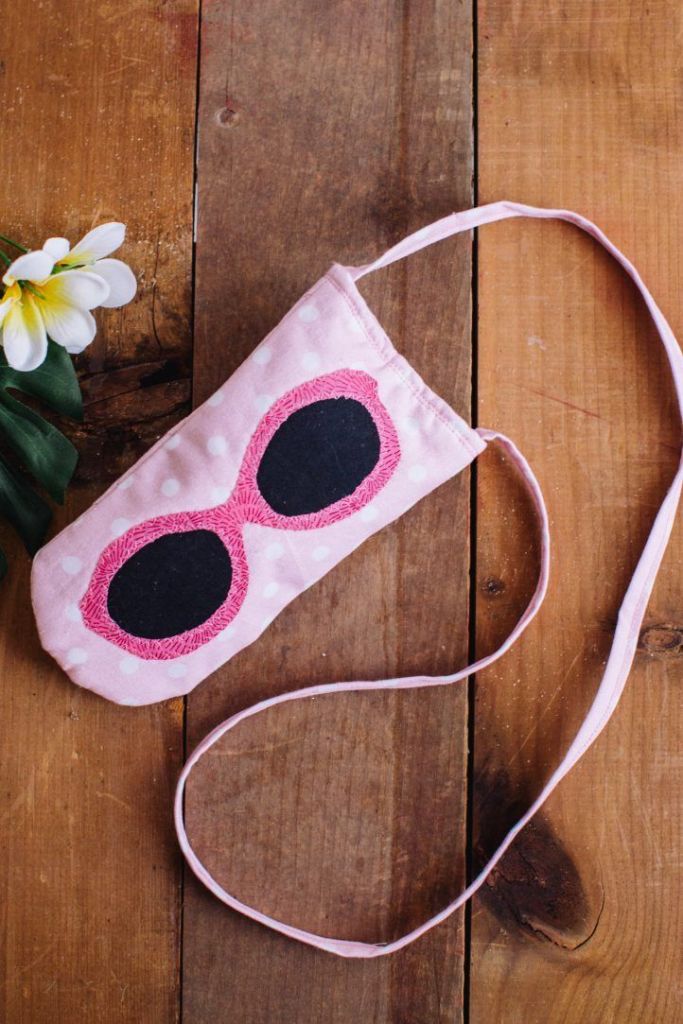
The pink sunglasses case – just right for the holidays – has sunspecs on the front and a long handle to go round your neck. The project is called ‘All Eyes on You’ Sunglasses Case Pattern.
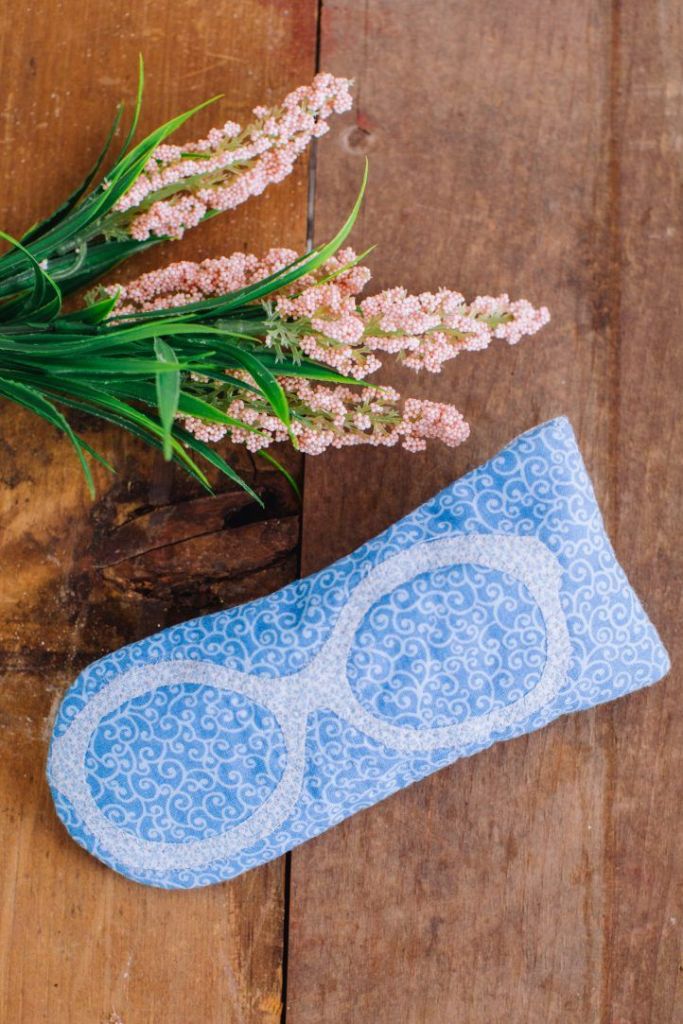
The second project is for ‘Eye to Eye’, a neat glasses case with a press-stud fastening.
This is the link to the magazine: https://welikequilting.com/toc/magazine-march-2024/
If you are interested in learning to put a a zip at the start of a project, I have some of patterns available that take you through the process step-by-step:
This is ‘Zip Purse’ available here

This is ‘Pretty in Pink’ available here

These are ‘Pretty Purses’ available here

Thank you for reading my blog. Quilt Patterns are here, Fabrics are here, Classes are here
Click the ‘Follow’ button to get a blog-post by email each Monday and click here if you would like the monthly newsletter with design and colour inspiration, etc.
