
A year-long quilt project
Welcome to the tenth step in the 2024 quilt project. (You can find the first one here, the second one here, the third one here, the fourth one here, the fifth one here, the sixth one here, the seventh here, the eighth here and the ninth here.) As I explained in the New Year’s post here, I’ll be making a quilt this year and inviting you to join with me, here on the blog.
Please note: All the instructions are free and available for your personal use. They cannot be used for commercial purposes or for teaching. I do run a small business, so if you enjoy making the quilt please consider also purchasing one of my patterns from the Etsy shop (link below) and/or tell your quilting friends about Amanda Jane Textiles. Thank you!
For the last nine months, this is what has appeared:
- a new appliqué block each month
- a new embroidery stitch each month
- cheerful bright colours (but of course you can choose your own colour palette!)
- a quilt celebrating the seaside
However, You are welcome just make the individual blocks each month and use them in a different way, but over the next three months there will be instructions for making the blocks up into a quilt measuring 72 x 72″.
Please note: All the instructions are free and available for your personal use. They cannot be used for commercial purposes or for teaching. I do run a small business, so if you enjoy making the quilt please consider also purchasing one of my patterns from the Etsy shop (link below) and/or tell your quilting friends about Amanda Jane Textiles. Thank you!
This month it is time to join the blocks together. This is quite a detailed post!
Materials
I have chosen solid white for the background of my quilt, so the ‘pictures’ appear like photos in an album. Whichever colour you choose, you need 2 metres of fabric 107cm wide.
Cutting the pieces
The method is: first cut a strip across the width of the fabric, then sub-cut each strip to create the pieces you need for the background. Start with the wider strips (as listed below) and then work down to the narrower strips, so you can make the best use of your fabric.

After cutting the piece, use a square of masking tape to add the number shown below in square brackets, for example [11]. This will help you to assemble the quilt top.

1 Cut two strips across the width of the fabric each 8½” wide
Sub-cut strip to make one piece 8½ x 18½” [7] and one piece 8½ x 20½” [11]
Sub-cut the second strip to make one piece 8½ x 18½” [24] and one piece 8½ x 20½” [19]
2 Cut five strips across the width of the fabric each 6½” wide
From the first strip, sub-cut two pieces 6½ x 12½” [4] [10] and one piece 6½ x 14½” [2]
From the second strip, sub-cut one piece 6½ x 14½” [1] and one piece 6½ x 18½” [8]
From the third strip, cut one piece 6½ x 12½” [27] and one piece 6½ x 18½” [28]
From the fourth strip, cut one piece 6½ x 12½” [23] and one piece 6½ x 14½”[20]
From the fifth strip, cut one piece 6½ x 20½” [14]
3 Cut four strips across the width of the fabric each 4½” wide
From the first strip, sub-cut one piece 4½ x 10½” [16] and one piece 4½ x 24½” [3]
From the second strip, sub-cut three pieces 4½ x 12½” [9] [13] [26]
From the third strip, sub-cut two pieces 4½ x 20½” [18] [21]
From the fourth strip, sub-cut one piece 4½ x 14½” [6] and one piece 2½ x 20½” [15]
4 Cut two strips across the width of the fabric each 2½” wide.
From the first strip, sub-cut one piece 2½ x 10½” [17] and two pieces 2½ x 12½” [5] [12]
From the second strip, sub-cut two pieces 2½ x 12½” [22] [25]
Place all your pieces in order from 1-28 for ease of use.
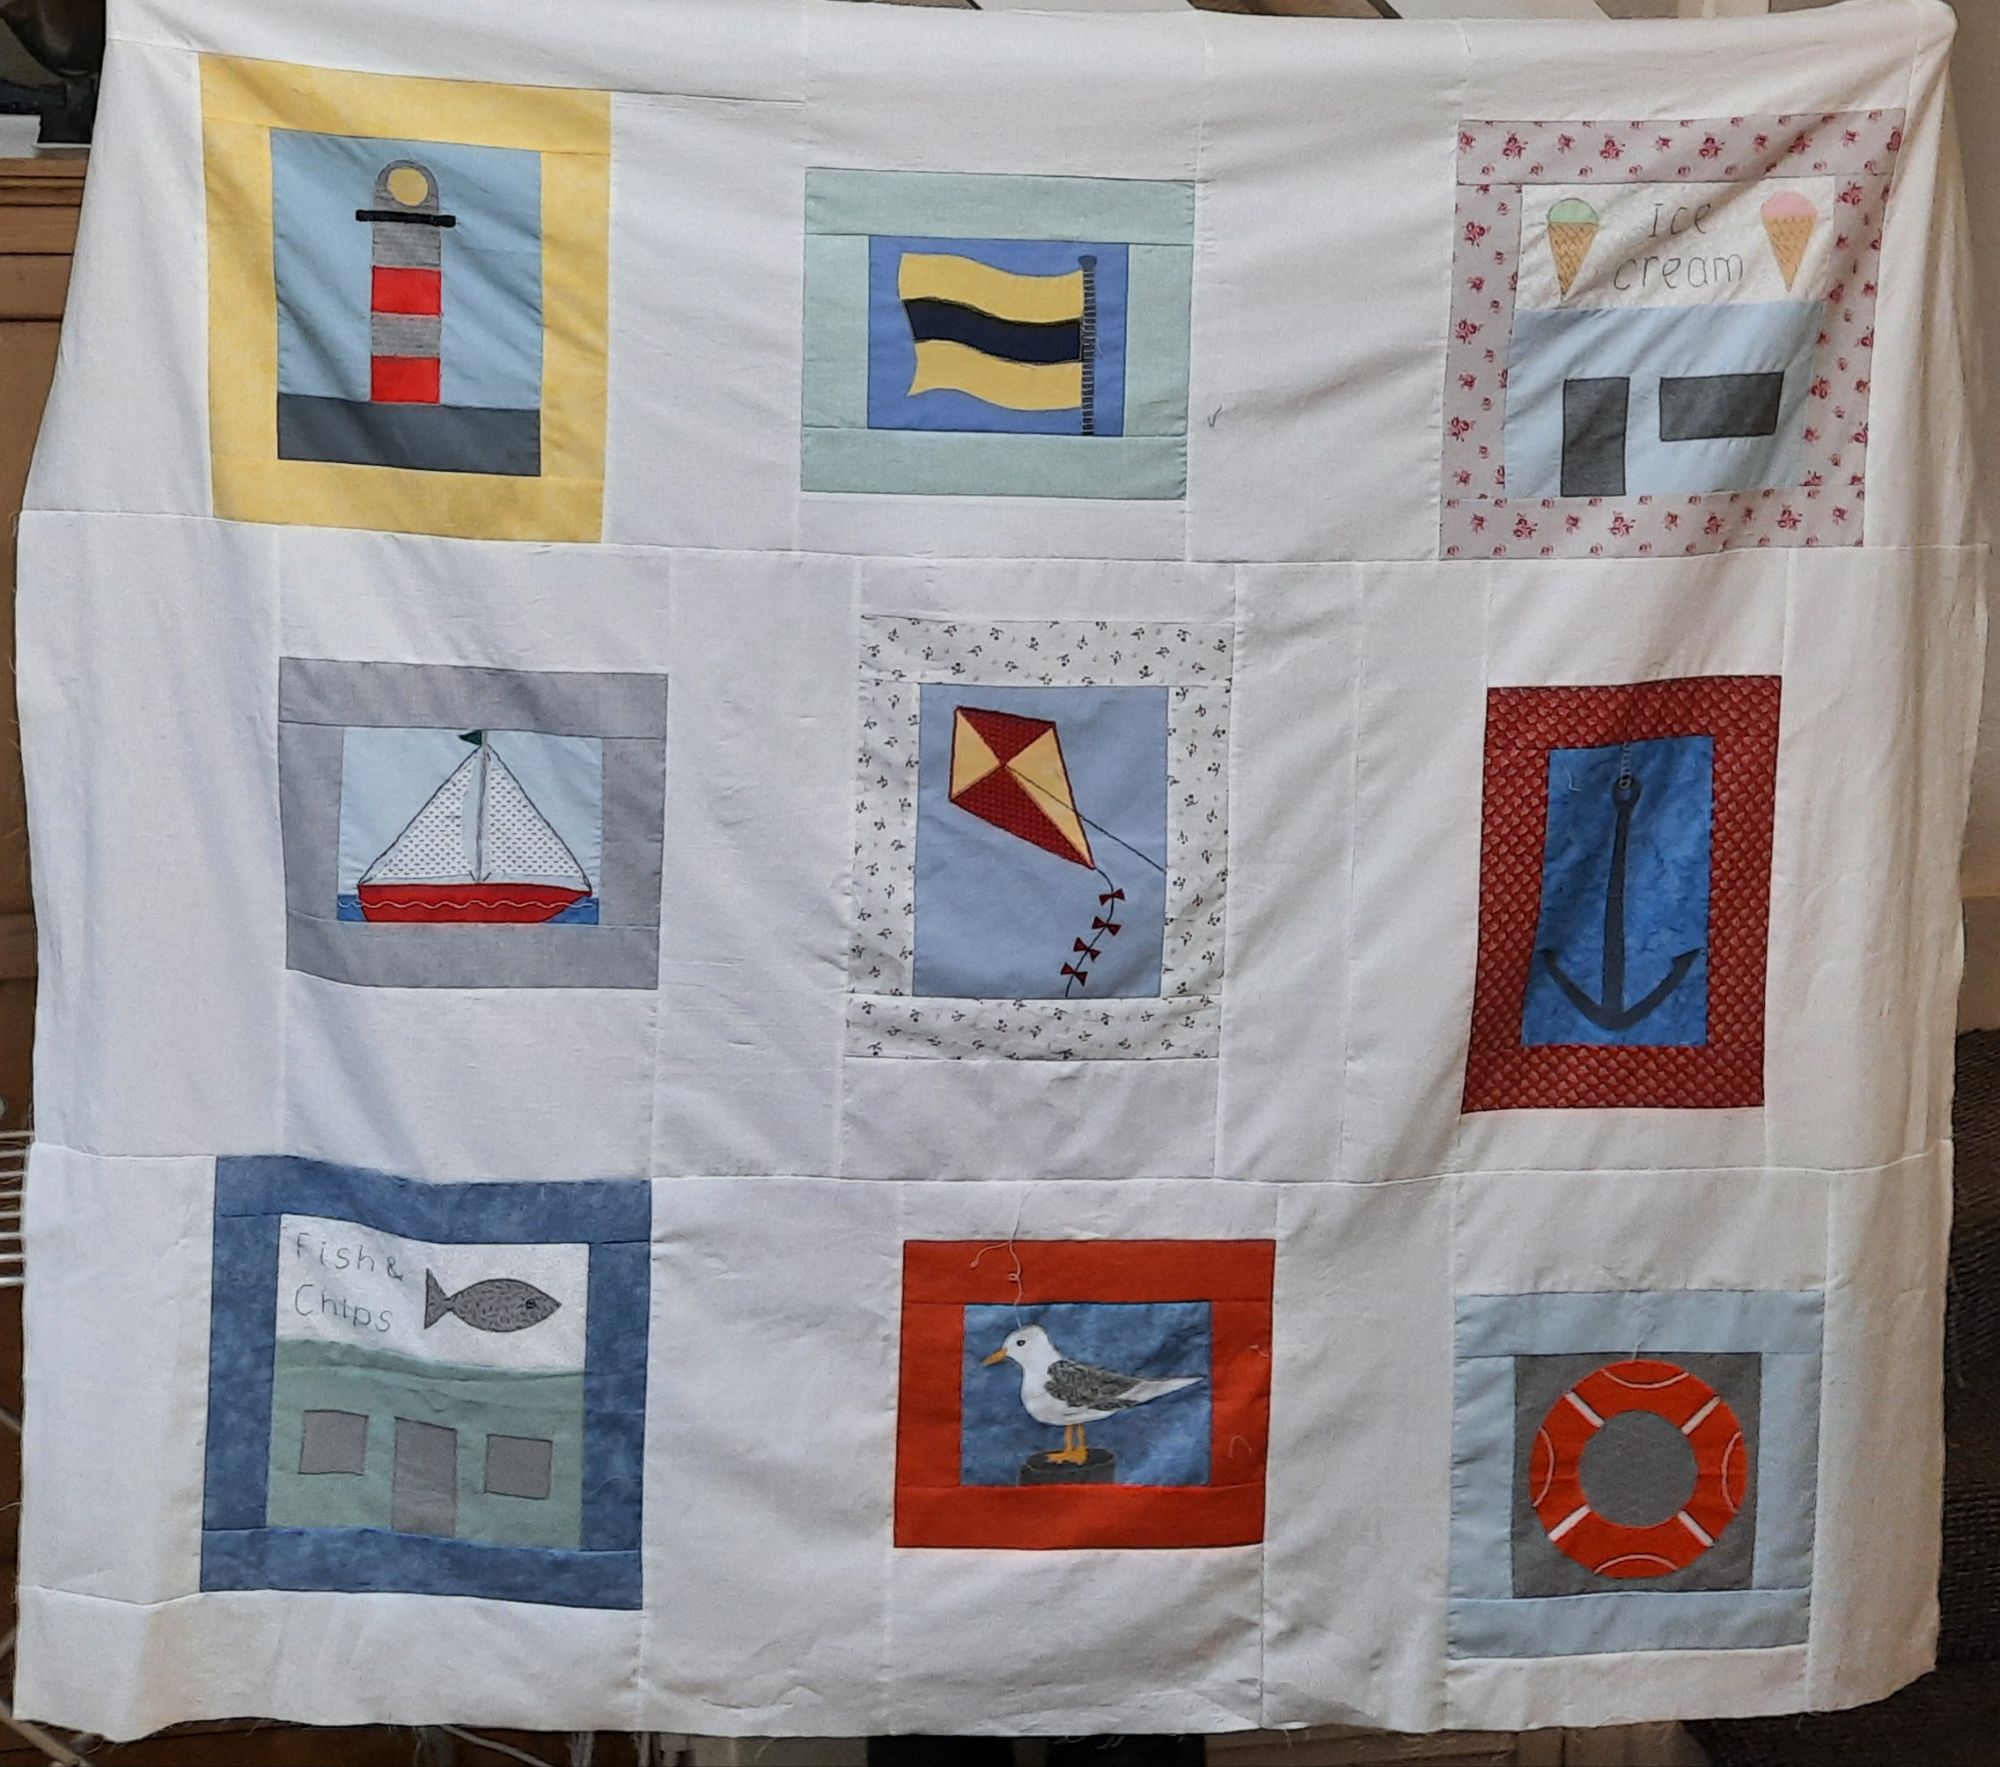
Assemble Section A
Press all seam allowances as directed (e.g. left, right, up, down).
1 Join piece [1] to the left of the lighthouse block. Press right, on the wrong side. Add piece 2 to the right of the lighthouse. Press left. Join piece [3] across the top. Press up.

2 Join [4] above the flag block. Press up. Add [5] below the flag. Press down.

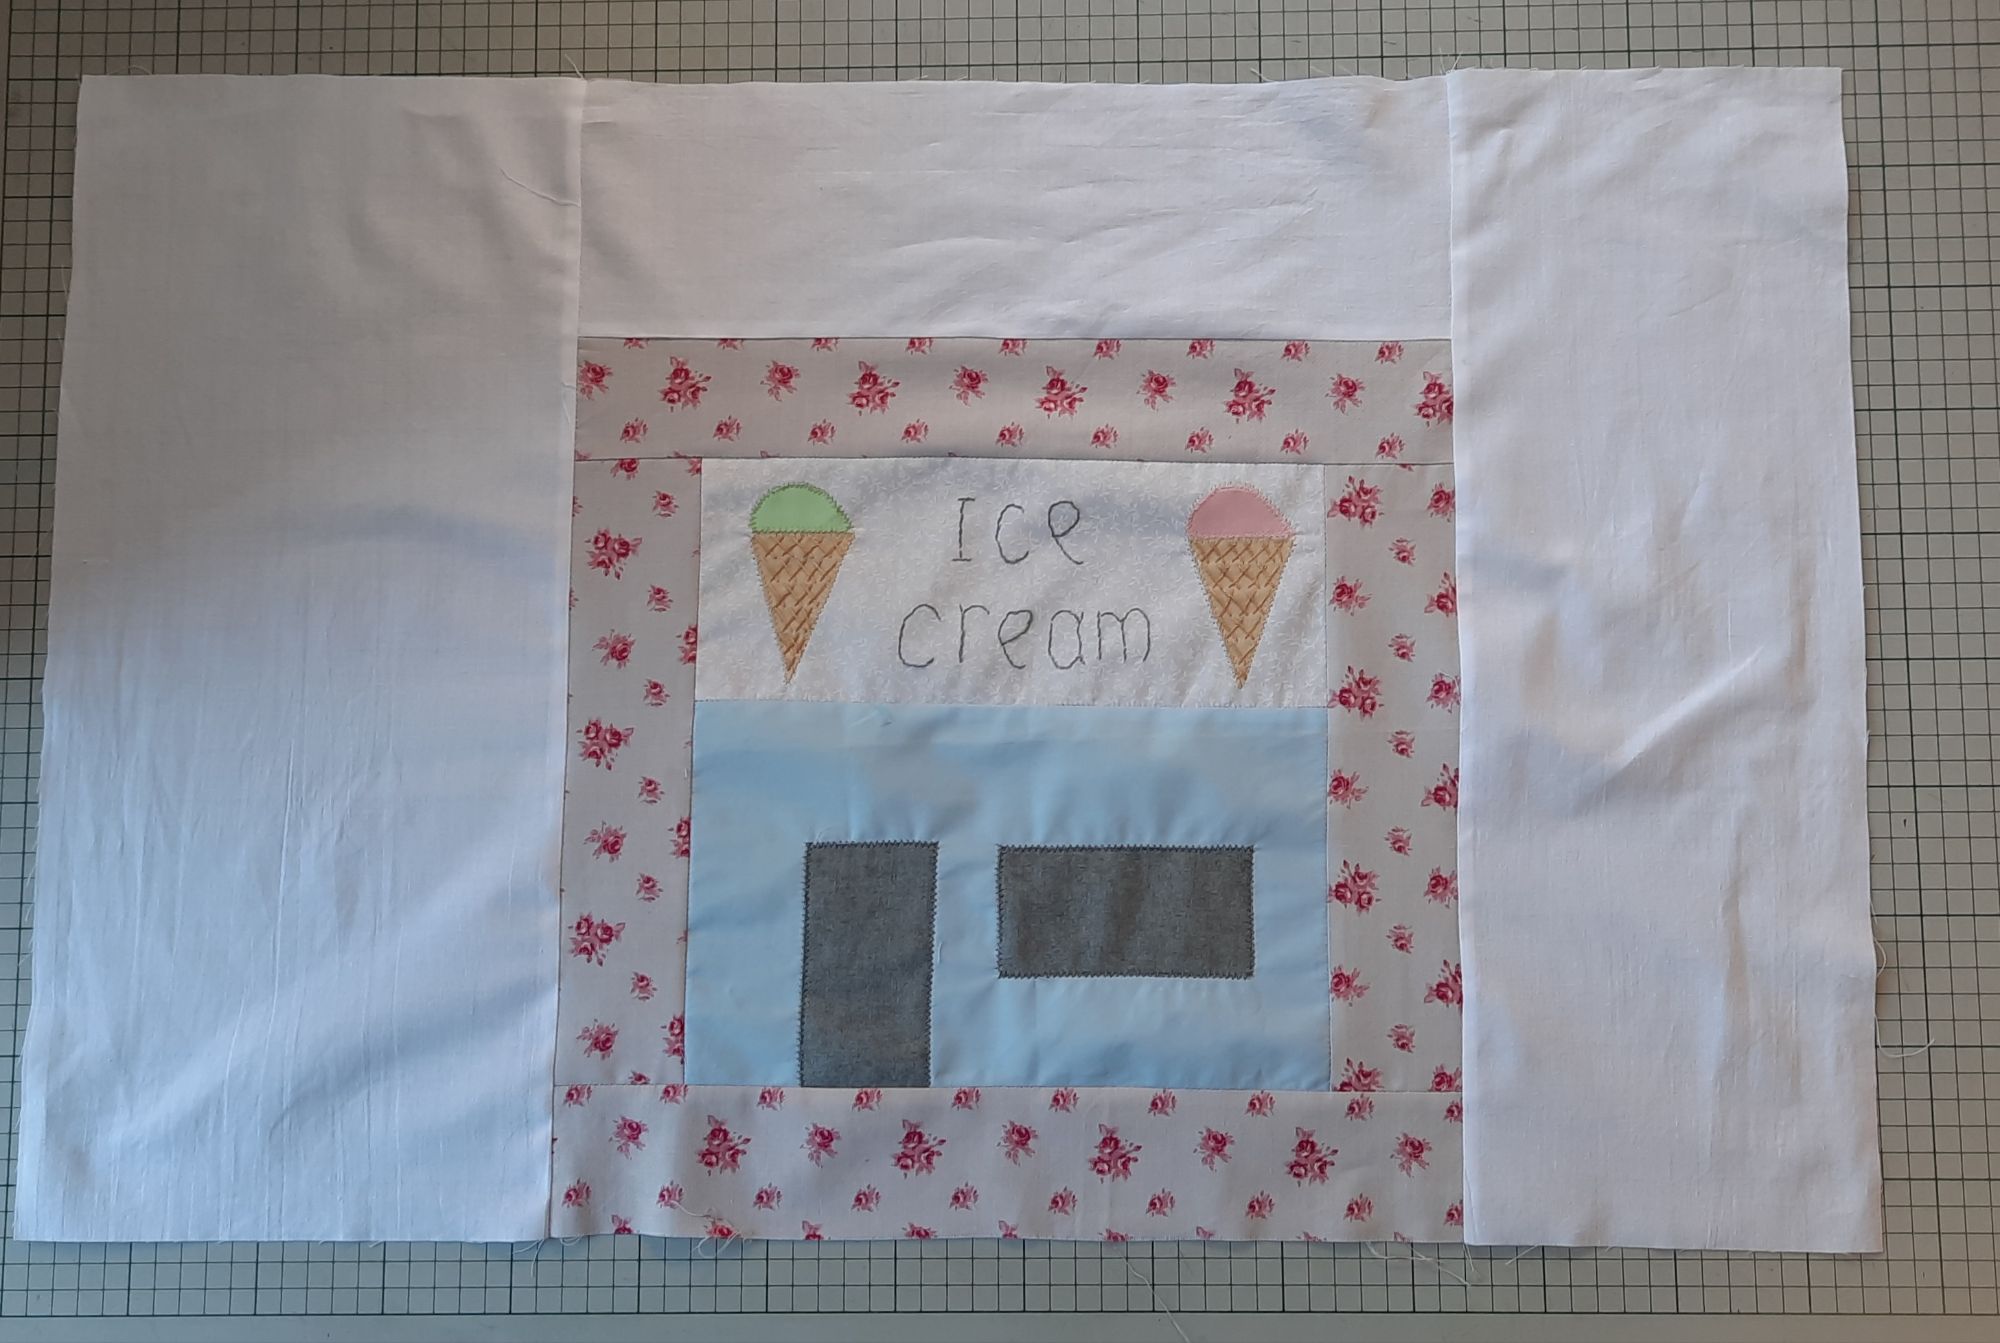
3 Join piece [6] above the ice-cream shop block. Press up. Join piece [7] to the left of the block. Press right. Join piece [8] to the right of the block and press left.
4 Join the piece made in step 1 to the left of the piece made in step 2 and then add the piece made in step 3 on the right. This completes Section A.
Assemble Section B
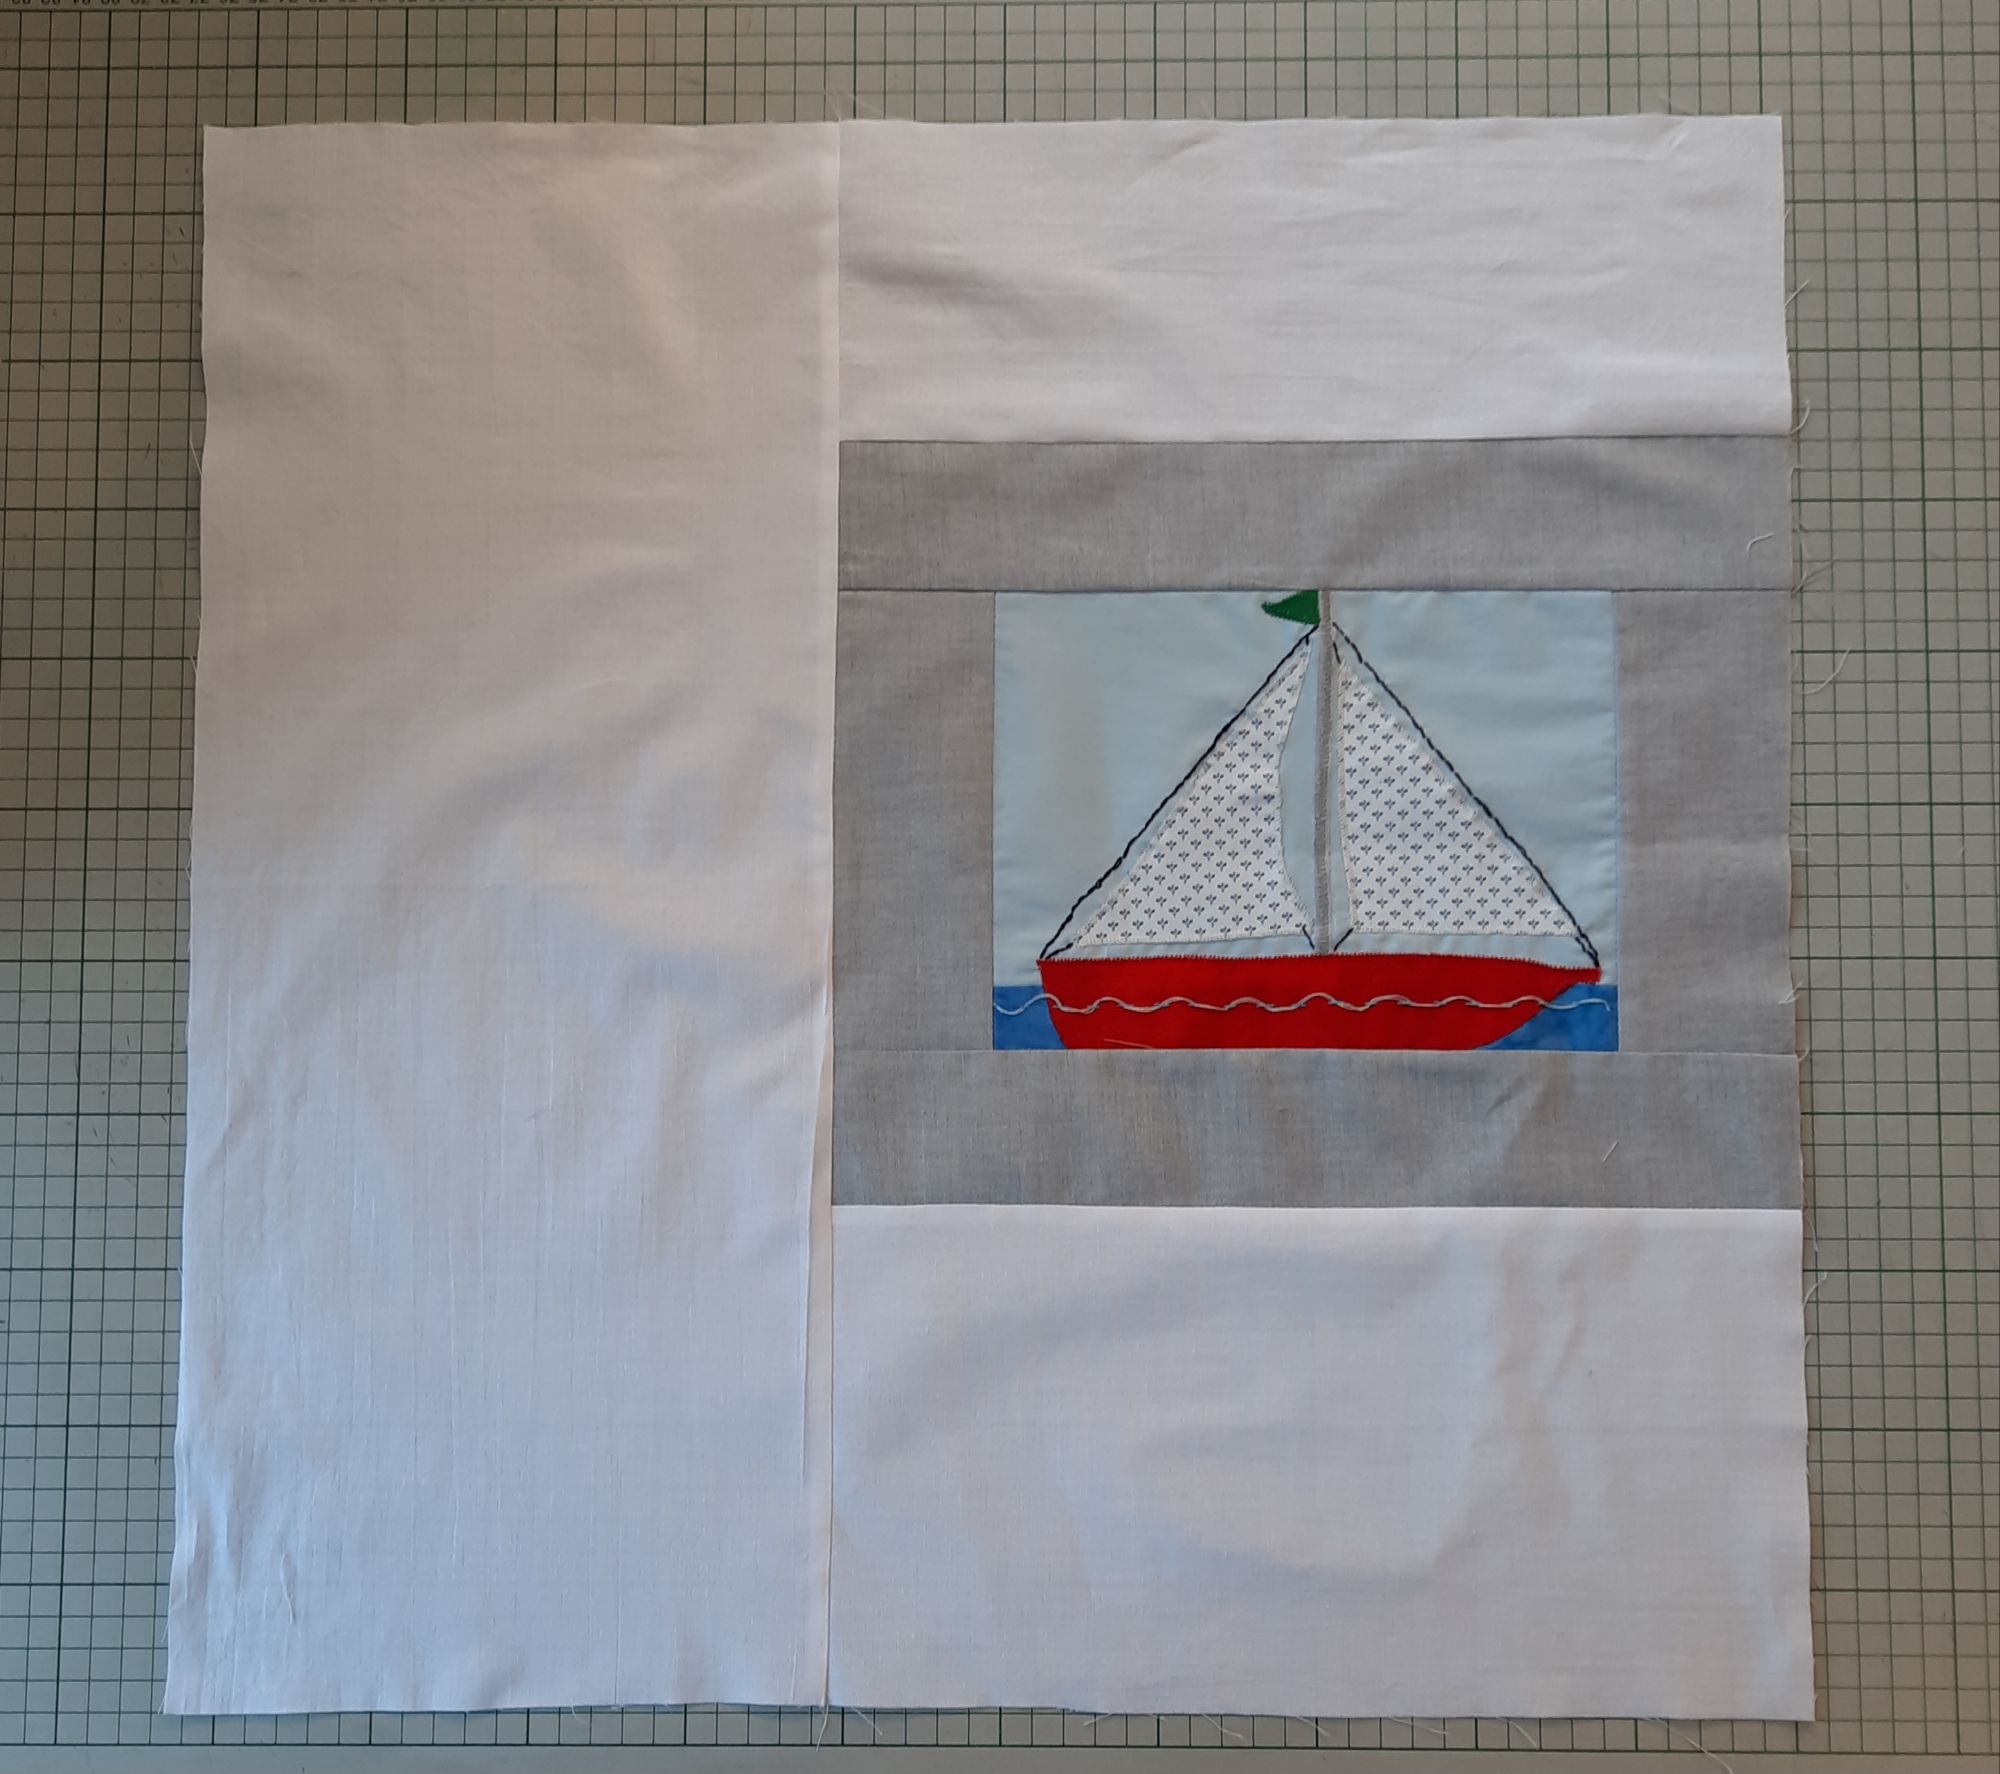
5 Stitch piece [9] above the yacht block. Press up. Add [10] below the yacht block. Press down. Stitch [11] to the left of the block. Press right.
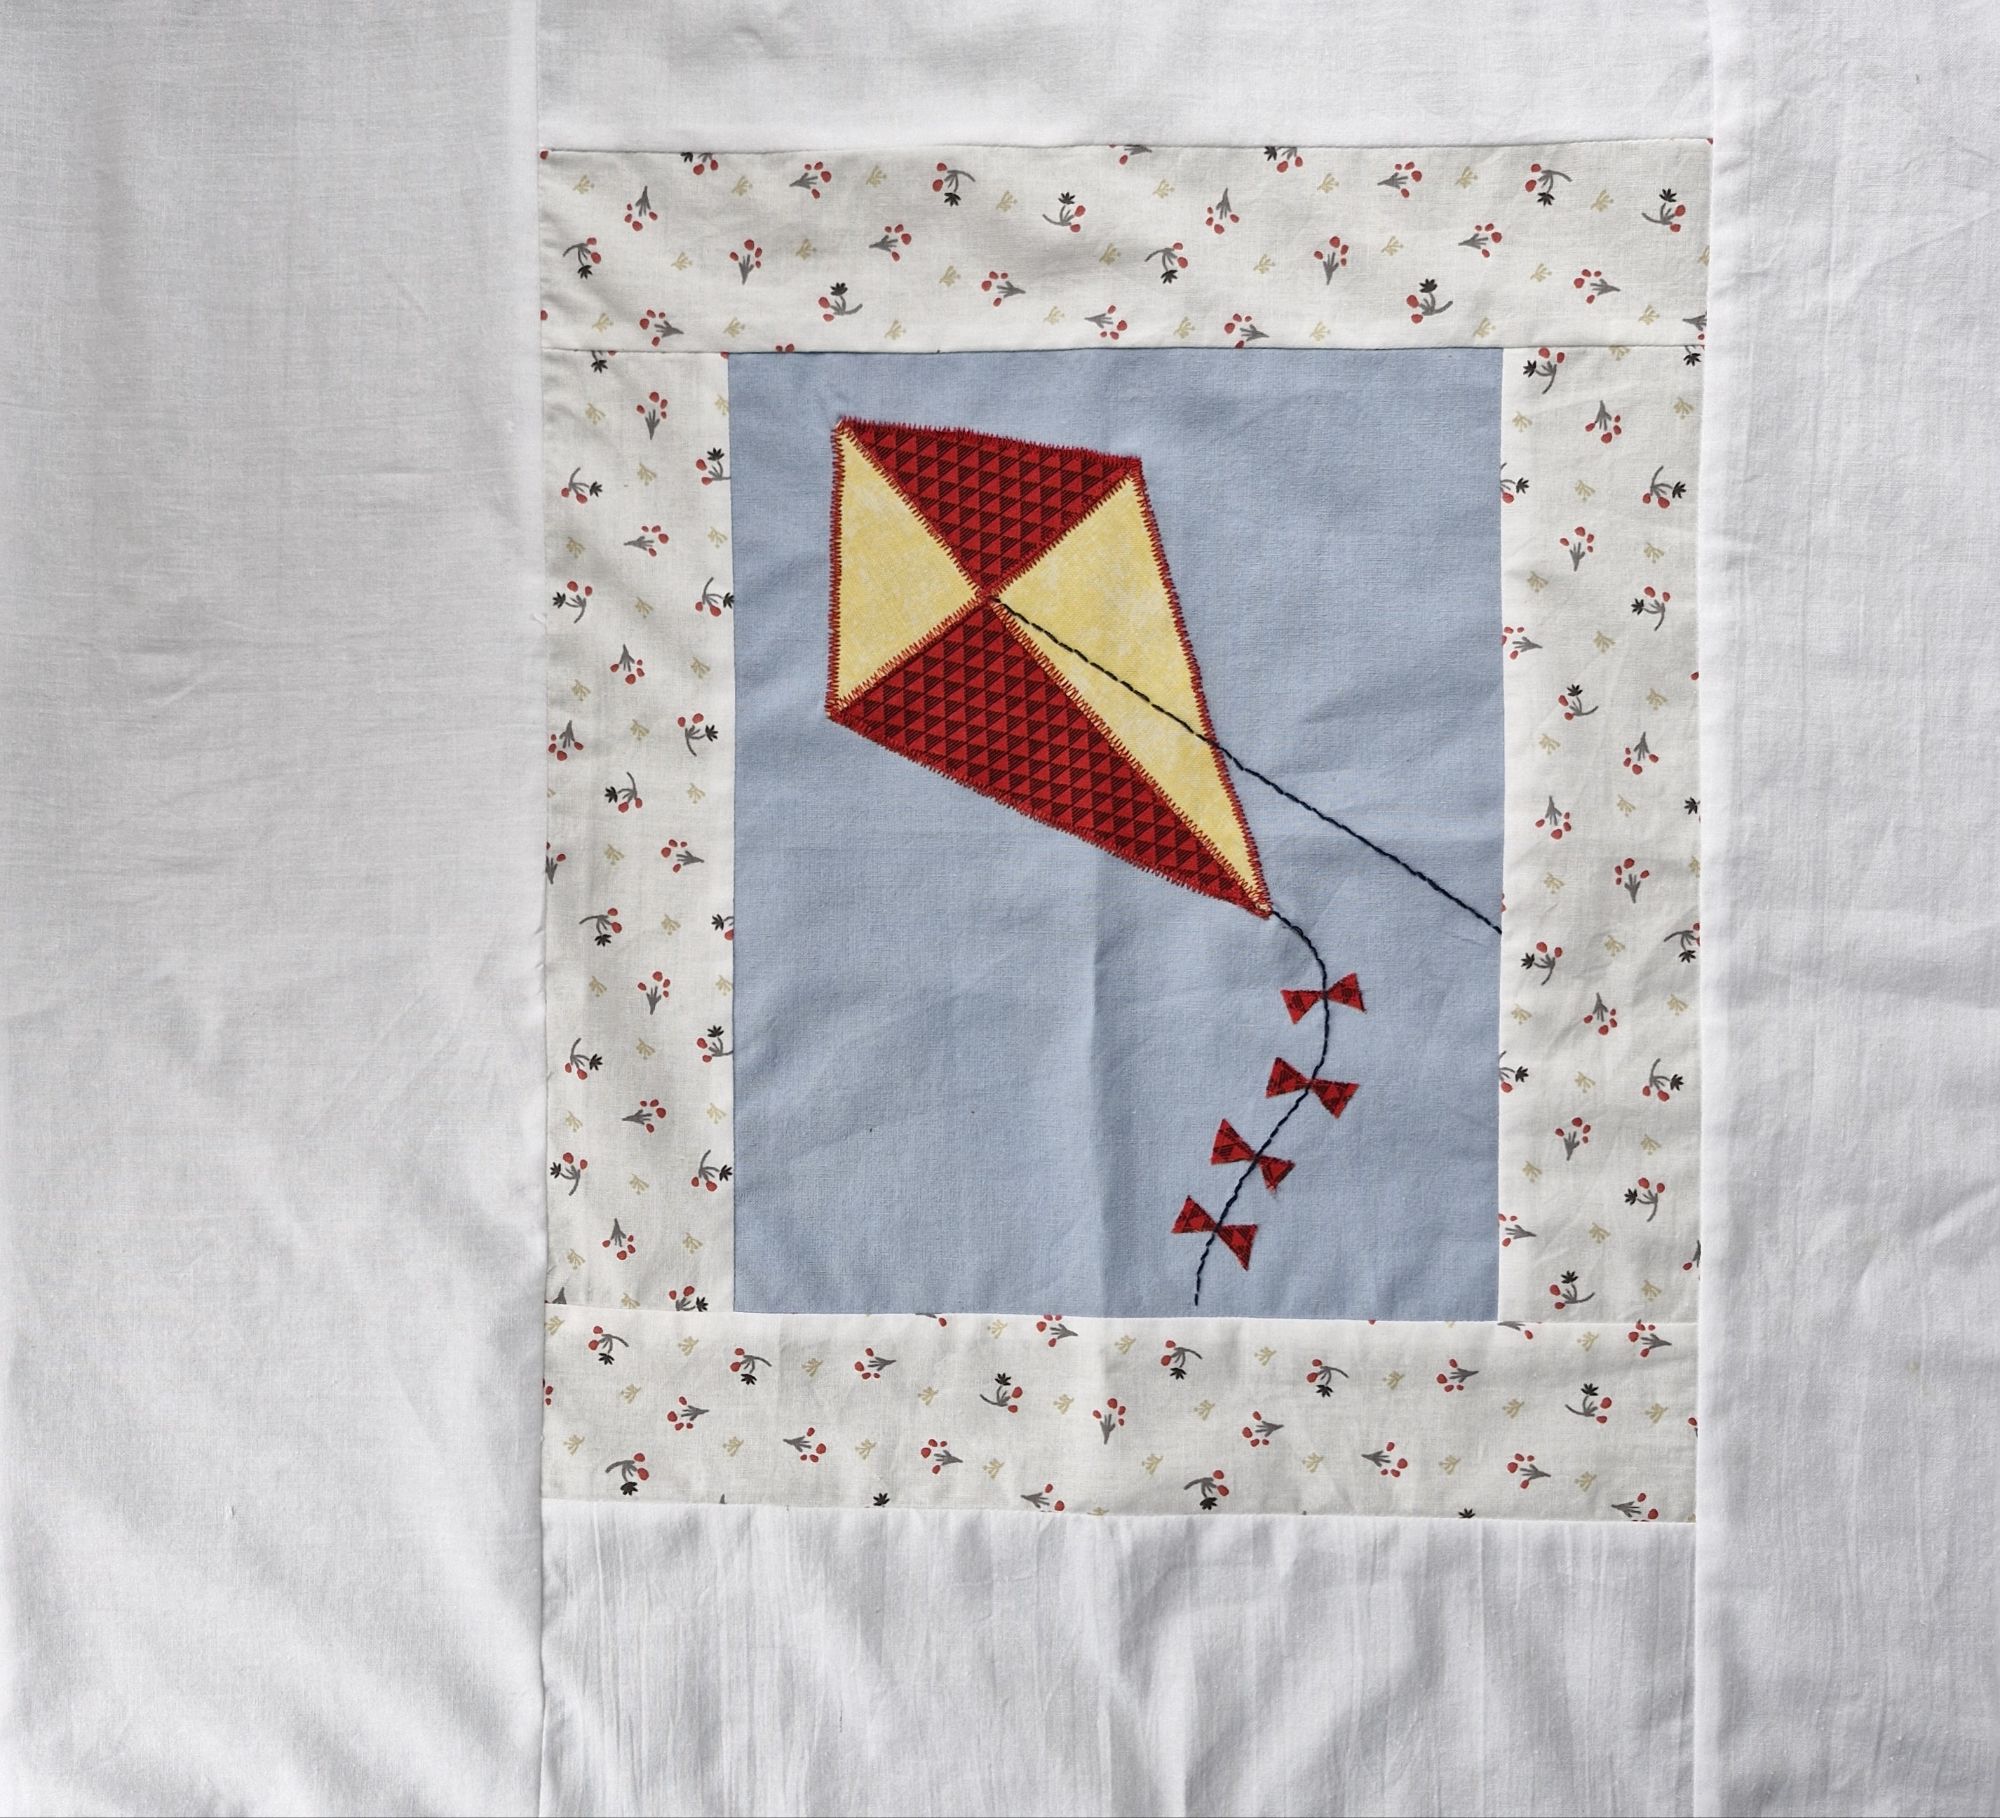
6 Stitch [12] above the kite block. Press up. Add [13] below the block. Press down. Stitch [14] to the left of the block (press right) and [15] to the right of the block (press left).
7 Stitch [16] above the anchor block (press up) and [17] below the anchor block (press down). Add [18] to the left (press right) and [19] to the right (press left).

Join the pieces made in steps 5, 6 and 7 working from left to right. Section B is complete.
Assemble Section C
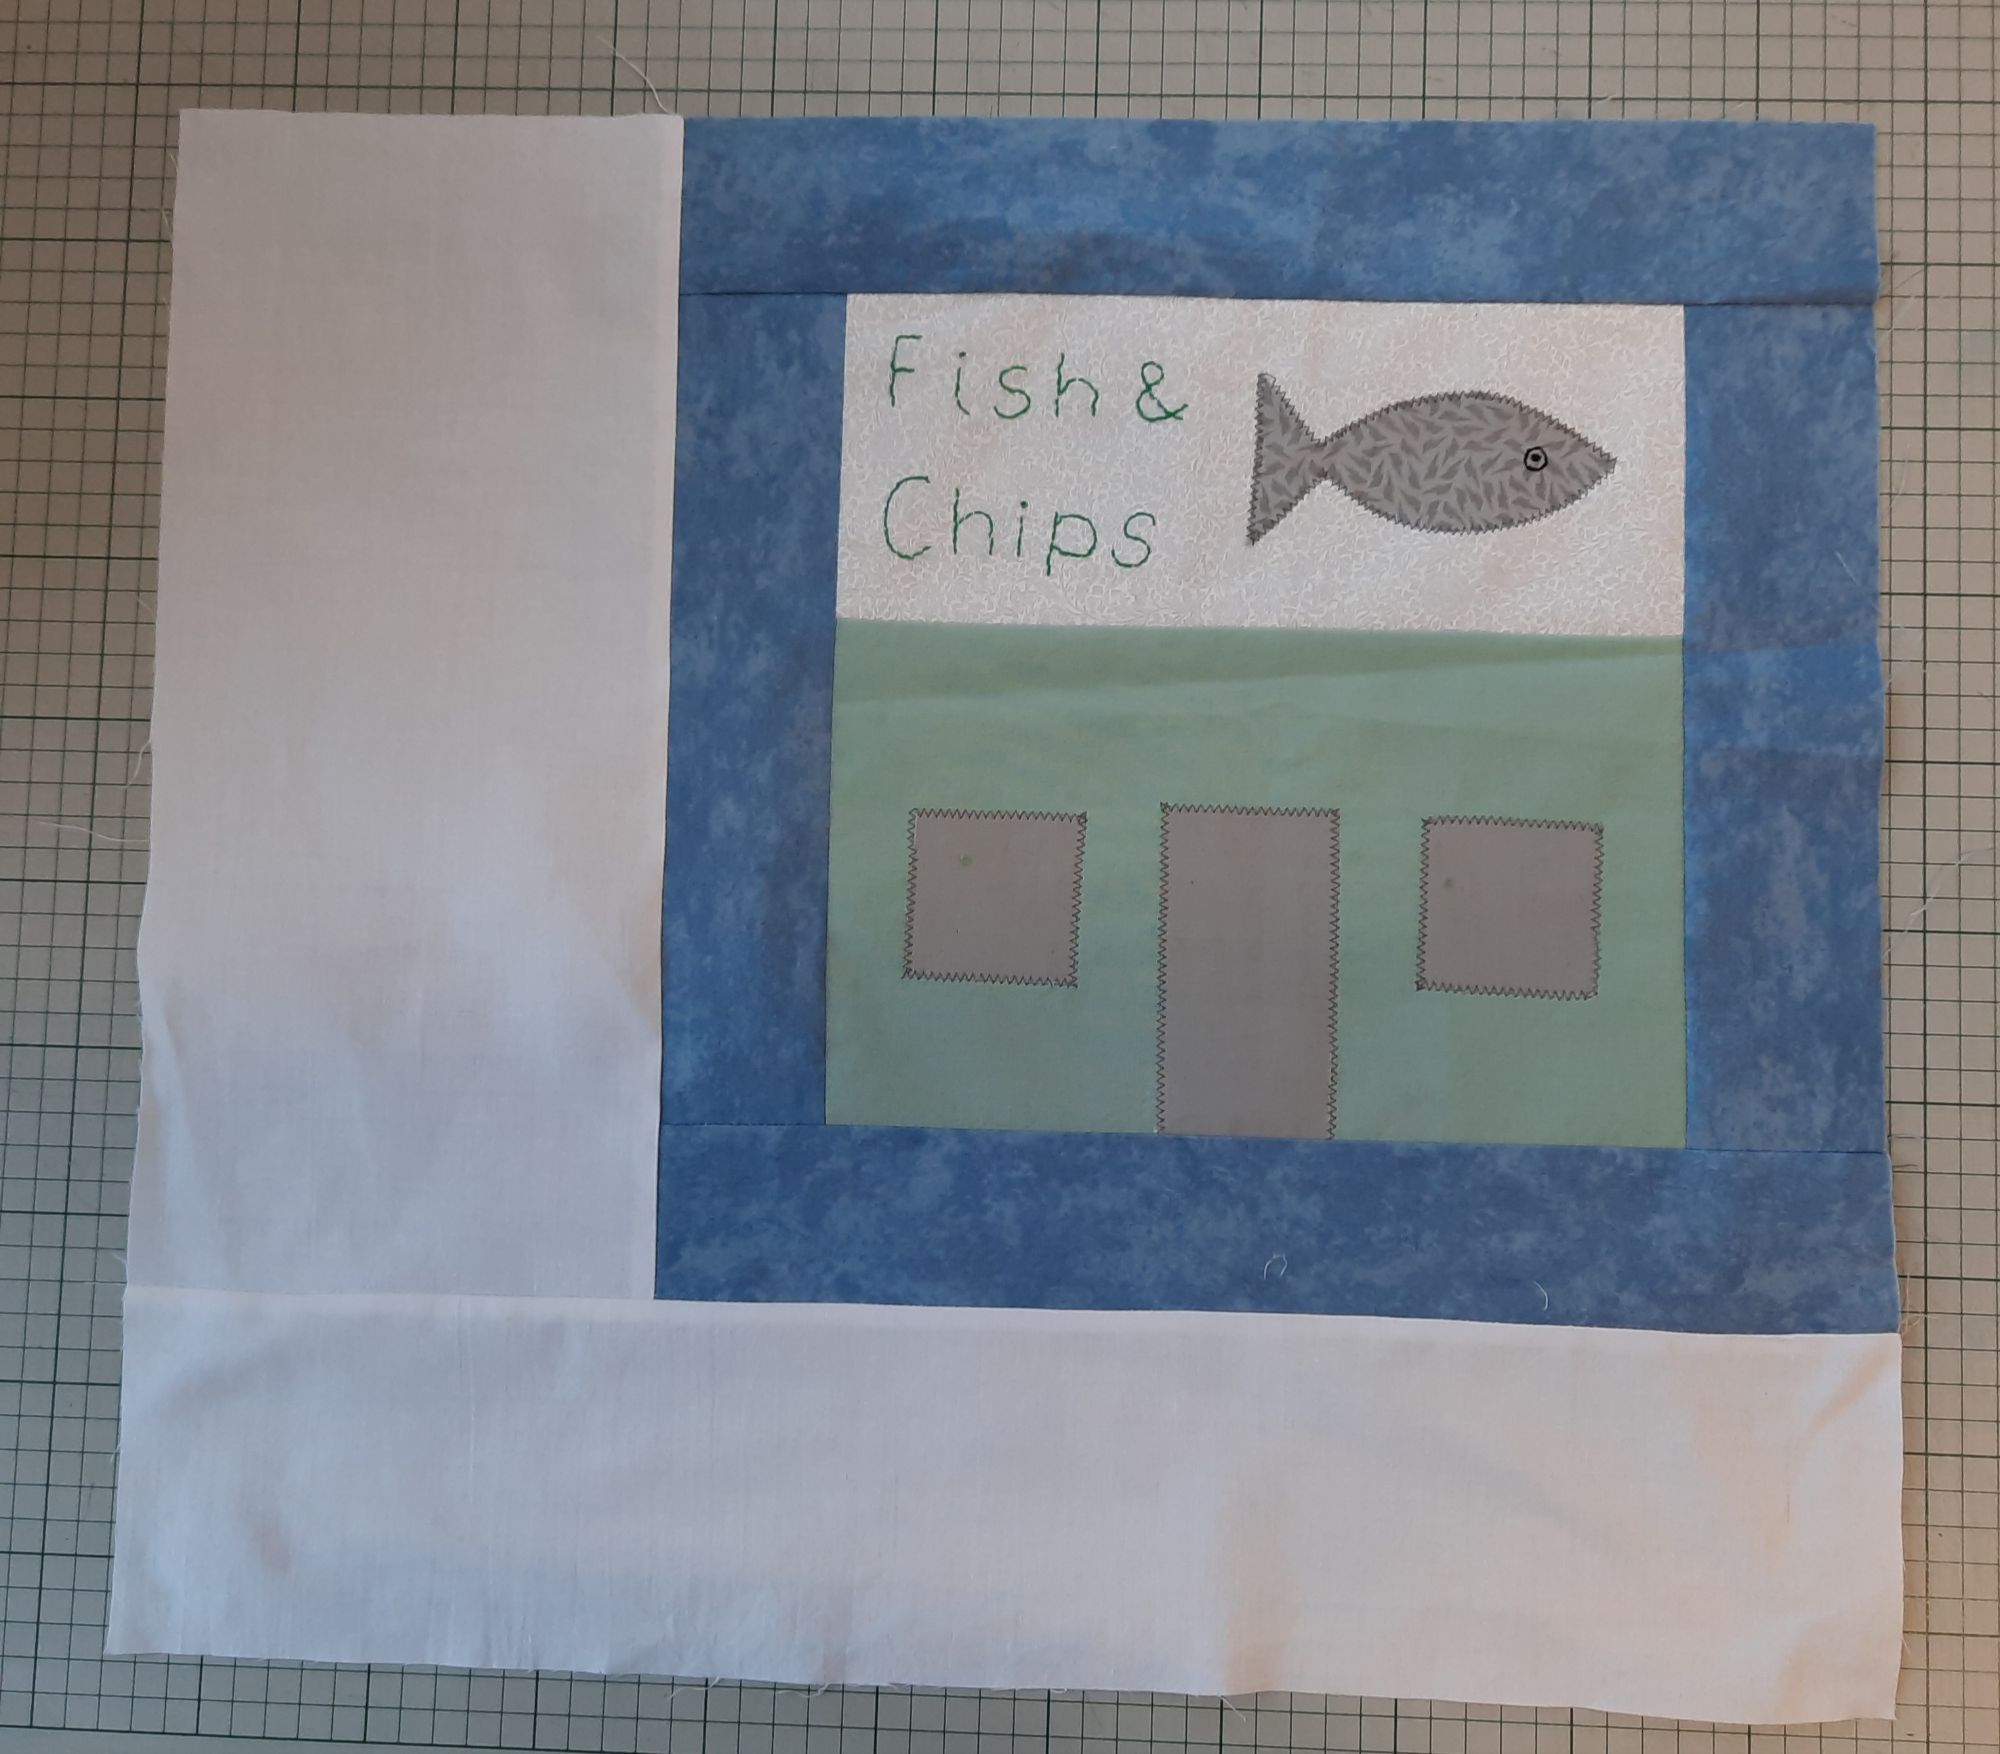
9 Join piece [20] to the left of the Fish Shop block (press right). Add piece [21] below (press down).
10 Add piece [22] above the seagull block (press up) and [23] below it (press down). Add [24 ] to the left (press right).
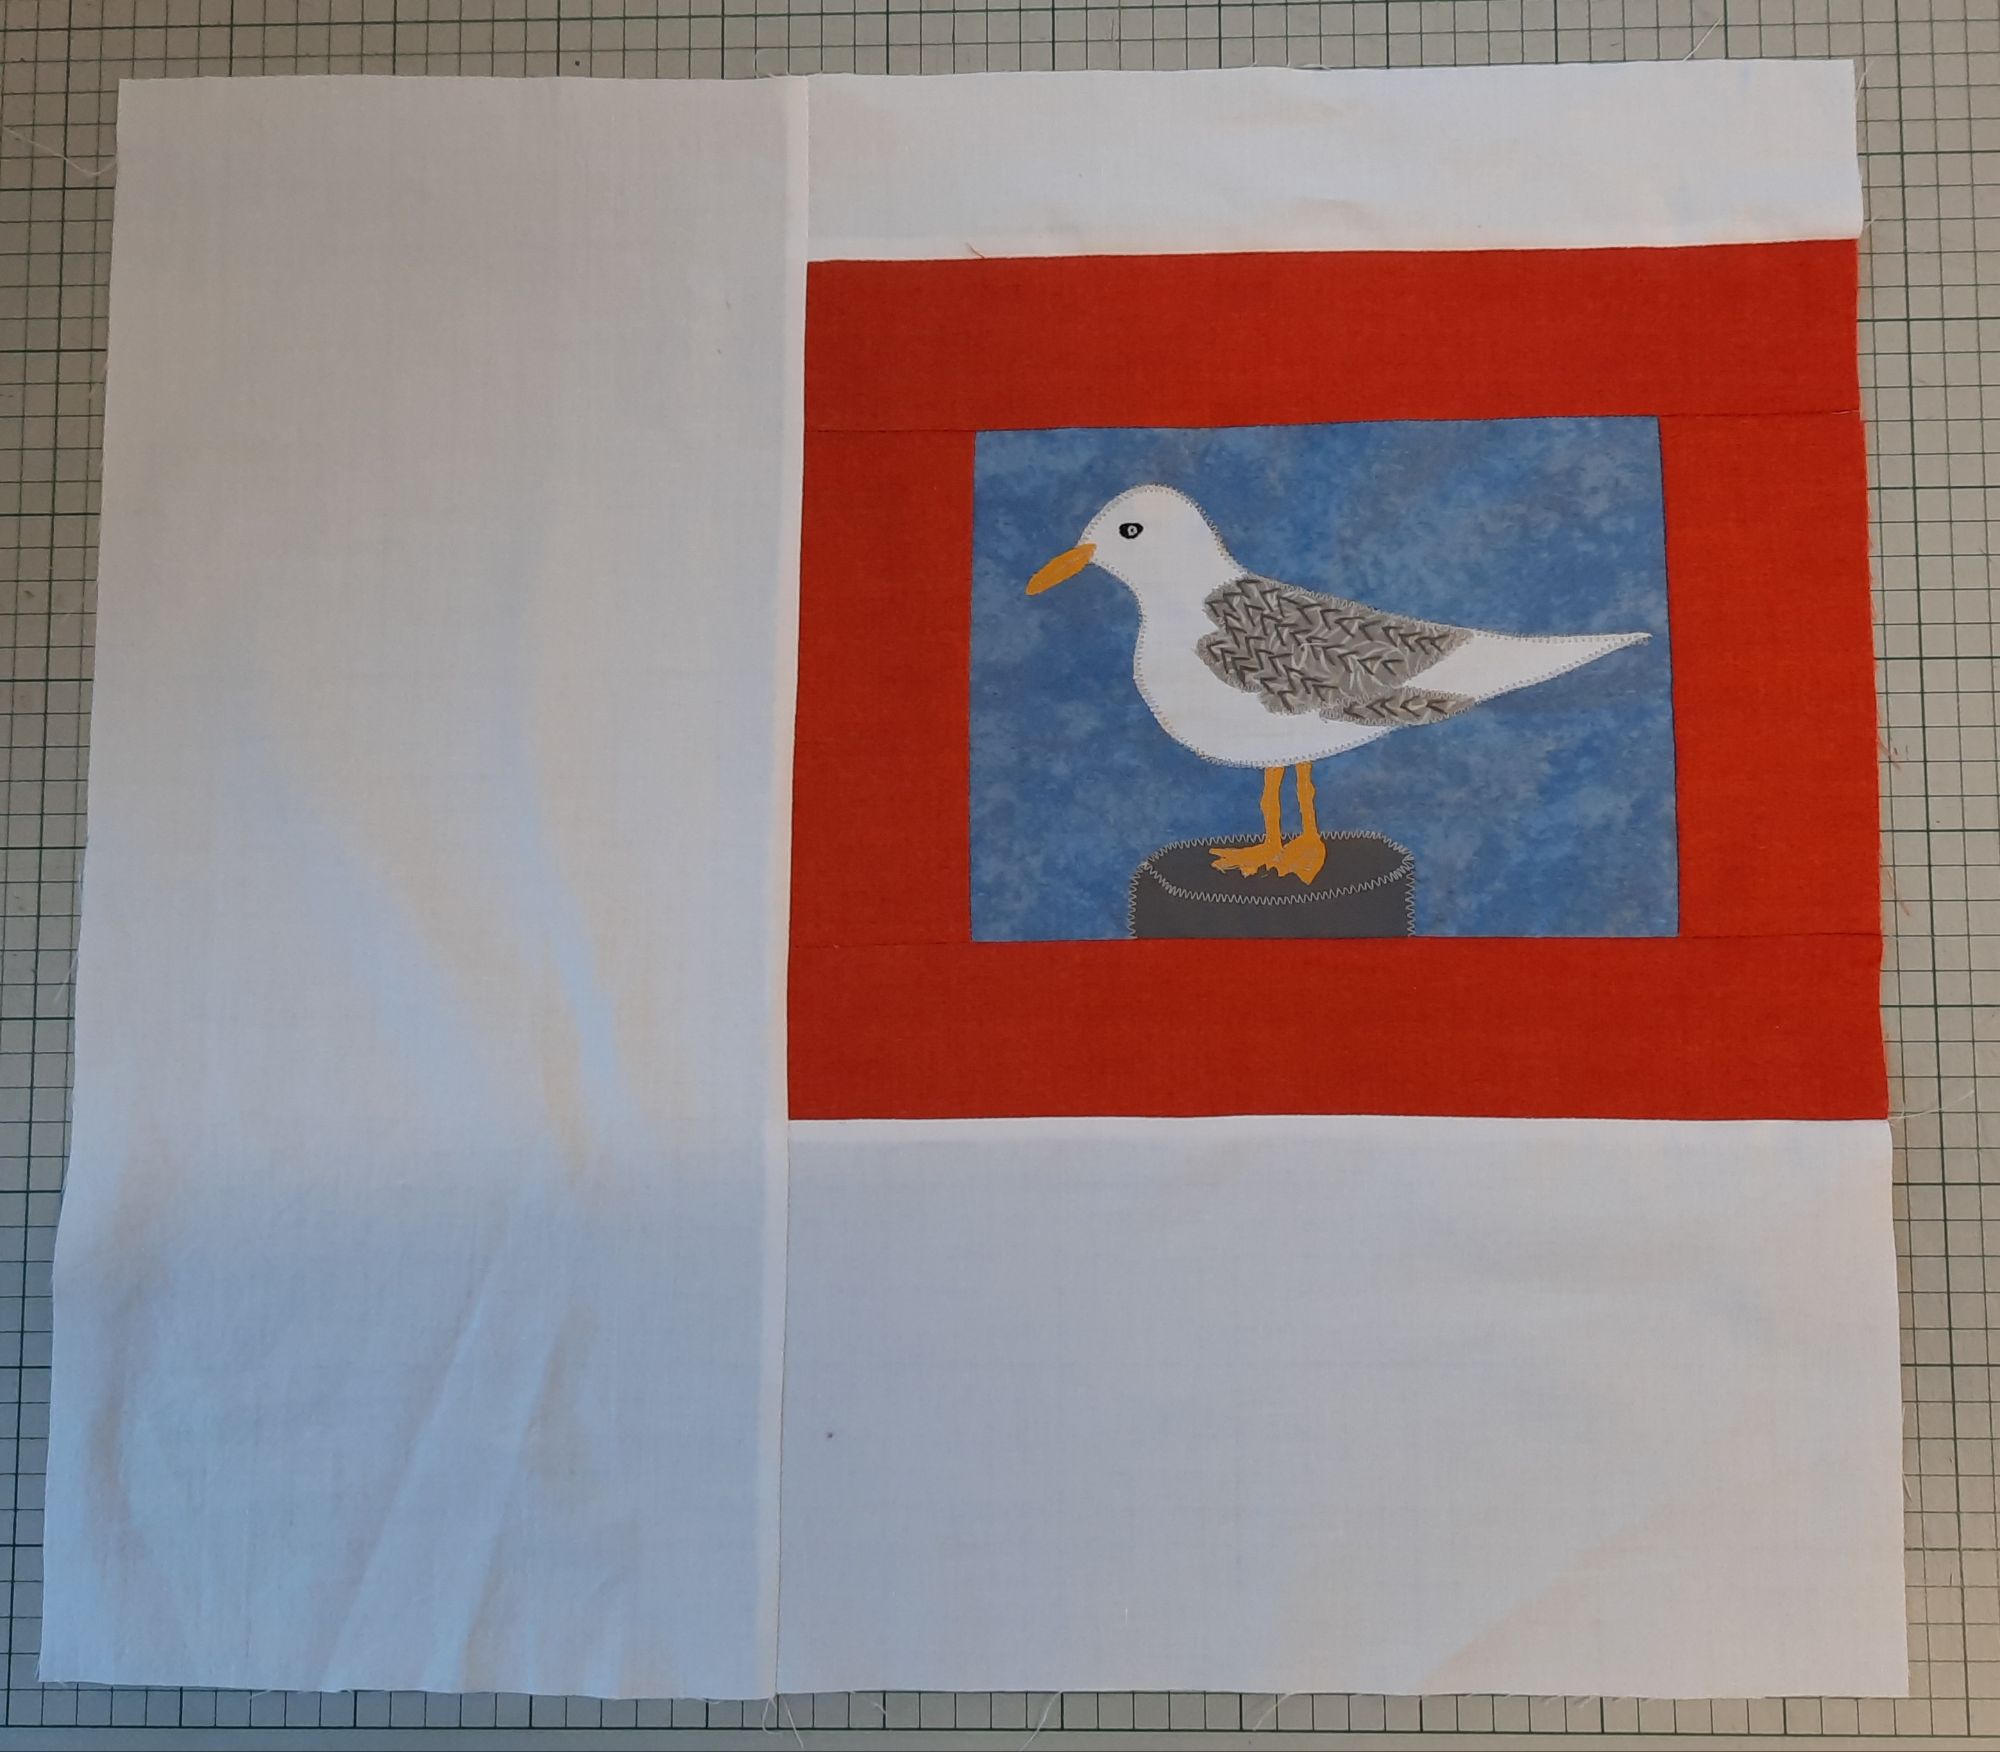
11 Add piece [25] above the life-belt (press up) and 26 below (press down). Join piece [27] to the left (press right) and piece [28] to the right (press left).

12 Join the pieces made in steps 9, 10 and 11. Section C is complete.
Joining the sections
Join Section B below Section A.
Join Section C below piece A/B.
Join me next month when we will be adding decorative borders and outside borders.
See you then.
The ‘Bright Garden Borders’ quilt, which is made by the traditional method of English Paper Piecing, has been attracting attention at my house during the East Kent Open Houses event (more about that here and here), If you want to make a quilt like this of your own, the pattern is here
Thank you for reading my blog. Quilt Patterns are here, Fabrics are here, Classes are here
Click the ‘Follow’ button to get a blog-post by email each Monday and click here if you would like the monthly newsletter with design and colour inspiration, etc.
