
This is the latest in the Tools for Textiles series (you can find measuring tools here, pins and pincushions here, safety pinsand clips here, irons and surfaces for pressing here, and scissors here .
Here, I’m going to talk about the each sewing machine foot that I use often on my Bernina sewing machine. Whatever make of machine you use, you will probably have the option of using a foot like each of these. Some of these feet came with the machine when I bought it and some I have added others more recently. To illustrate the use of each one, I’ve taken a textile item from one of my sewing and quilt patterns
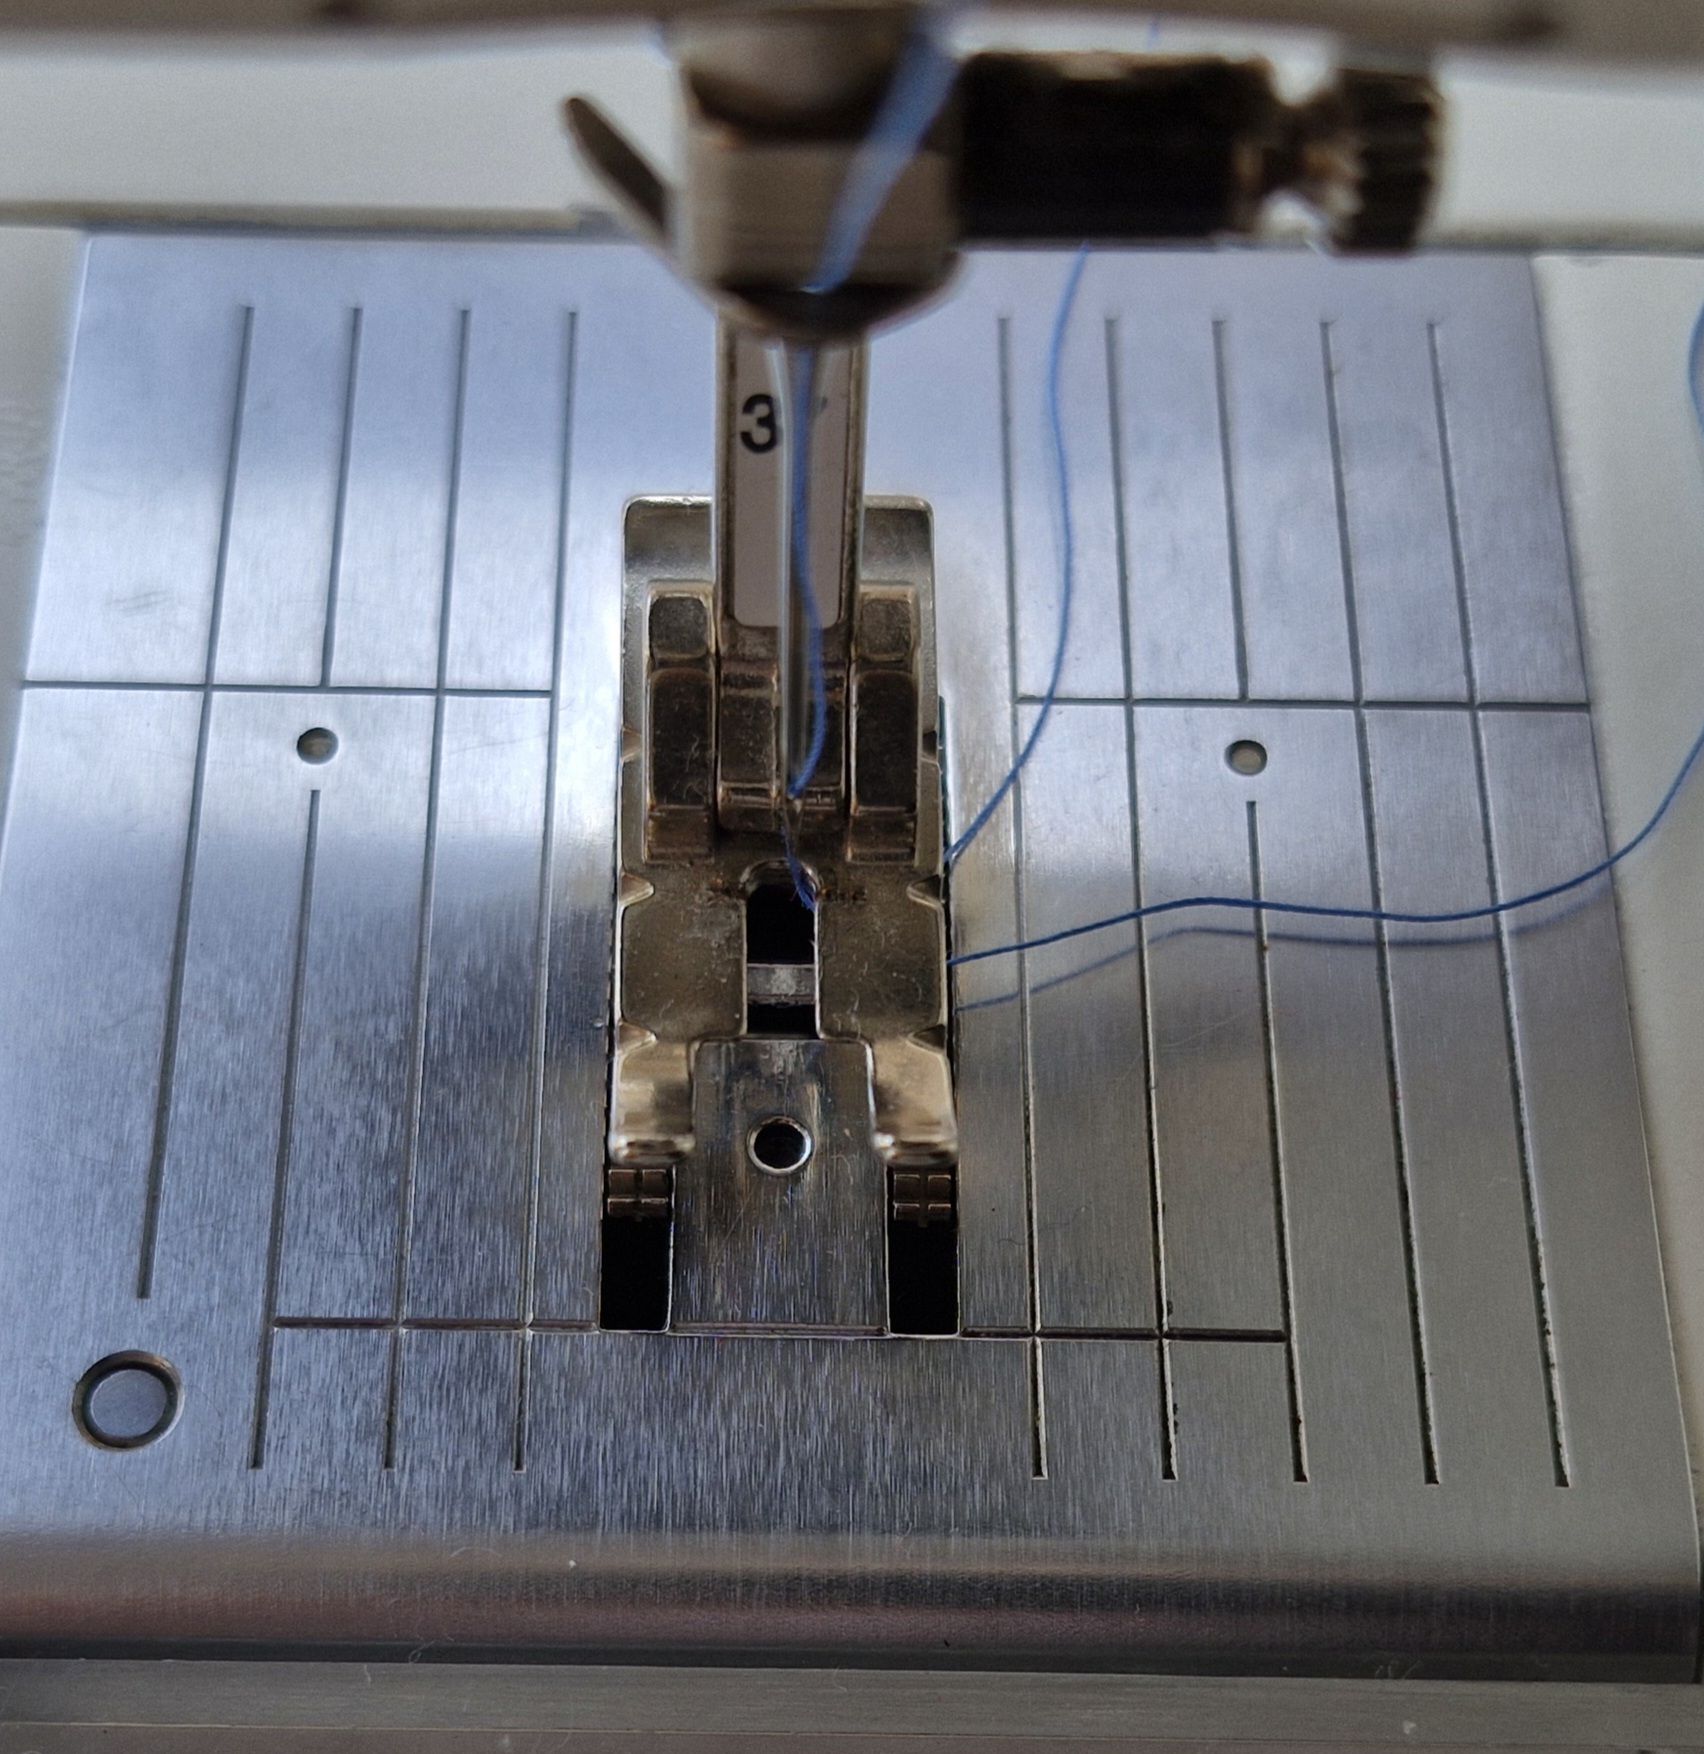
Foot number 1
First up is the number 1 machine foot which I use for regular sewing, for example when making a garment or a cushion cover, say. It allows for straight stitching (for a seam, for example) but the wide aperture under the needle allows for zig-zag stitches (which you might use to neaten a seam allowance, say) and also for a number of decorative stitches in the range available on the machine. The stitch plate (the silver square underneath the foot) has a wide slit underneath the centre of thefoot to accommodate the width of the stitches.


The portfolio pattern is a sewing pattern using a regular five-eighths of an inch (1.5cm seam) so the number 1 foot is appropriate for this kind of sewing.
You can get the pattern here
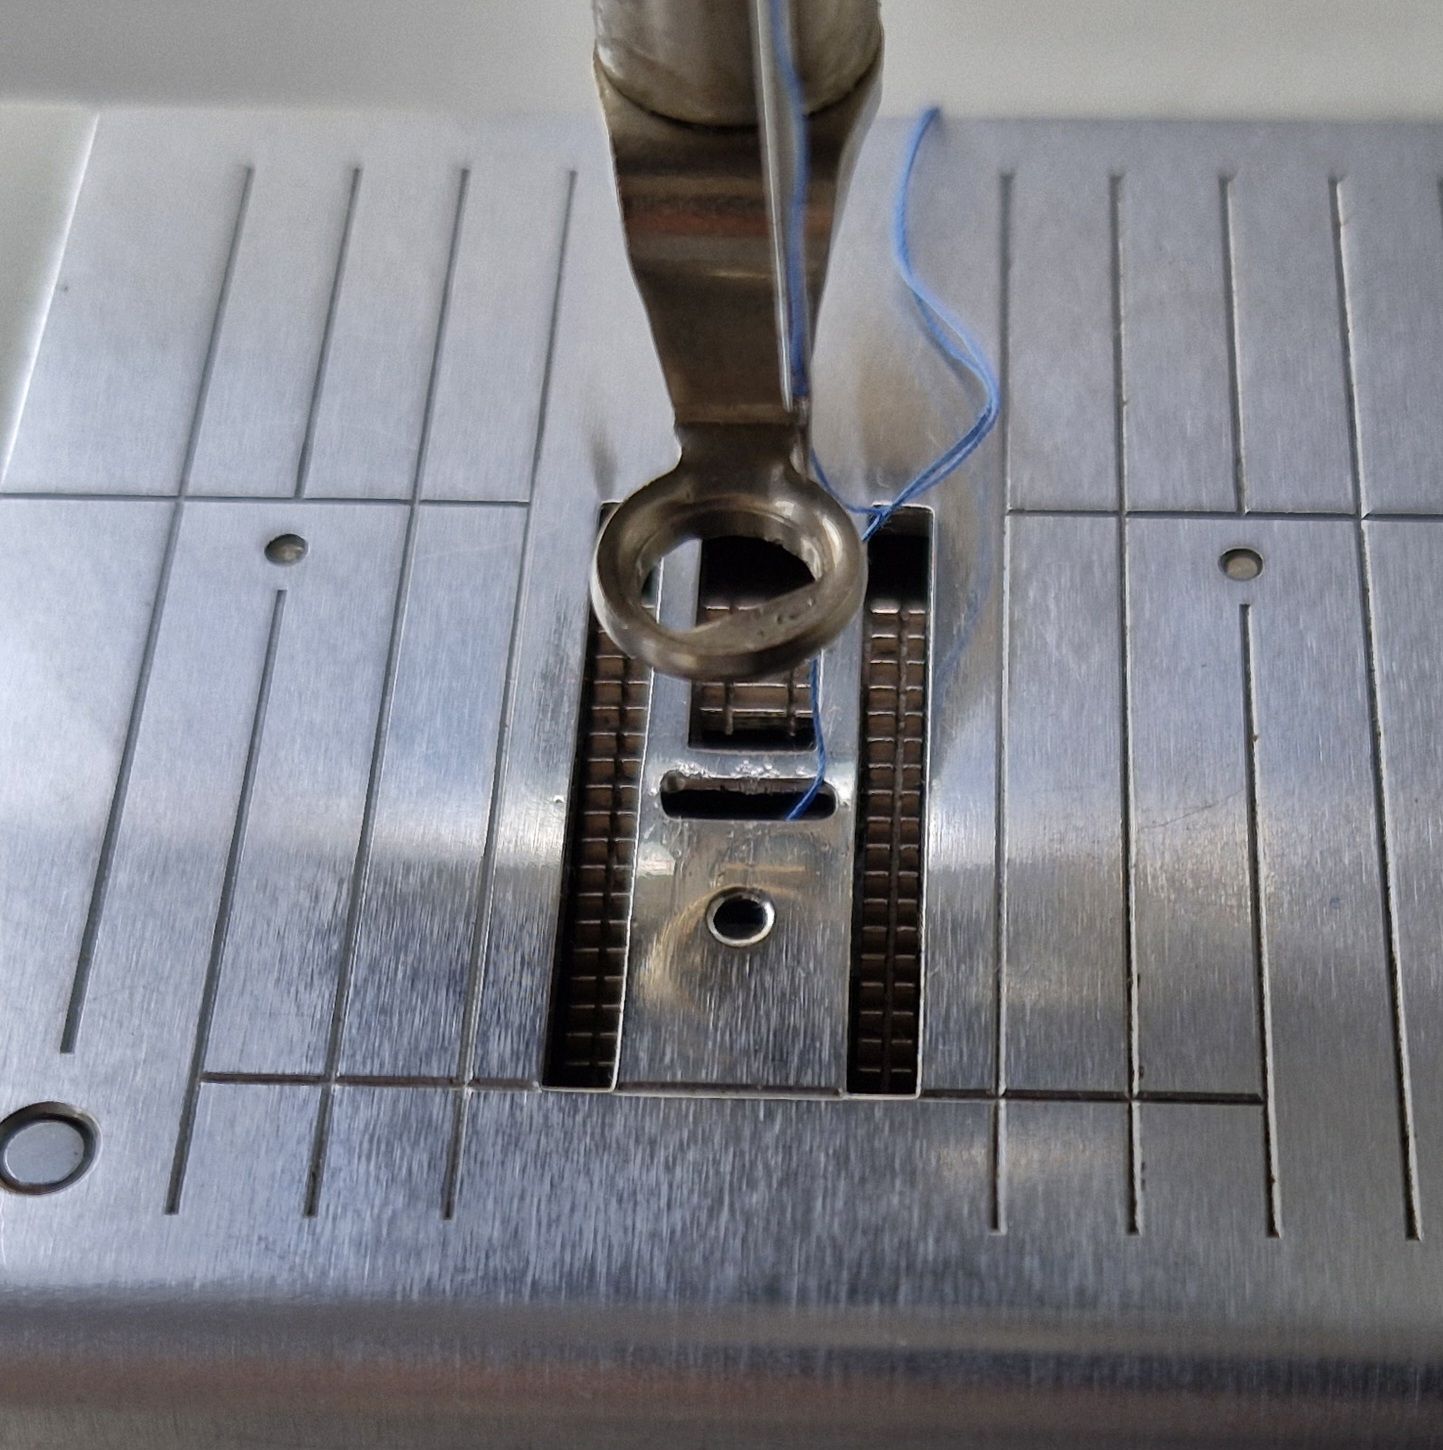
Quarter-inch foot
Next, is foot number 37, the quarter-inch foot. I use this foot whenever I am piecing fabric to make quilt blocks. it is extremely useful because the distance from the needle to the outside of the foot is exactly a quarter of an inch (6mm) so by lining up my fabric pieces with the edge of the foot, I can be sure of an accurate seam. The sides of the foot are also marked out with quarter-inch grooves, which can sometimes be useful. When I use this foot, I also change the stitch plate to a ‘single-hole stitch plate’ which you can see in the photo: beneath the needle there is a single hole instead of a wide slit (seen above). The single hole also leads to greater accuracy and makes it less likely that small fabric pieces will be pulled down into the stitch plate. Warning: it’s best to remove the quarter-inch foot and the single-hole stitch plate the minute you have finished using them – it’s so easy to forget, switch to a zigzag setting and find yourself with a broken needle! This is for straight stitching only.

This is a pattern for a lap-quilt or throw, with an adaptation to make an oblong quilt. It uses a quarter-inch seam throughout so the quarter-inch foot would make the piecing easy.
You can get the pattern here
Open-toe embroidery foot
This is Bernina foot number 20 which looks quite similar in shape to the number 1, but if you compare the two you clan see that because it is open at the front you have a much better view of what the machine is stitching, so it is particularly good if you are using any of the decorative stitch patterns on your machine or if you are sewing something where it is helpful to have an accurate view of what is happening under the machine foot.
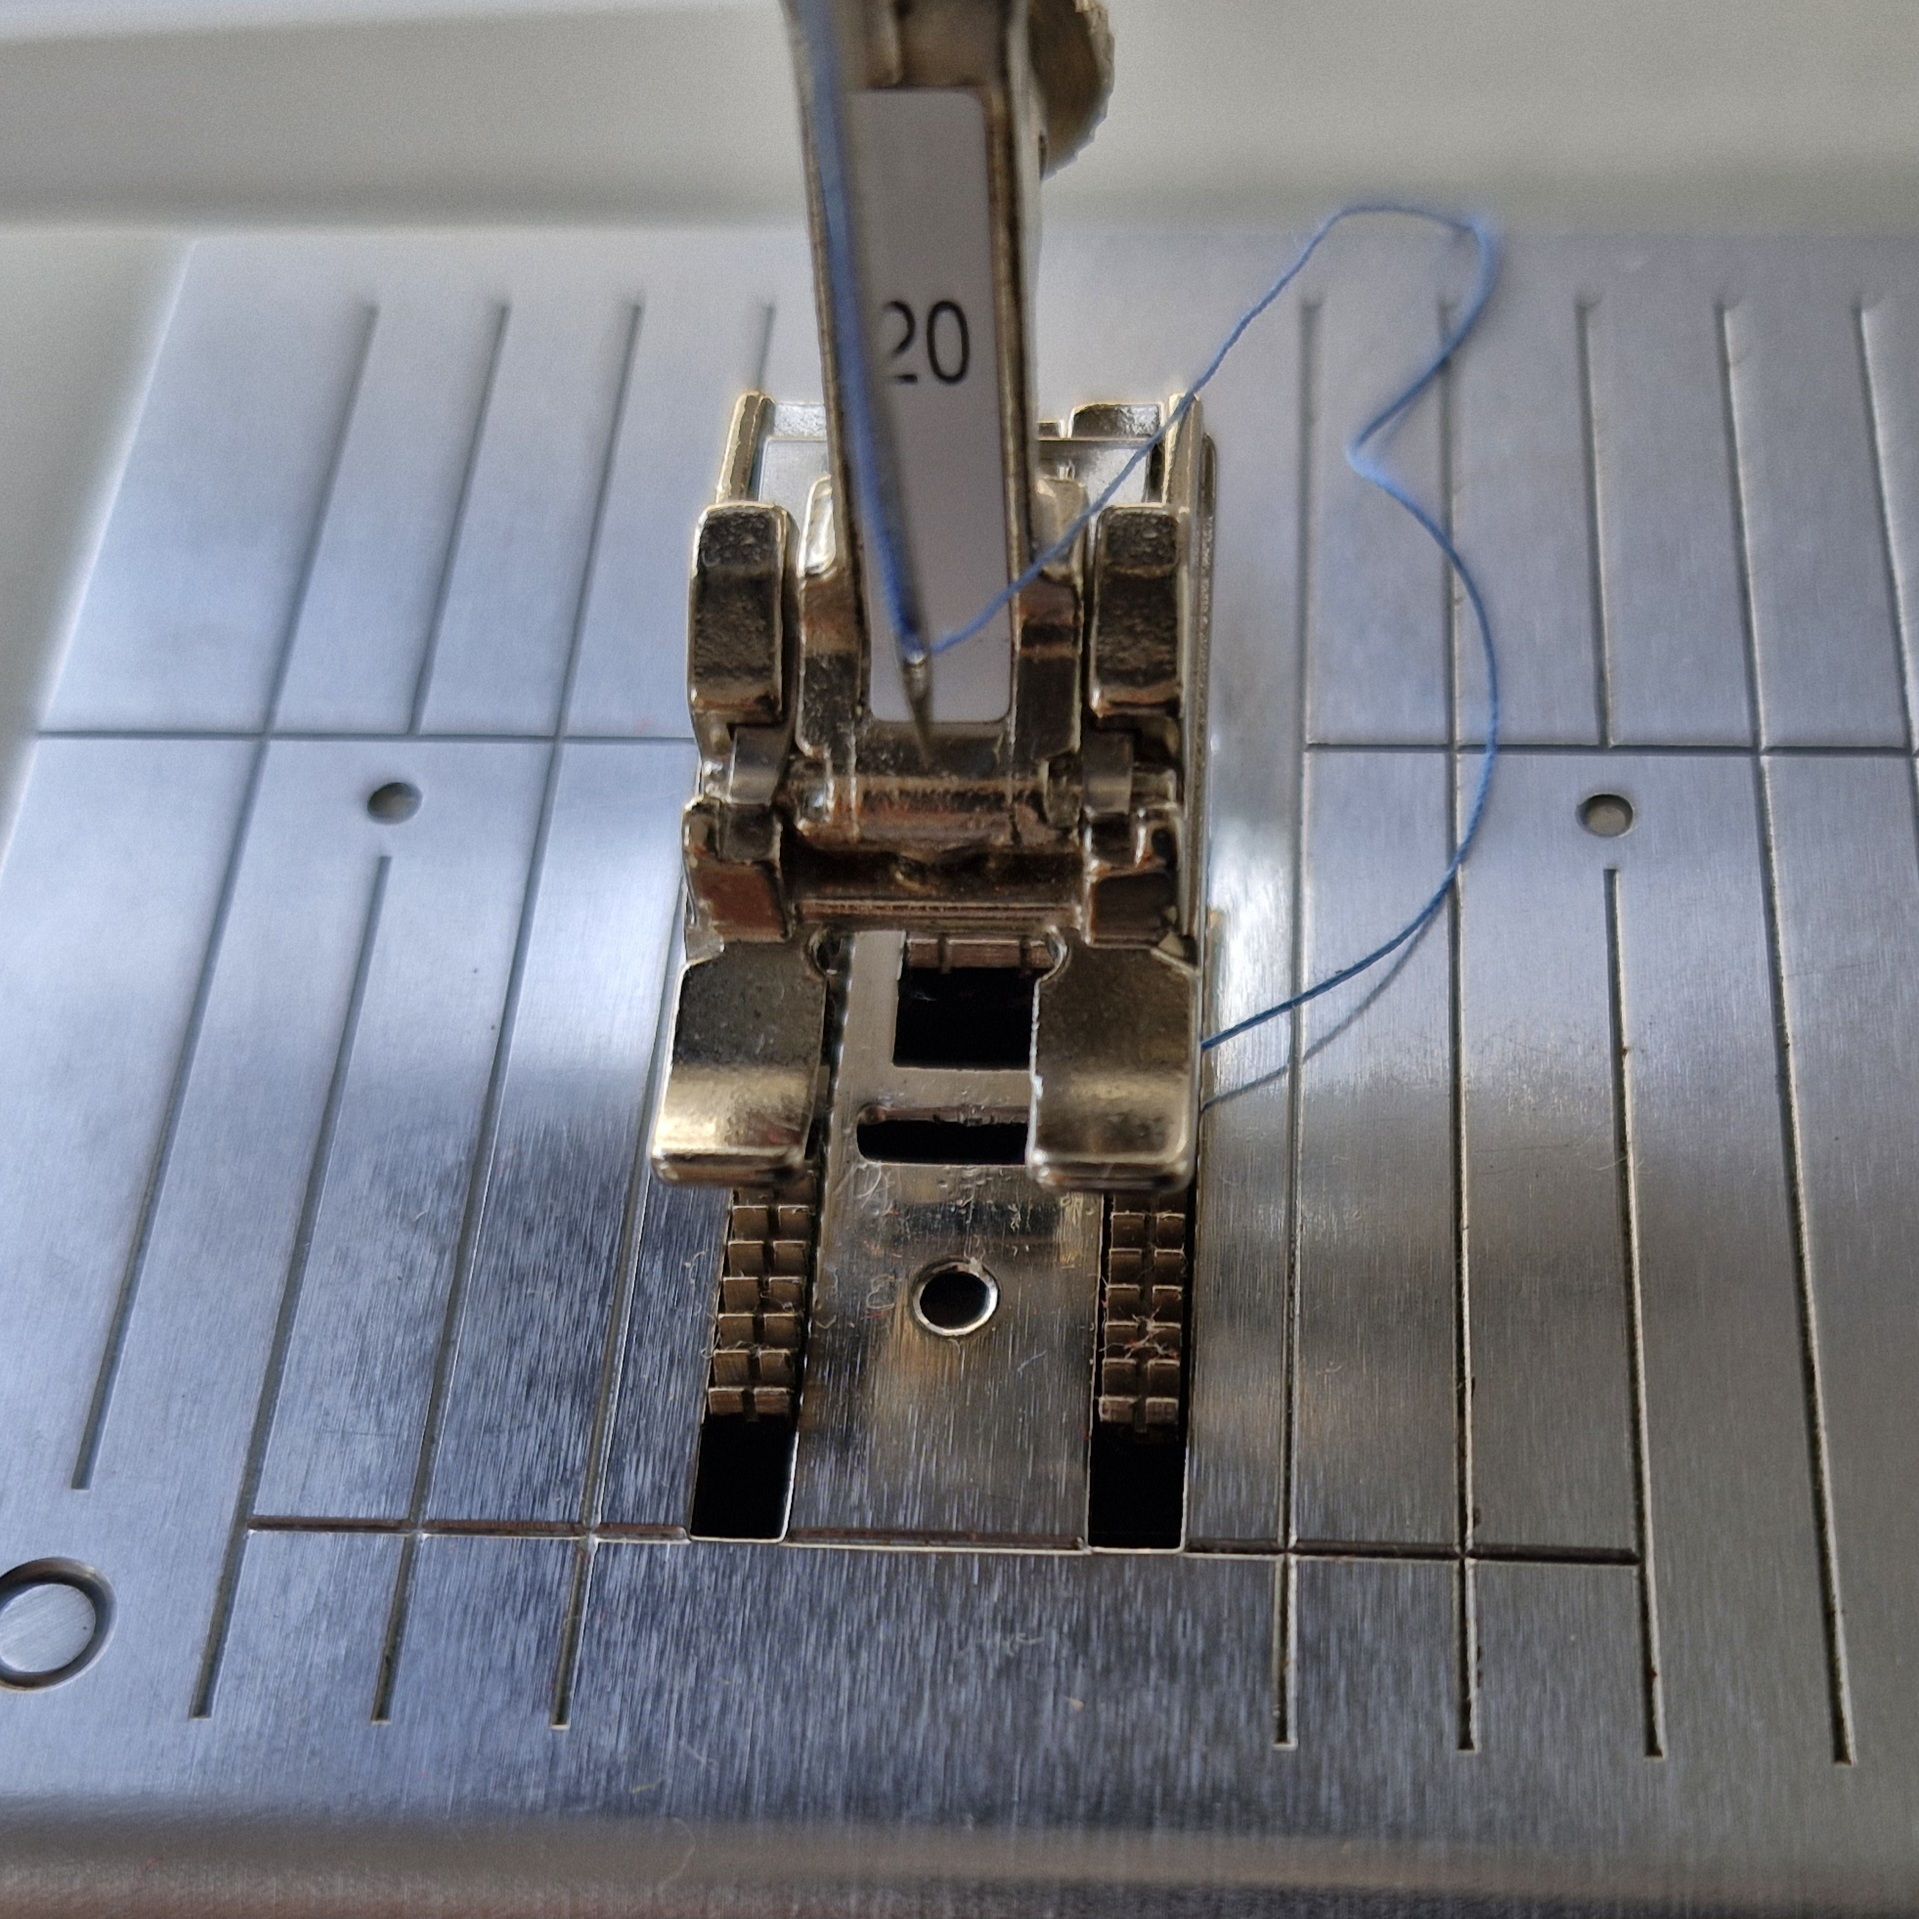
This pattern involves careful, accurate zig-zag quilting to appliqué the various pieces of fabric to form the birds in this vibrant cushions. The open embroidery foot would allow you to see exactly what you were stitching.
You can get this pattern here
Zip foot
This foot is also only used for straight stitching and it is also one with a risk of broken needles if you don’t use it well. You can see that the foot has a notch cut out on each side and that in the photo the machine needle is above the notch on the right-hand side. If I am attaching the side of a small pouch to one side of a zip, I can get really close to the zip with the needle in this position and the foot well out of the way of the zip. When I have stitched one side of the zip I can move the needle position to the left-hand side and stitch the other side of the zip in place.
Most machines will have a mechanism for altering the needle position. On my Bernina, it’s found at the centre of the dial shown below, set at the ‘needle left’ position. (The danger of a broken needle comes when you set the needle back to the normal position but forget to take off the zip foot…)


This pattern for a small pouch with a zip includes a basic tutorial for inserting the zip. the zip foot allows you to make a neat job of sewing in the zip.
Find this pattern here
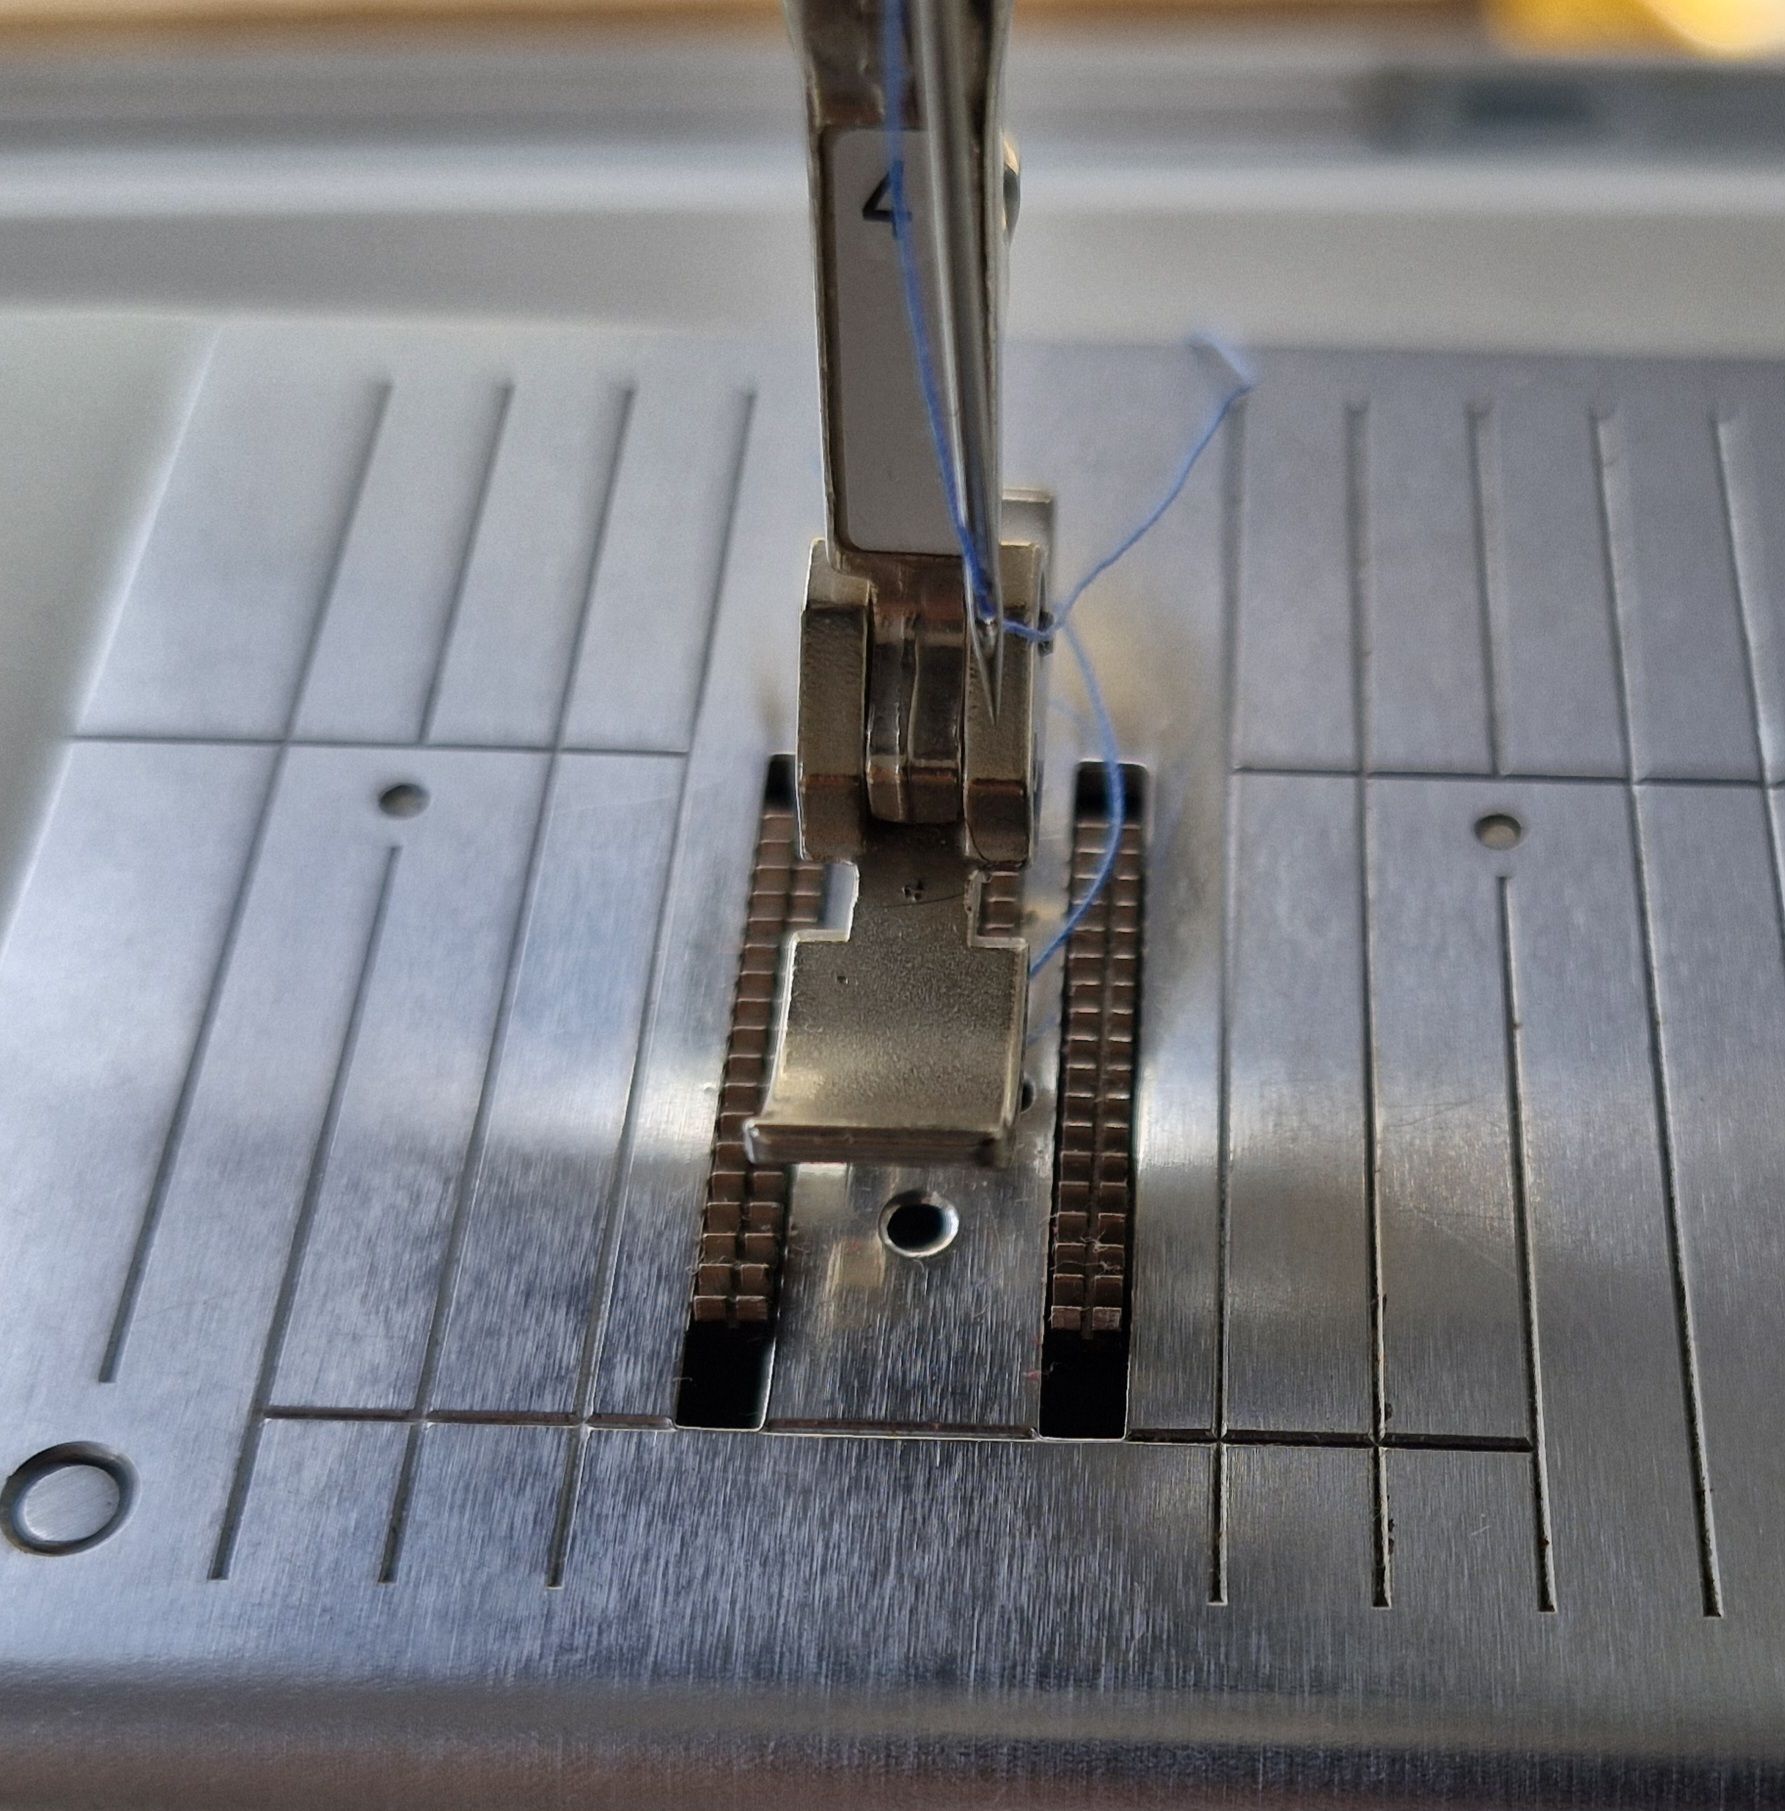
Darning foot/Embroidery foot
This is foot number 9 which will indeed work to darn a hole in a piece of fabric but which I use most often for free machine embroidery or free machine quilting. To use it, I put in the regular stitch plate and I drop the feed dog (those small corrugated tracks which push the fabric through under the needle). This foot allows the foot to slide to and fro, forwards and backwards across the surface of the fabric. You can see in the photo that the feed dog is lying below the surface of the stitch plate.

This pattern for a fabric pouch with a zip, includes a tutorial for how to do free-machine quilting on the side of the bag. The darning foot/embroidery foot makes this kind of embroidery and quilting easy.
Walking foot
This is a large foot which is useful for quilting. The food is inserted in the usual way but it also has an arm which is fixed over the needle clip (above and to the right of the needle – as seen in the photo below). The feed dog pushes the fabrics through the machine from underneath. When you are quilting with three layers in the machine (including wadding) the layers can slip against each other and you find you have tucks on the back of your work. The walking foot helps to push the top layer of the fabric through at the same time as the bottom two layers and you are more likely to get even stitches.


This quilt would lie on top of a double bed and hang down each side of a single bed. A walking foot to stitch in the quilting lines will make the process of quilting it much easier.
You can get the pattern here
Thank you for reading my blog. Quilt Patterns are here, Fabrics are here, Classes are here
There’s a great monthly newsletter full of design and colour inspiration, plus textile news of all kinds – click here if you would like to get it.
Click the ‘Follow’ button to get a blog-post by email each Monday
