
Recently, individuals have been coming to the studio to learn how to make a quilt for the first time. (This is my one-to-one ‘Quilt in a Day’ class for beginners- find out more about it here.) An important part of the day involves learning to cut fabric with a rotary cutter and a quilters’ ruler.
I keep a large selection of rulers in the studio, so each person can try out a good number of different rulers, This way, they can make an informed choice about buying their own. A quilters’ ruler is relatively expensive and you are hopefully going to use it for a long time, so it’s worth getting something that is going to suit you.

It is helpful if you can try a ruler before you buy, but that is not always possible. What suits you, may not be so good for someone else. All the rulers featured here are in inches, though many of the points will still apply if you work in metric.
One important consideration is whether you are right-handed or left-handed. The learner pictured below is left-handed and found the 3½ x 18½” ruler by Creative Grids pictured particularly clear and easy to use.

These are many kinds of rulers available but one thing to look out for is whether the ruler adds half an inch or not. Some rulers, like this one from Quiltlines depict whole inches. This is a 6 x 6″ ruler…

…whereas this ruler from TrueCut is 6½ x 6½”. You can see the extra ½” on left of the ruler and at the bottom of the ruler in the photograph.

If you are cutting rectangles for quilting and patchwork, you need to add ¼” (6mm) to each side when cutting out. So to achieve a square measuring 5″ on each side in your finished quilt, you need to cut a square 5½ x 5½”. The big question is whether you want to have that ½” added by the ruler, or whether you want to look along the ruler edge and find the five and a half inch measurement yourself. The ‘plus-half’ can sometimes cause confusion for beginners.
This ruler, by Creative Grids, has black numbers for the ‘plus-half’ measurements on two sides and white for the whole numbers on two sides, which is helpful – though of course you still need to be alert as to which corner you are measuring from!

Any ruler you buy must have clear markings for ¼” and ⅛” increments. On the Quiltlines ruler at the top, the ¼” lines are a continuous red line and the ⅛” a red ‘notch’ on the inch lines. On the Creative Grids ruler above, you can see the black inch and ⅛” lines and can just see the dashed lines in white for the ¼” line.
Look out for the position of the numbers along the edges. Are they easy to read? Can you see clearly where the ‘plus-half’ is (if the ruler has added ½”)? On this ruler, by EZ quilting, the bold numbers with arrow) mark the inches and the ‘plus-half’ can be seen to the right and at the base of the ruler.

On this ruler, the ⅛” marks only appear on the edges. However, some useful ⅛” measurements are marked at the centre: 1⅞”, for example. For those readers new to quilting, you will use these measurements when cutting triangles for your quilt. To make a square (measuring 4 x 4″), made up of two different coloured triangles, joined across the diagonal (as seen below), you will initially, cut a square 4⅞ x 4⅞”.

The next thing to consider is the colour of the print on the ruler. You need to choose something that will show up against the majority of fabric colours. This Omnigrid ruler, printed in yellow is very clear on most fabrics, even on yellow fabric – because of the black printed inch-lines.

This ruler is 6 x 24″ (no added ½”). This is a particularly useful length of ruler for cutting long strips of fabric, for example for quilt-borders. If you had to cut lots of 2½ x 2½” squares for a quilt, you might first cut a 2½” strip from your fabric with this long ruler and then sub-cut it into squares with a smaller ruler like this one from Le Summit:

Once you have been quilting for a while, you might want to consider a triangular ruler. This one by Sew Easy (specifically designed to cut ‘flying geese’ units – the patchwork shape depicted in red on the ruler) has a 90 degree angle at the top and 45 degree angle on either side at the base.

This is useful for help with creating blocks of a particular size, but it is worth noting that a number of rulers include diagonal lines at 45 degrees and 60 degrees, as seen on white lines marked on the 12½ x 4½” ruler by Creative Grids below.

It is worth looking out for ‘freebies’ given away with quilting magazines, like this small, rectangular ruler from Quilt Now magazine. They can be a handy addition to your collection.

Thank you for reading my blog. Quilt patterns are here, Fabrics are here, Classes are here.
Click the ‘Follow’ button to get a blog-post by email each Monday and click here if you would like the monthly newsletter with design and colour inspiration, etc.
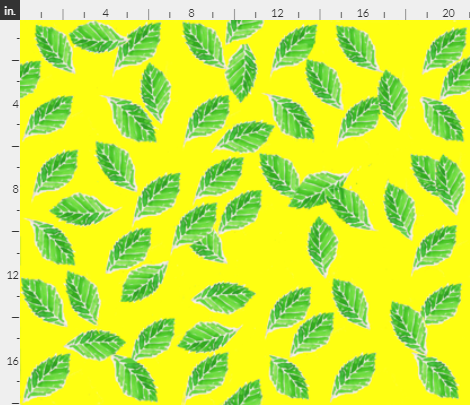
And if you’re looking for some pretty fabric to cut in to, how about ‘Summer Leaves’? Find it here

Hello Amanda Jane! I am looking for a ex rule jr. but I am in Alberta Canada! Trying to find one at a reasonable price but can’t locate it. Would you know of a supplier in Canada? Thanks in Advance for any info you can provide! Stay safe and sew on ! Deb at https://quiltchatter.blogspot.com/
LikeLike
Dear Deborah,
Thanks for your question.
I am not familiar with the specific ruler you mention. Also, I am based in the UK and so I am more familiar with British suppliers. However, Troll Brothers Quult Shop on Vancouver Island have an excellent range of quilting rulers and operate a mail order service. Hope this is helpful
Amanda
LikeLike