This week I’m showing you how to do a reverse appliqué technique. You could use this on sewing projects such as quilts, dressmaking and embroidery. Valentine’s day is not far away, so I’m taking a heart as the shape for my appliqué. You may or may not like the idea of cards and flowers on the day itself, but sending a heart to someone is a nice way of showing love and affection. This week I’ll show you the basic steps and next week, suggest some ideas for how to use the piece you have made.
You will need: A square of woven cotton fabric 4″ (10cm) in a solid colour A square of woven cotton fabric 4″ (10cm) in a coordinating small scale print Matching thread A piece of scrap paper, a pencil, a ruler, paper scissors and glue A sewing machine and basic sewing tools: pins, a needle and small sharp scissors
1 Iron your fabric.

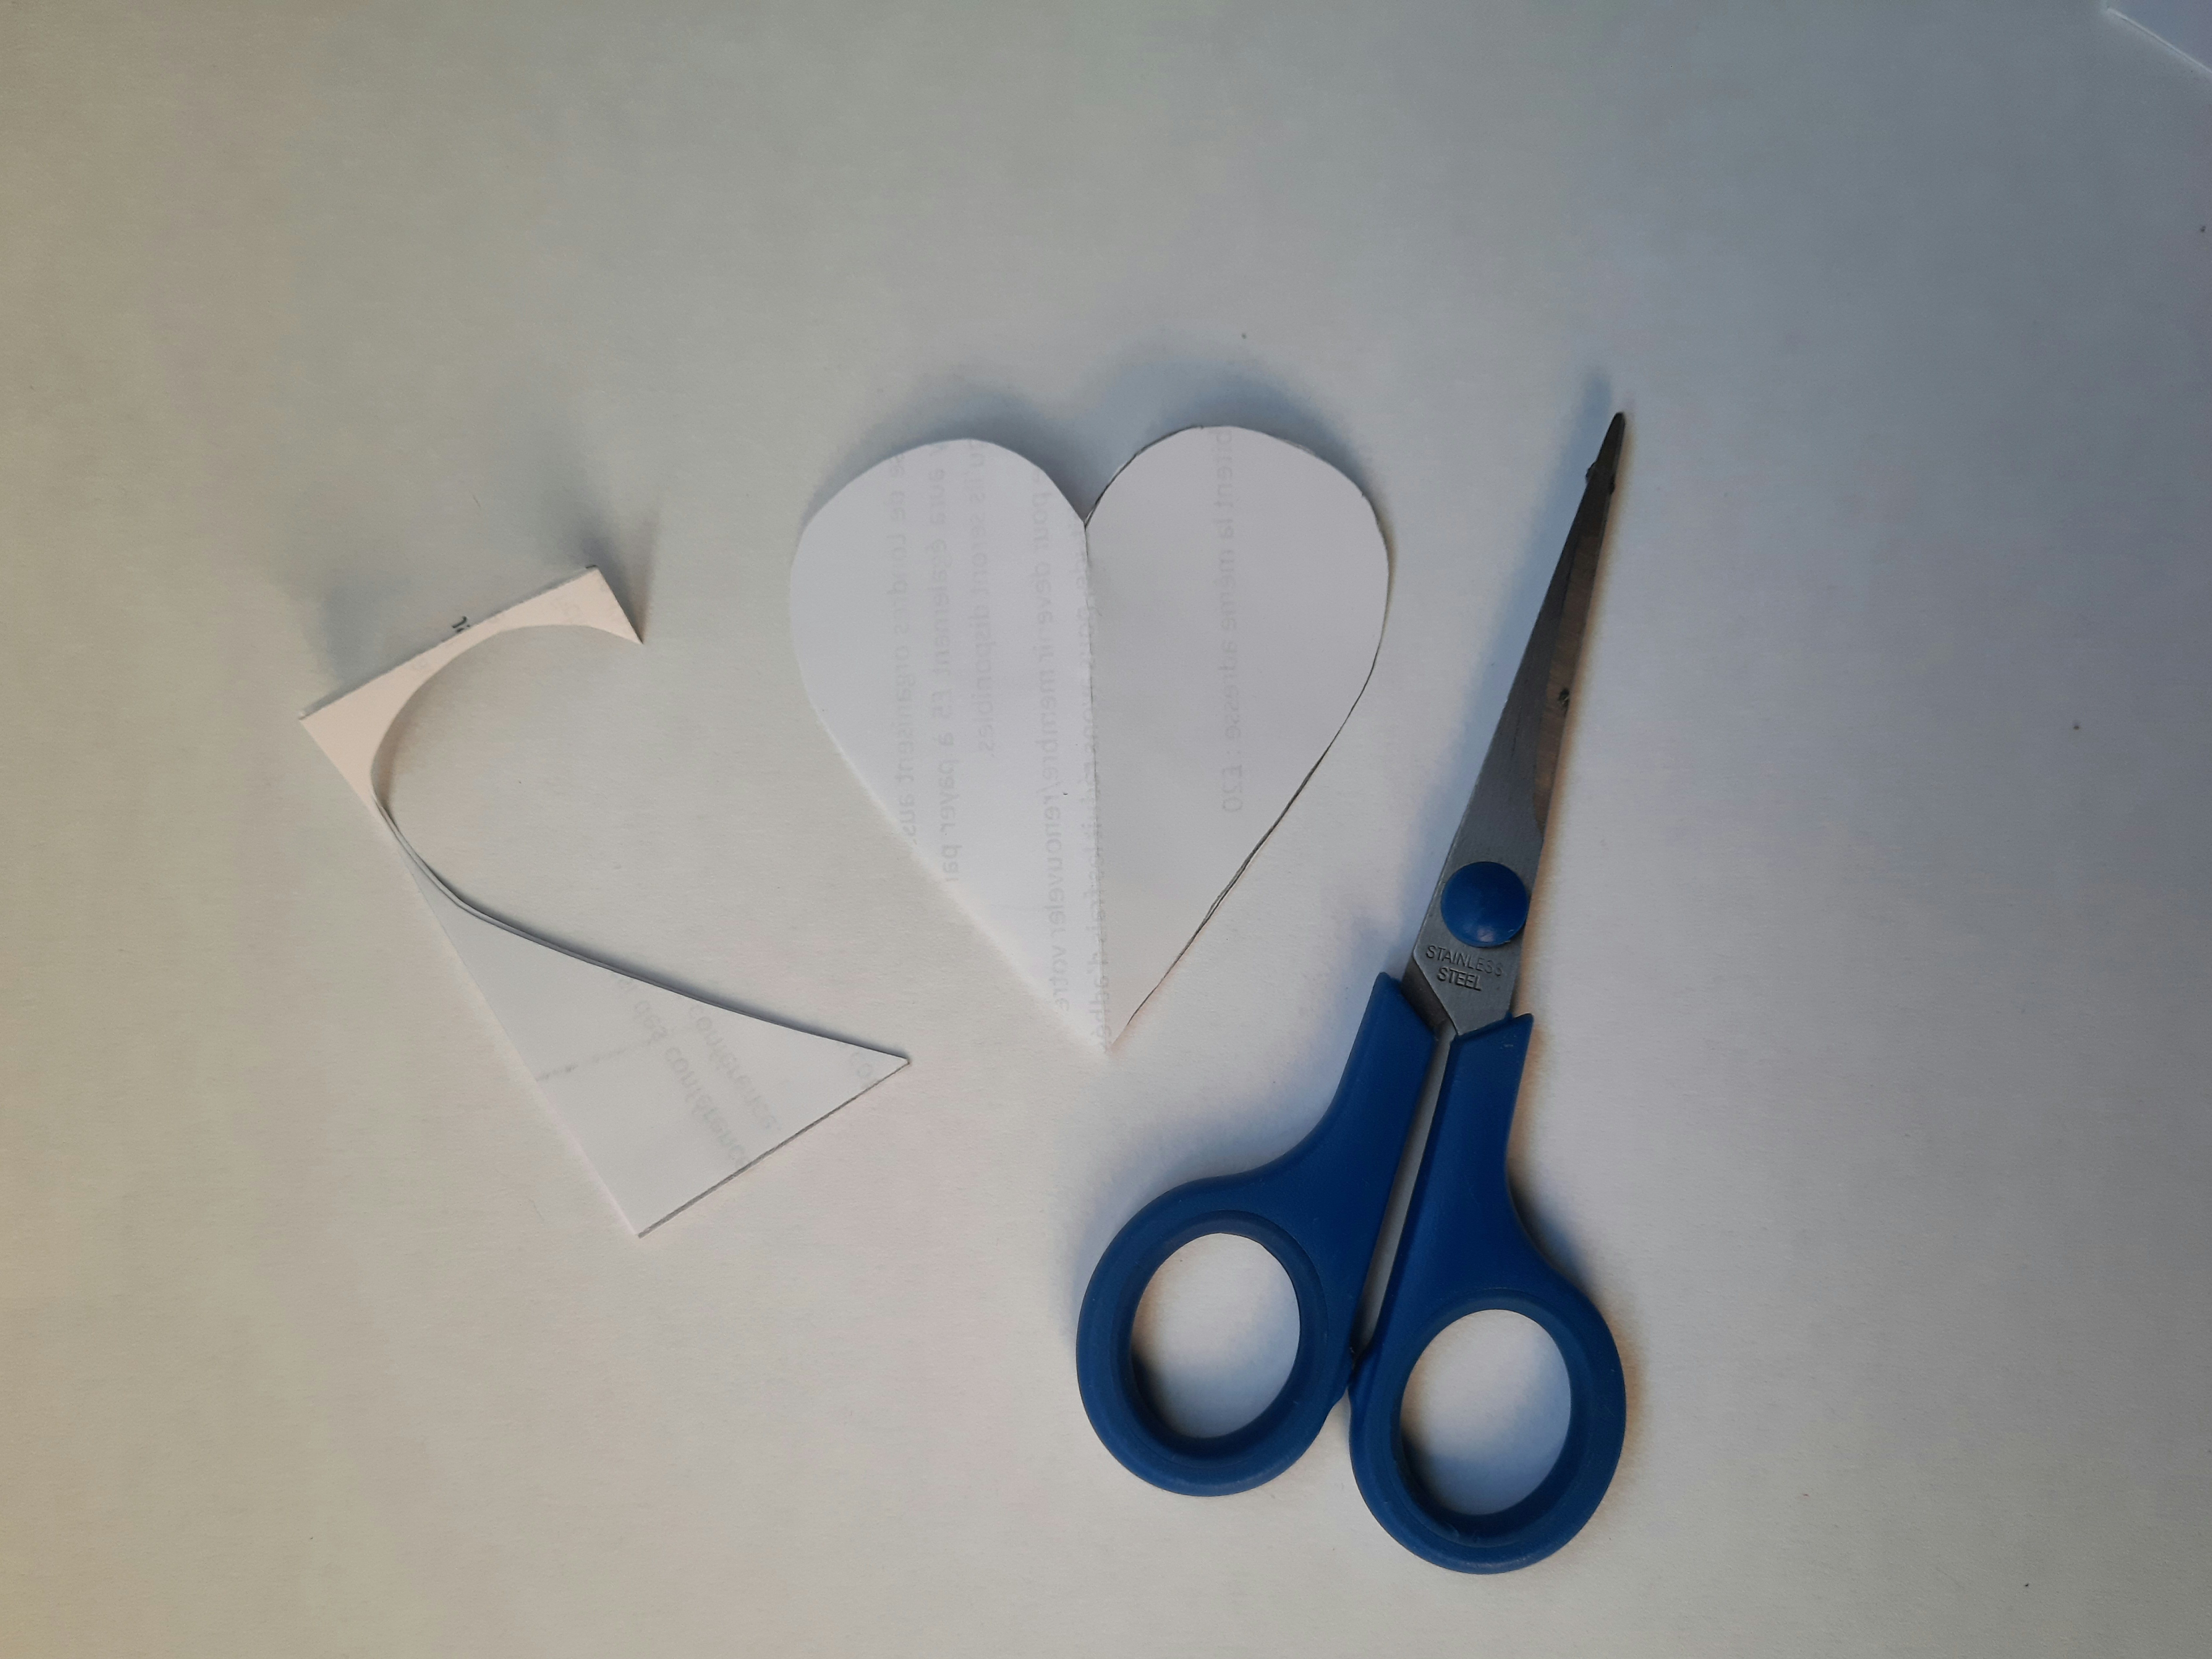
2 Using your ruler and pencil, mark out a square 3 x 3″ (76 x 76mm) on the scrap paper. Cut out the square and fold it in half. Draw a curved shape (like part of a figure 9) going out from the fold and back to it, as shown.

3 Without unfolding the paper, cut along the line to make your paper template. (If you want to adjust the shape of your heart, just repeat step 2 until you are happy with the shape.)
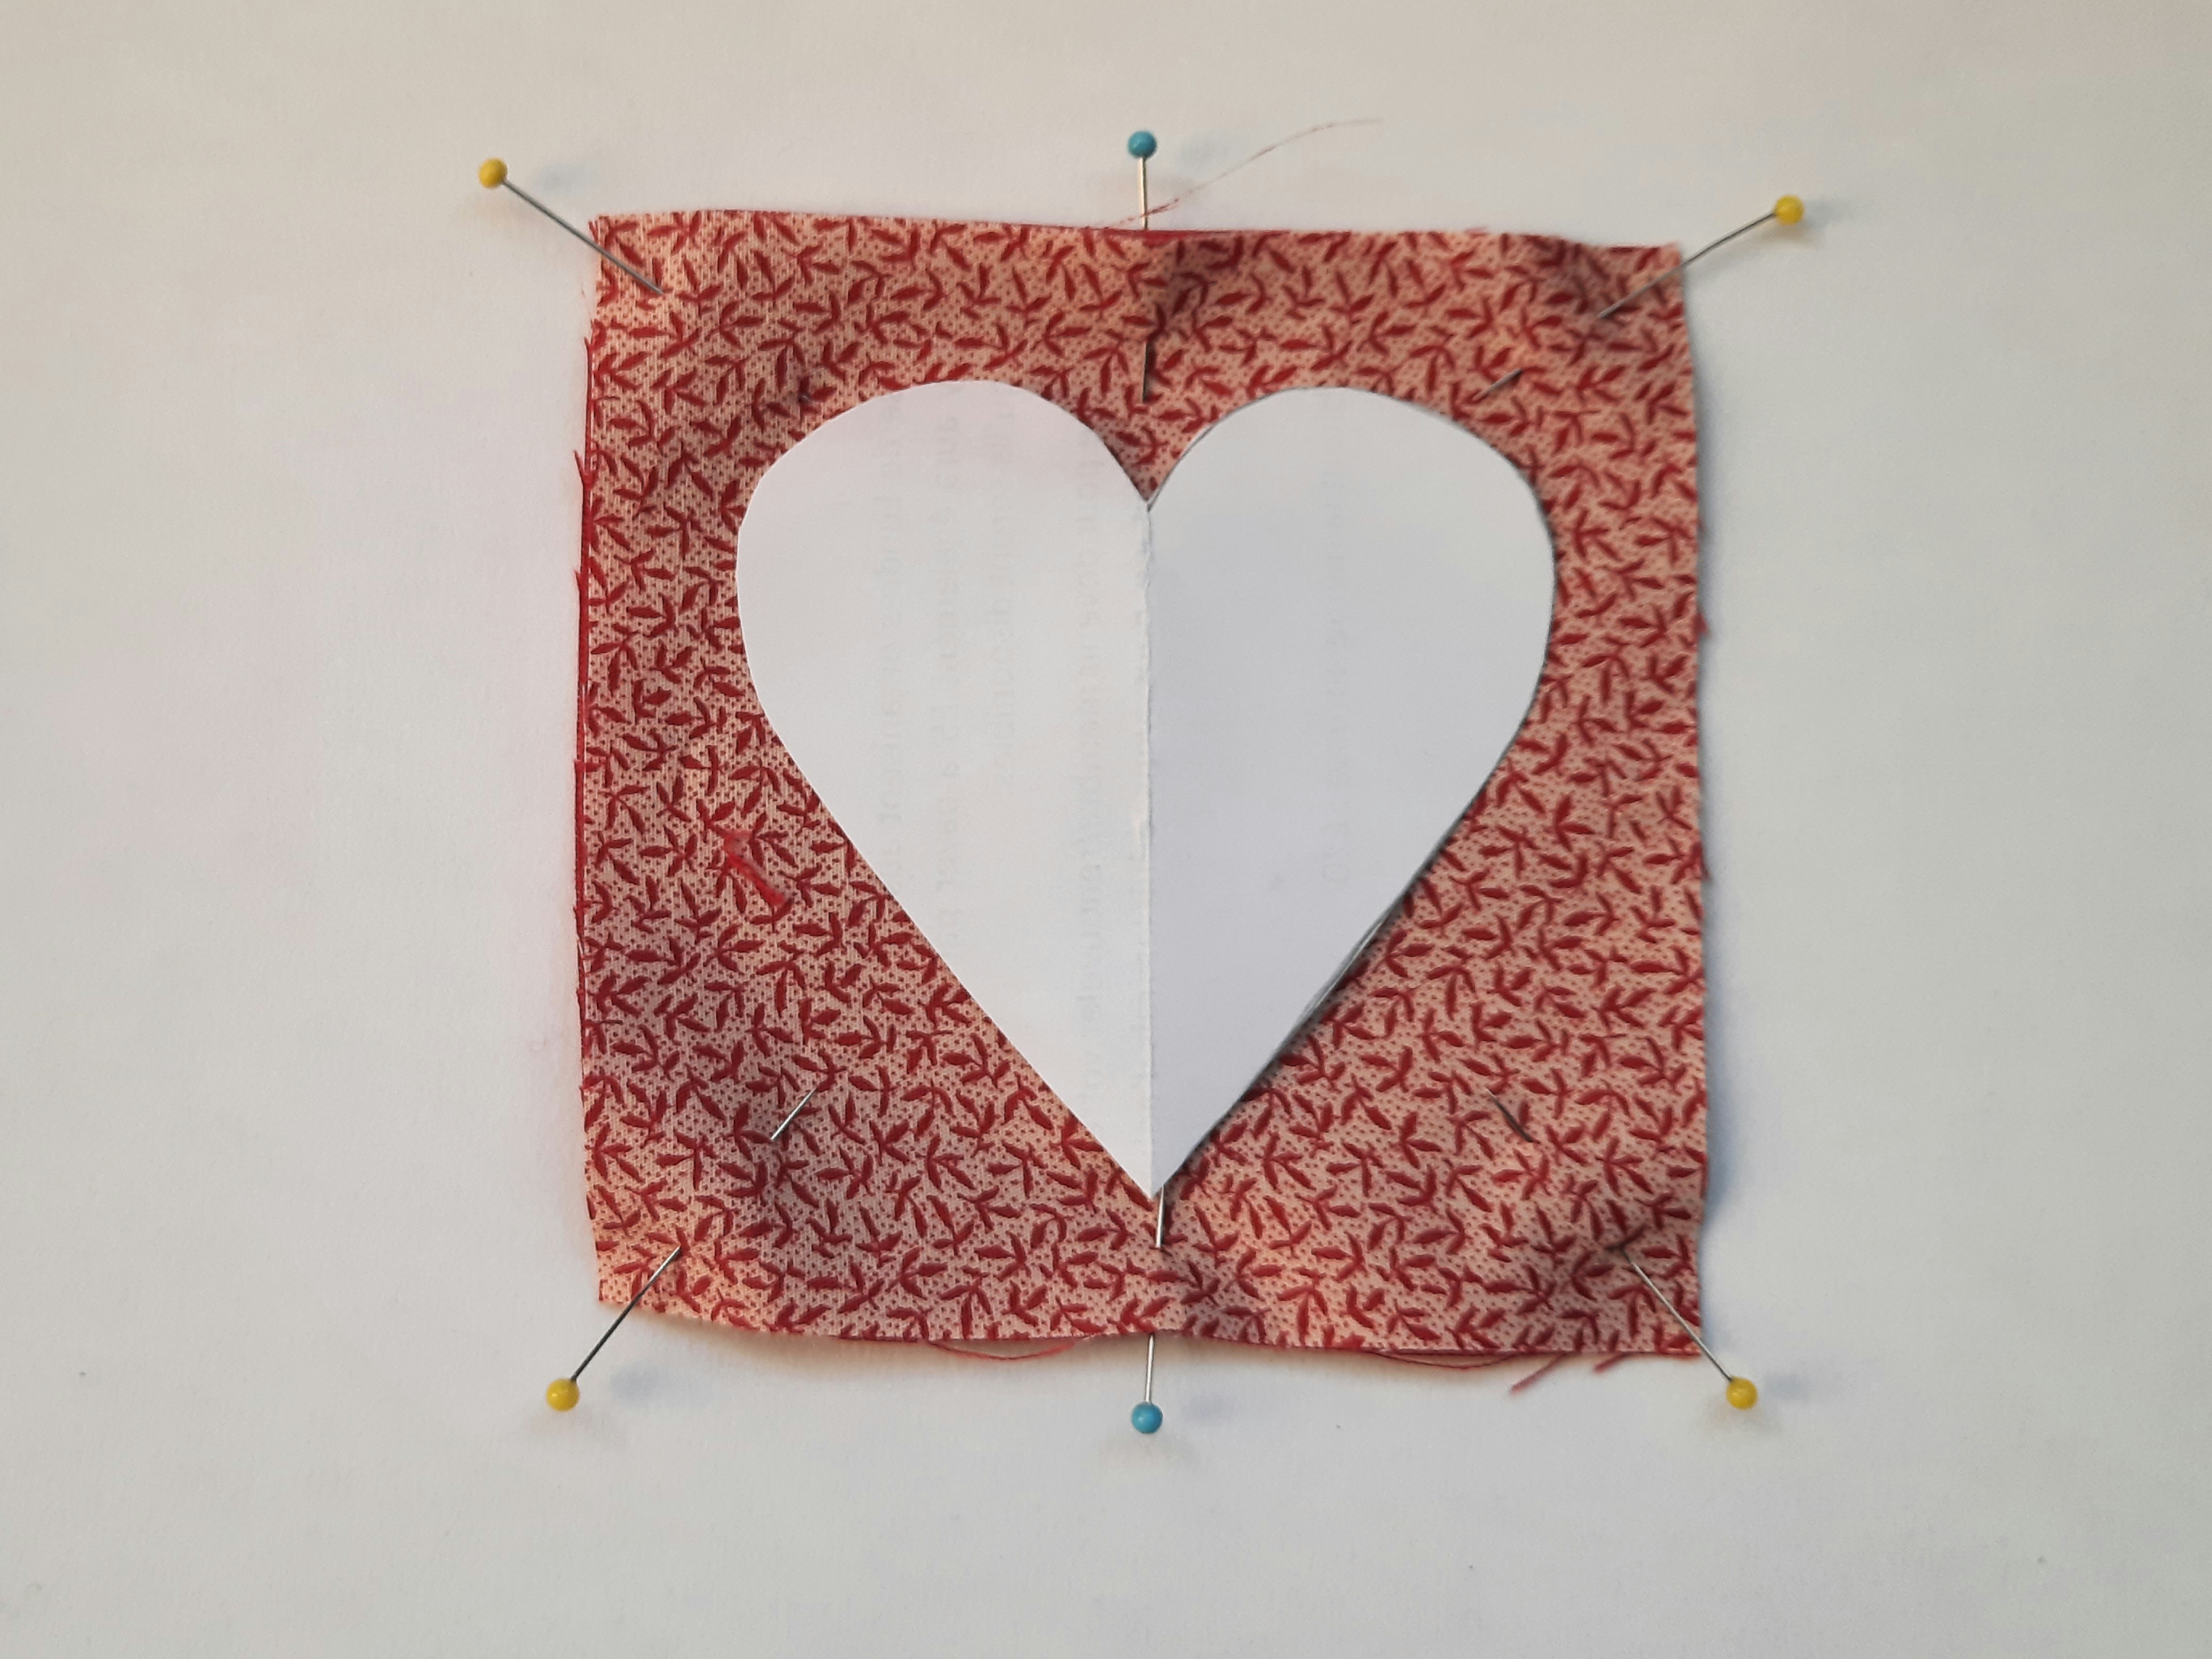
3 Place the printed square on top of the solid square and pin in each of the four corners to secure.

4 Mark the top edge at the centre, with a pin at right-angles to the edge. Do the same on the bottom edge.

5 Place the paper heart template on top of the printed square, aligned with the two marker pins you placed in step 4.
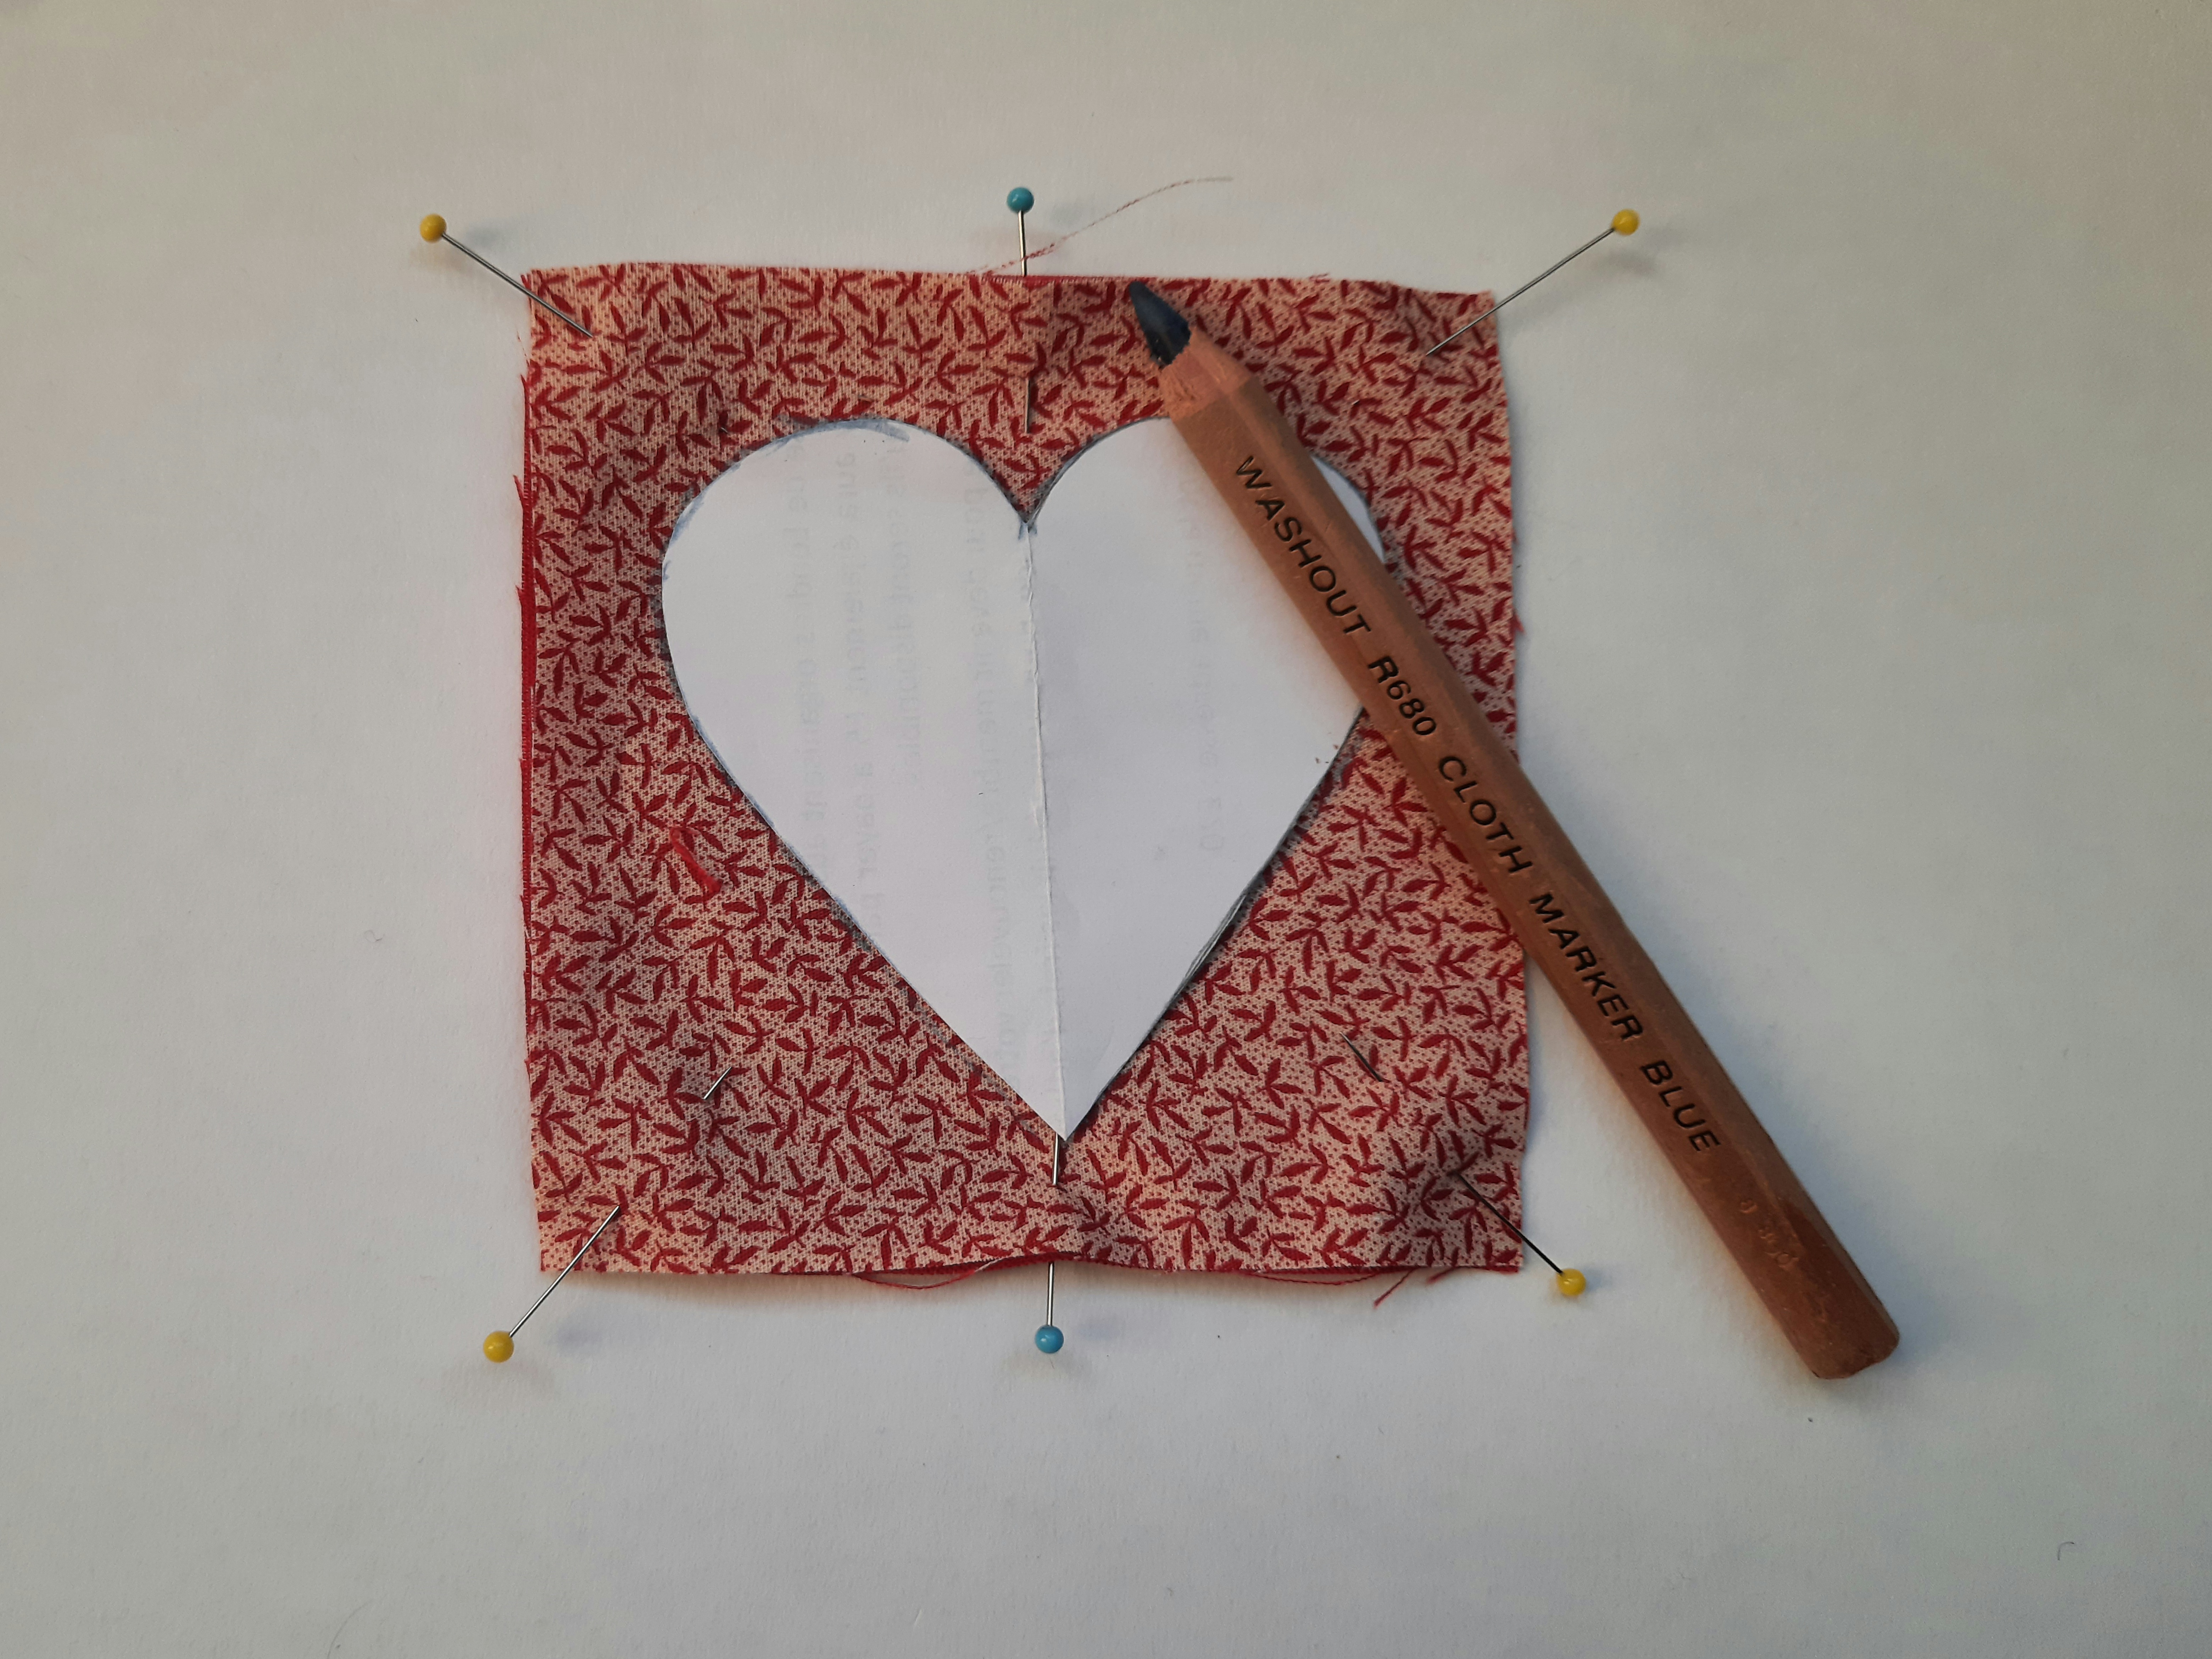
6 Draw round the heart template with a pencil, an erasable pen or tailor’s chalk.
7 Set the sewing machine to do a short straight stitch (for example, 2.5 stitch length). Stitch round the heart shape on the sewing machine. Start in the middle of one side and stitch towards the base. At the base, insert the needle in the fabric using the hand-wheel, lift the presser-foot and pivot the work on the needle, as shown.
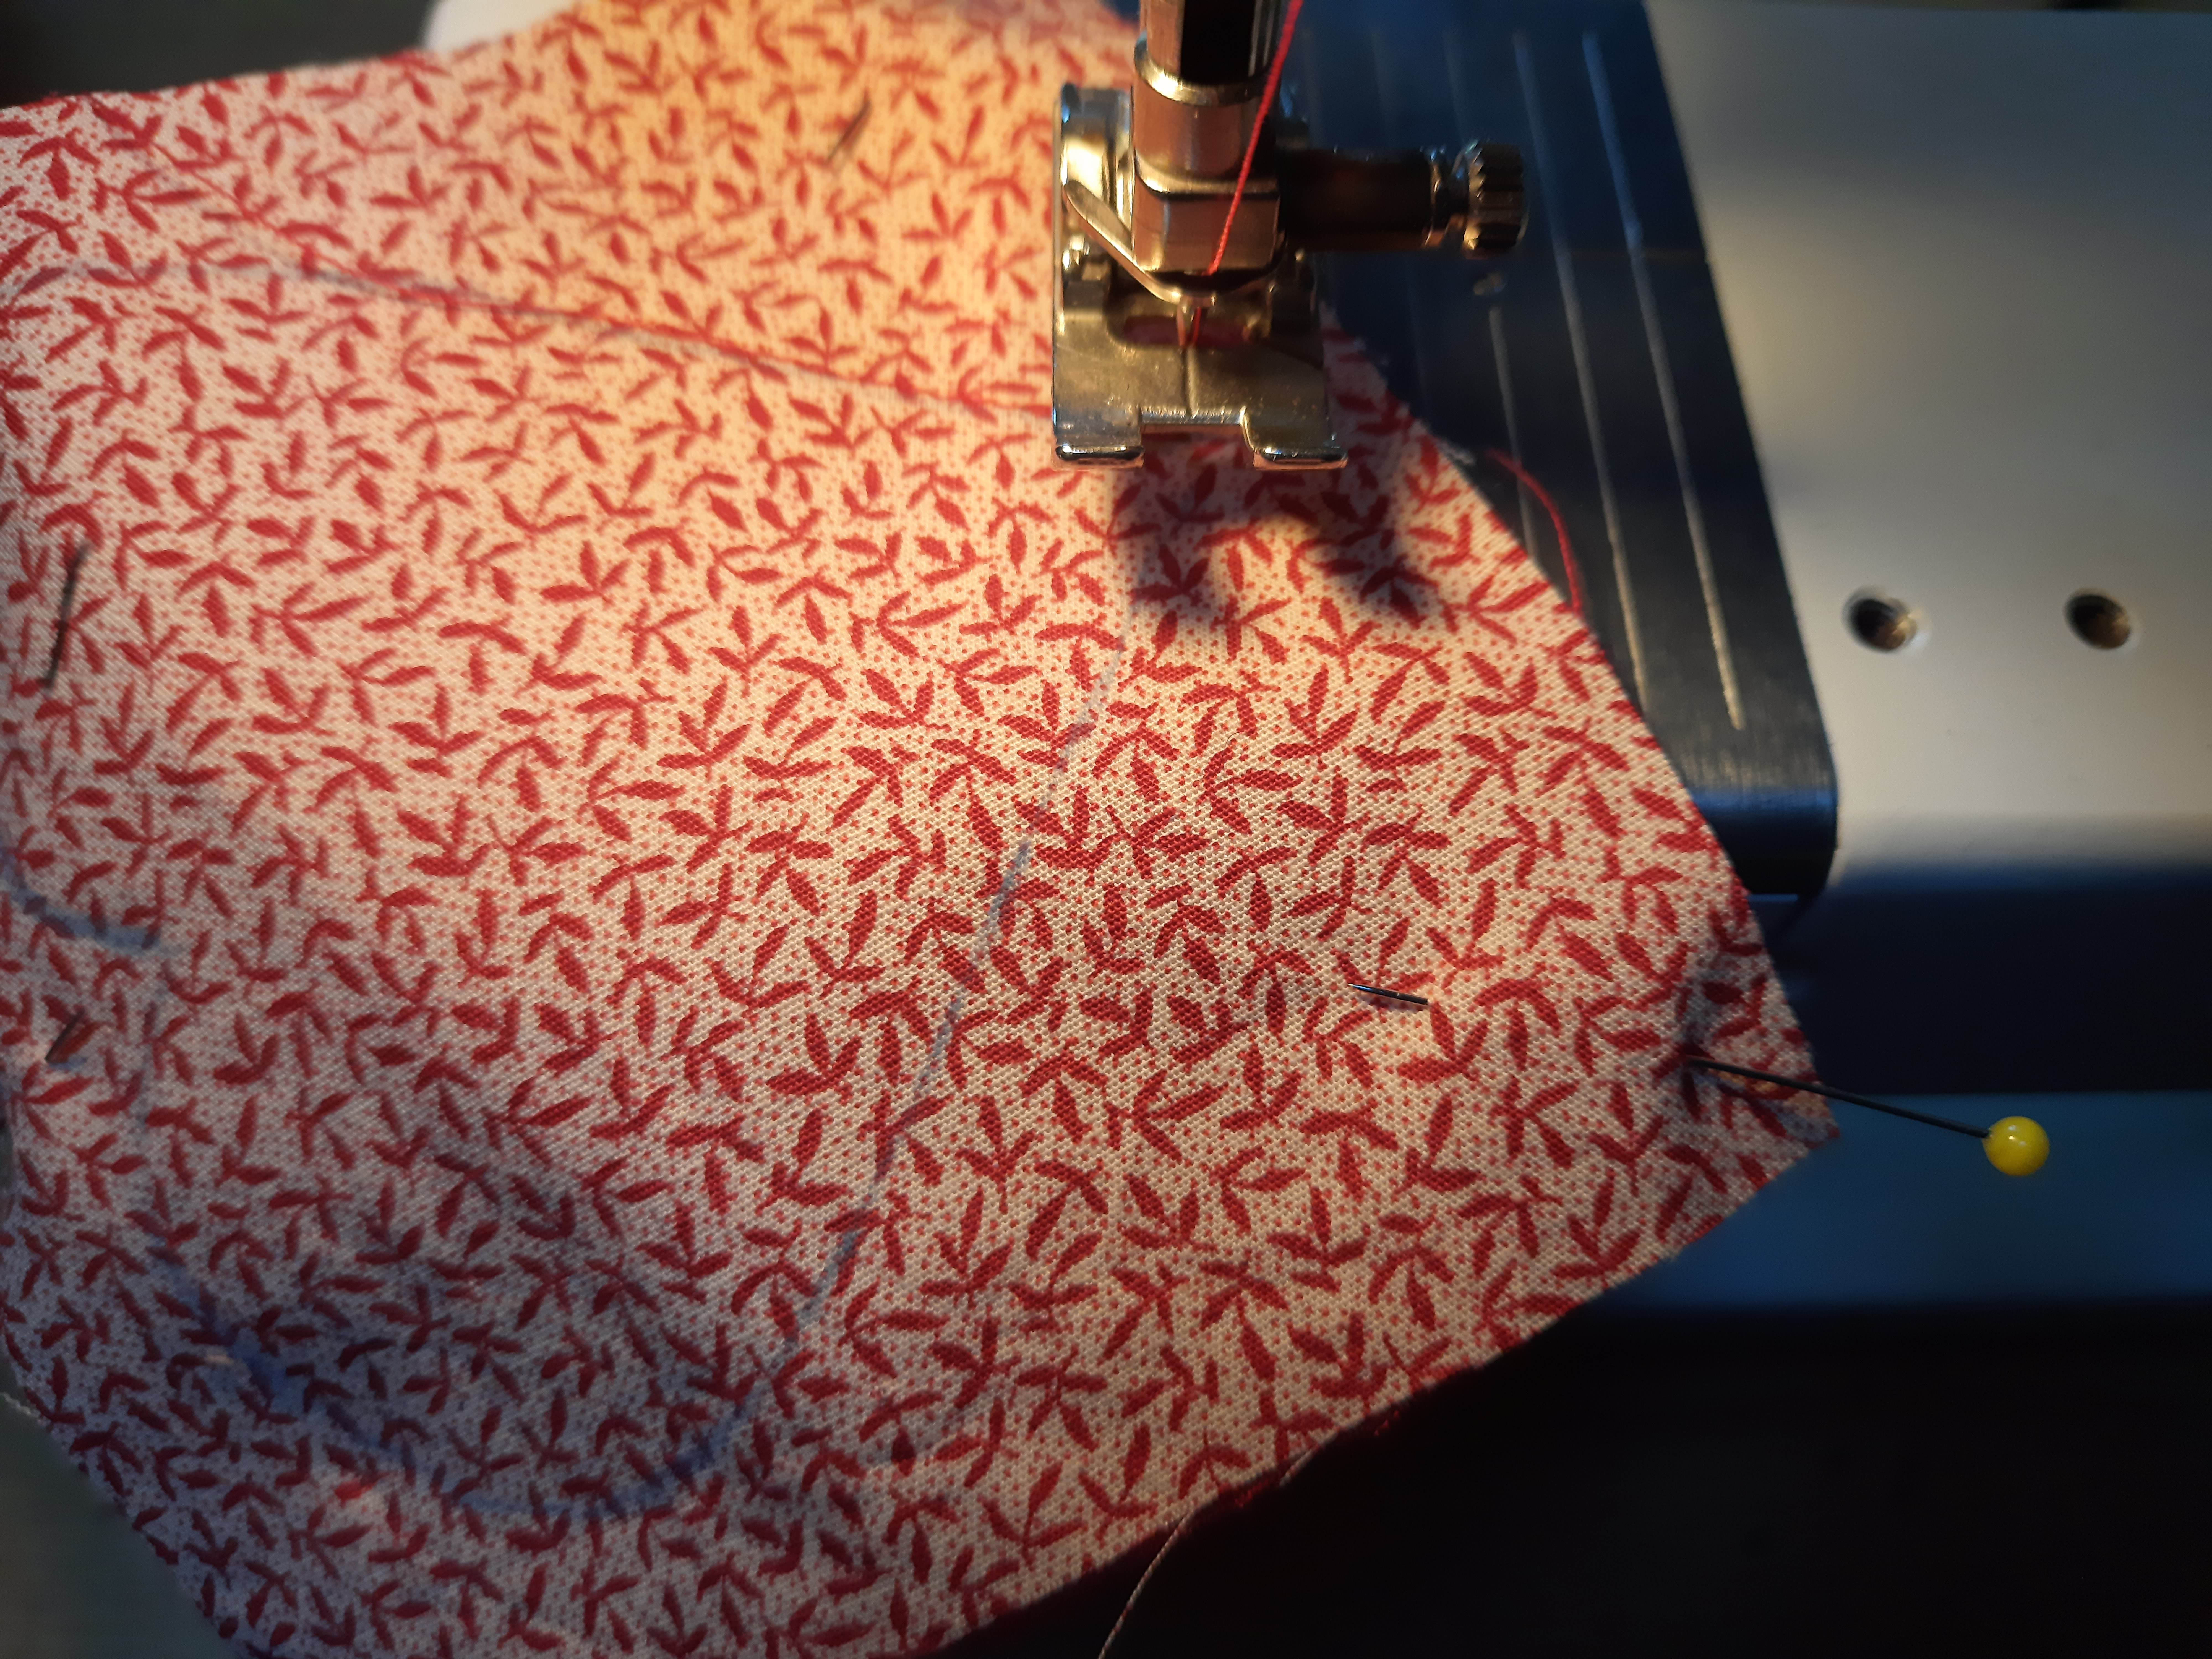
Lower the presser-foot again and sew on. Repeat this process at the dip in the centre of the heart at the top. Continue to stitch to where you started. Take the work out of the machine. Take the threads to the back and knot them securely.
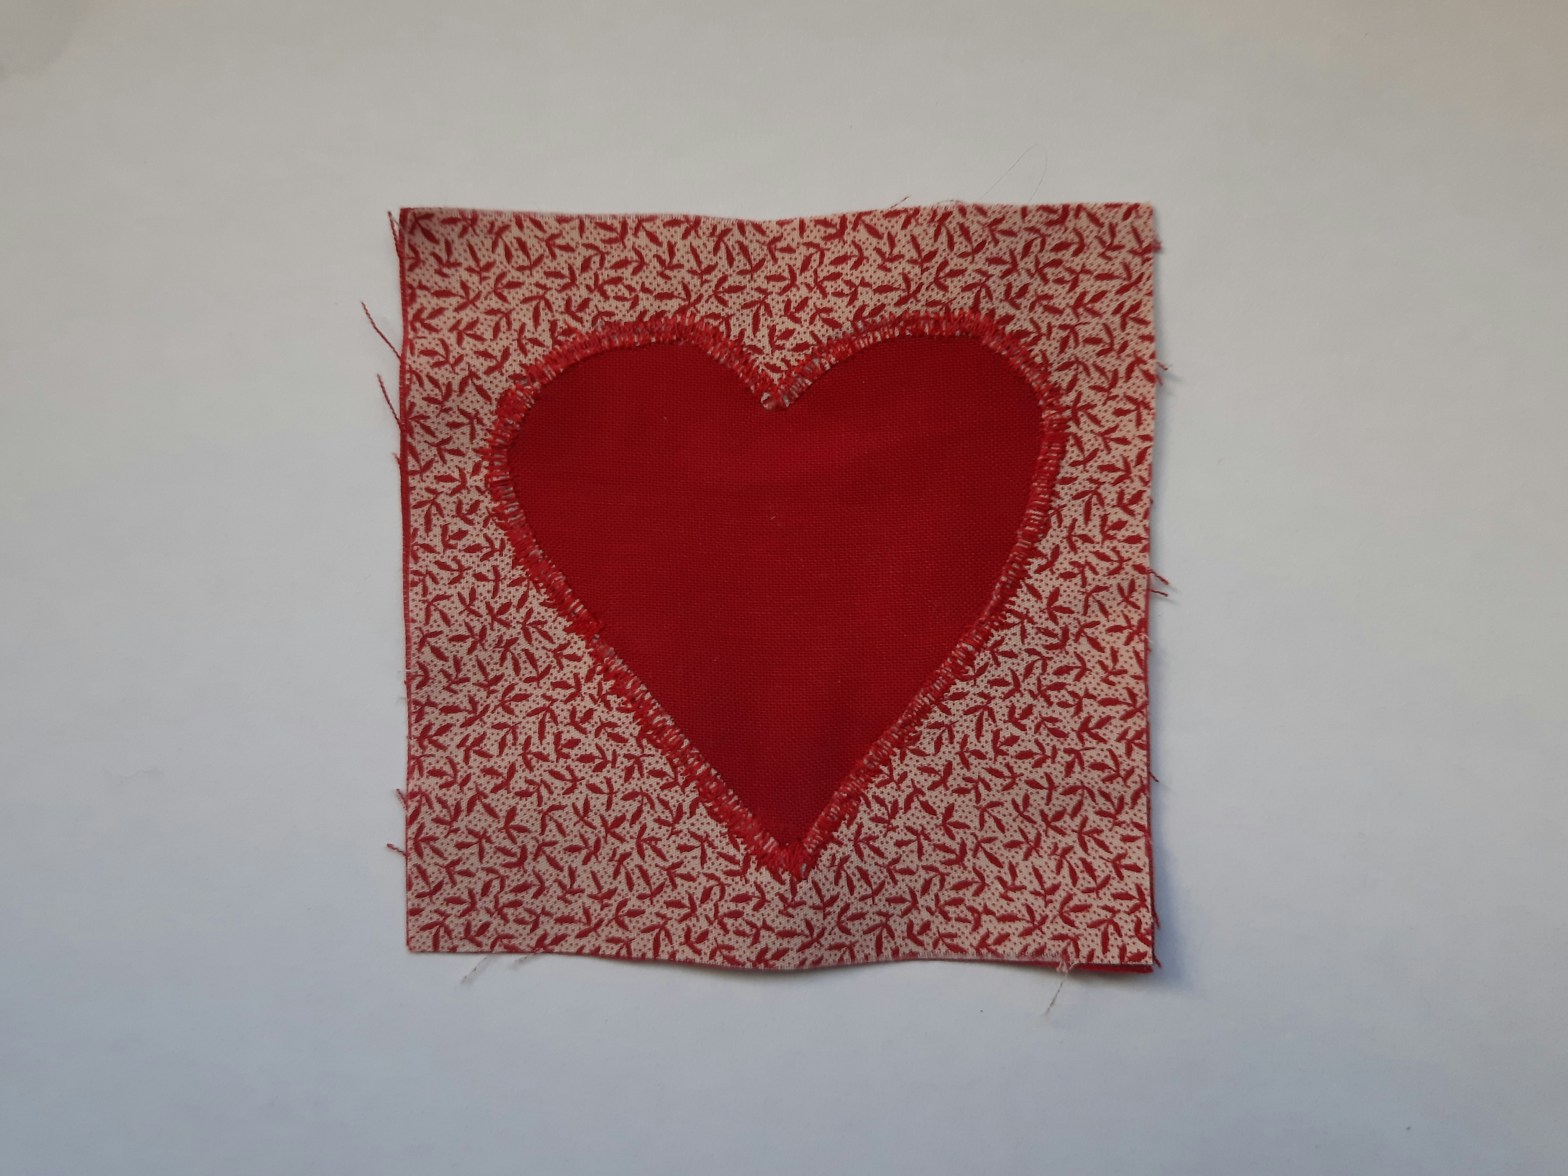
8 Gently pull the two fabrics away from each other and make a cut in the surface of the printed heart with small sharp scissors.
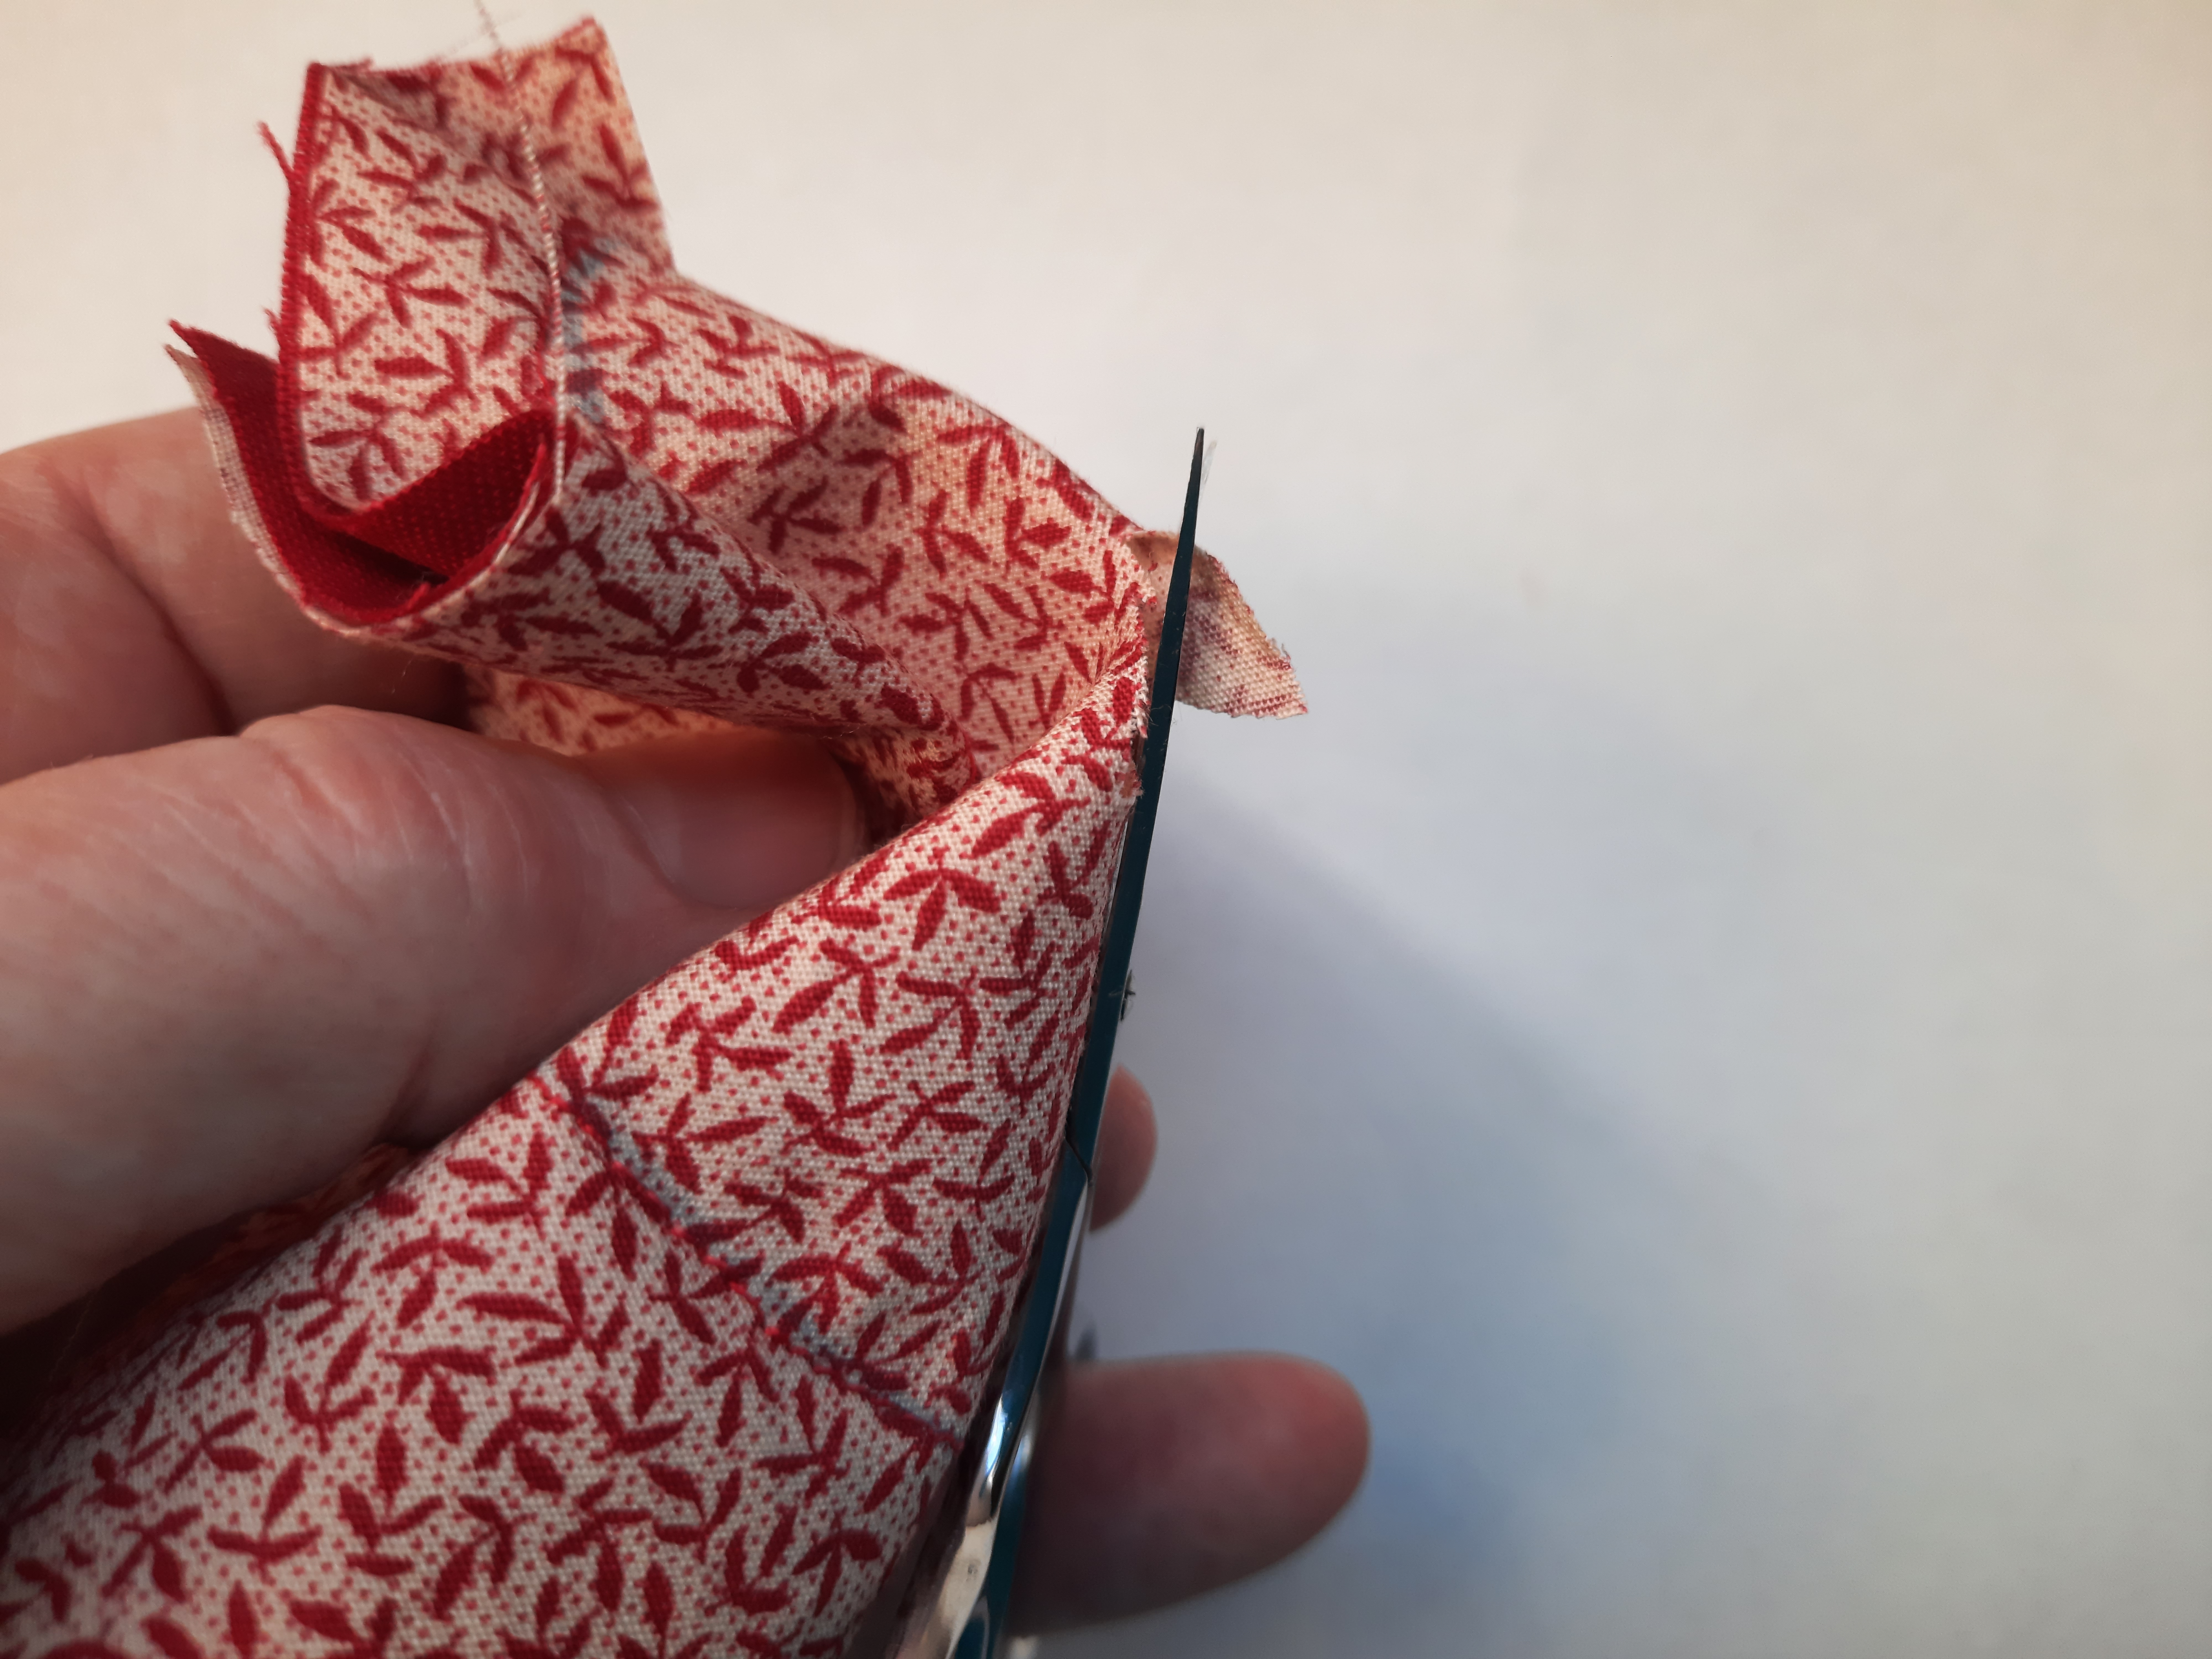
9 Now cut from the hole, out towards the stitching. Cut round the heart shape ⅛” (3mm) away from the stitching, inside the shape.
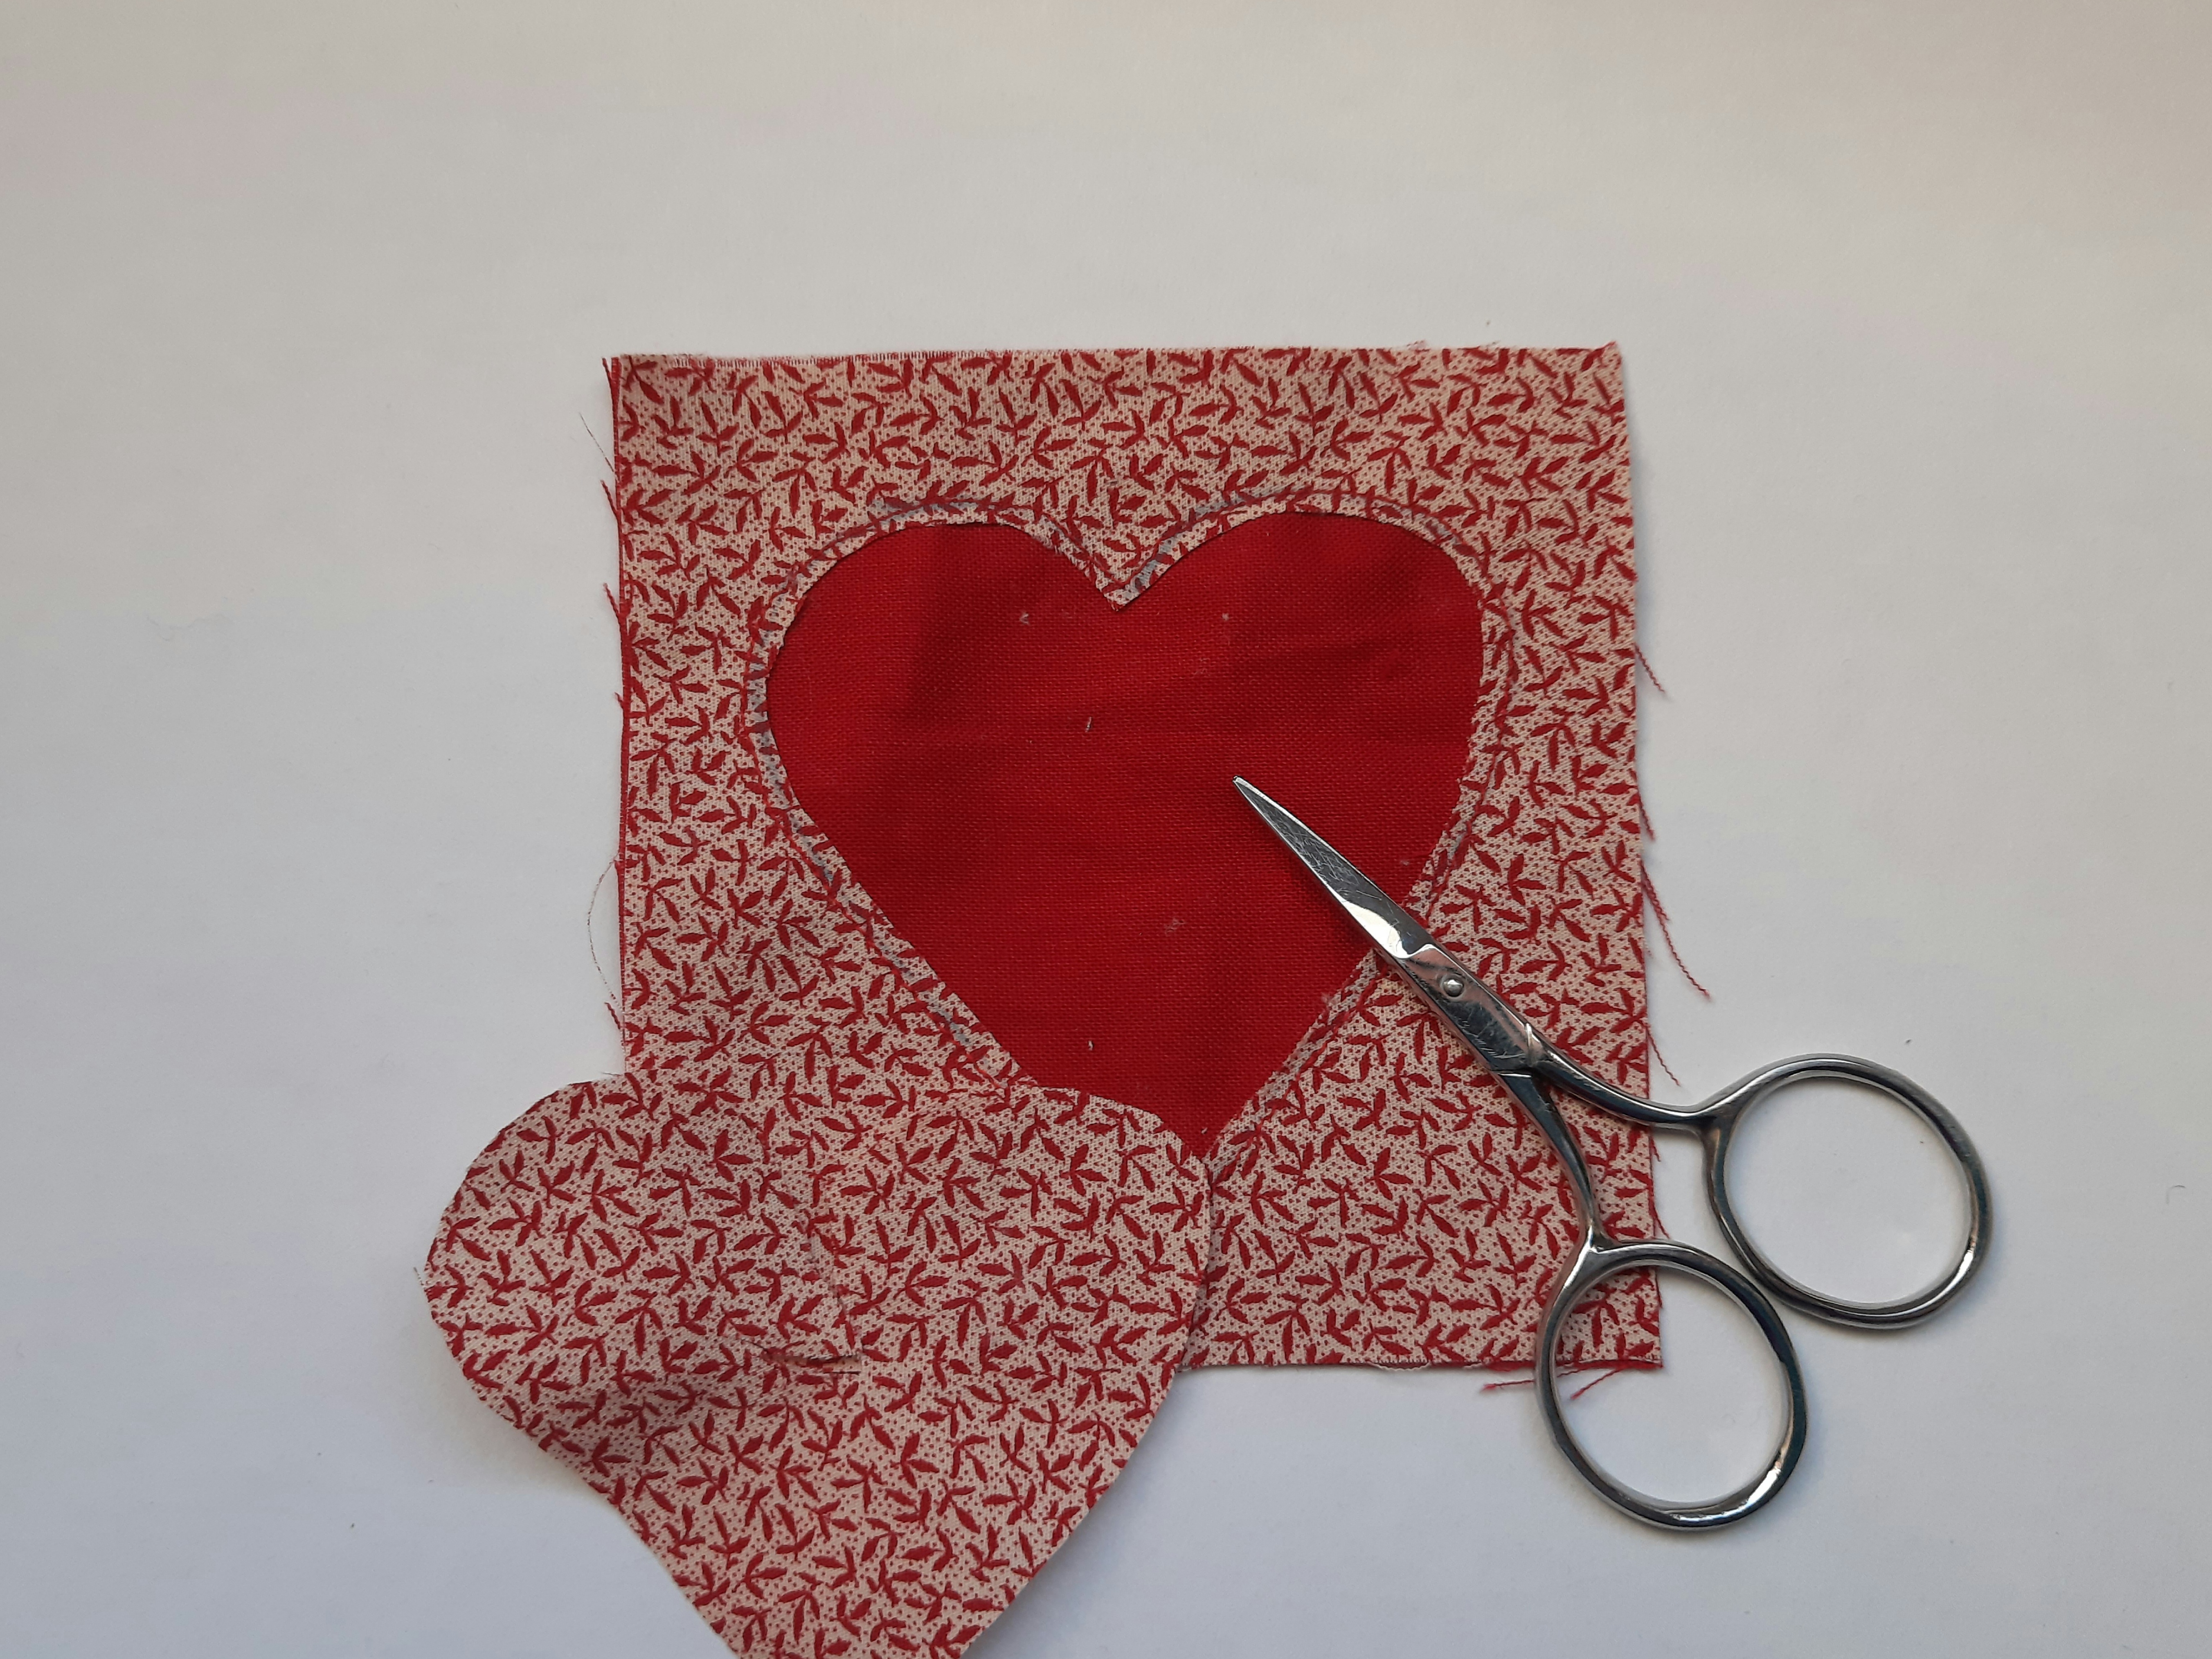
10 Now set the machine to a close zig-zag (for example, stitch width 4, stitch length 1). You might like to test it on a piece of scrap fabric first. Starting on one side (like you did in step 7) stitch round the heart shape with a zig-zag stitch. Your zig-zag should go from just beyond the raw edge, to just beyond the line of straight stitching. At the bottom of the heart and at the dip in the top, slow right down and use the handwheel to make the stitches, so you can achieve a neat finish. When you get back to the beginning again, take the work out of the machine, take the threads to the back and knot them securely.

11 Press the piece well and keep it safe until next week, when I will give you some ideas about what to do with your reverse appliqué sample.
Thank you for reading my blog. Quilt patterns are here, Fabrics are here, Classes are here.
Click the ‘Follow’ button to get a blog-post by email each Monday and click here if you would like the monthly newsletter with design and colour inspiration, etc.
There are some new patterns in the Etsy shop this week:
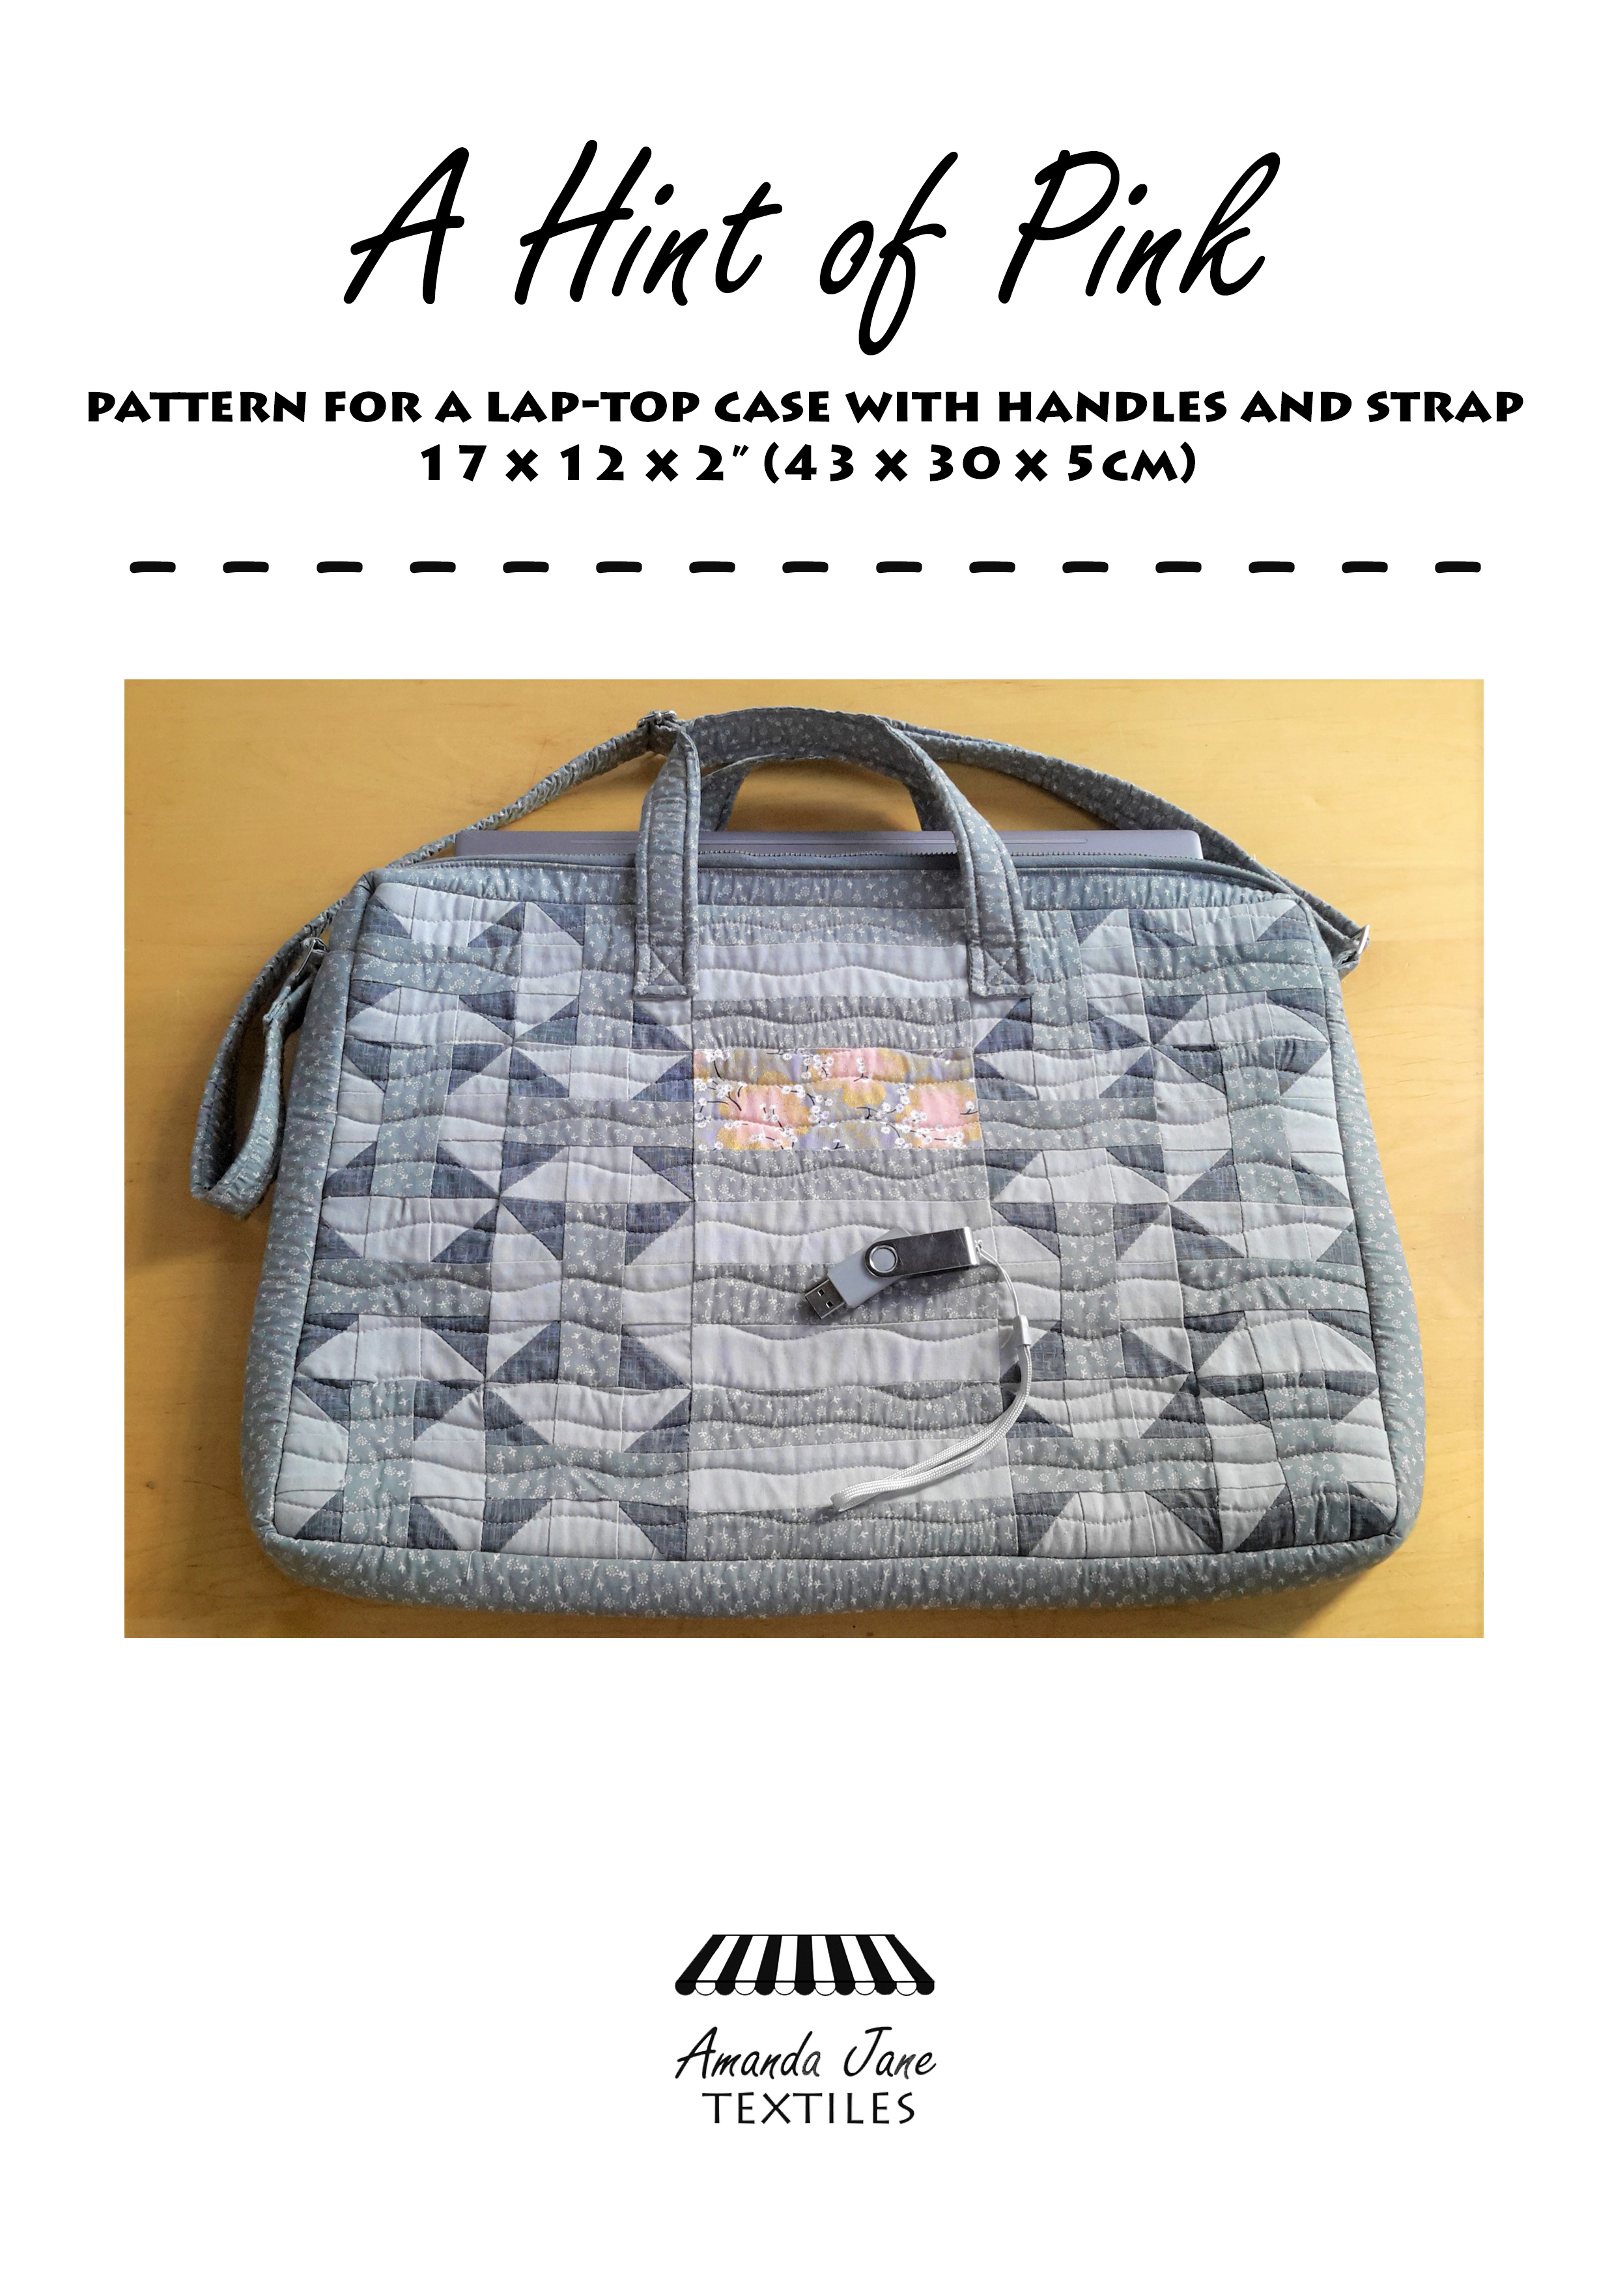
‘A Hint of Pink’ is a smart laptop case with a pink highlight. Get the pattern here
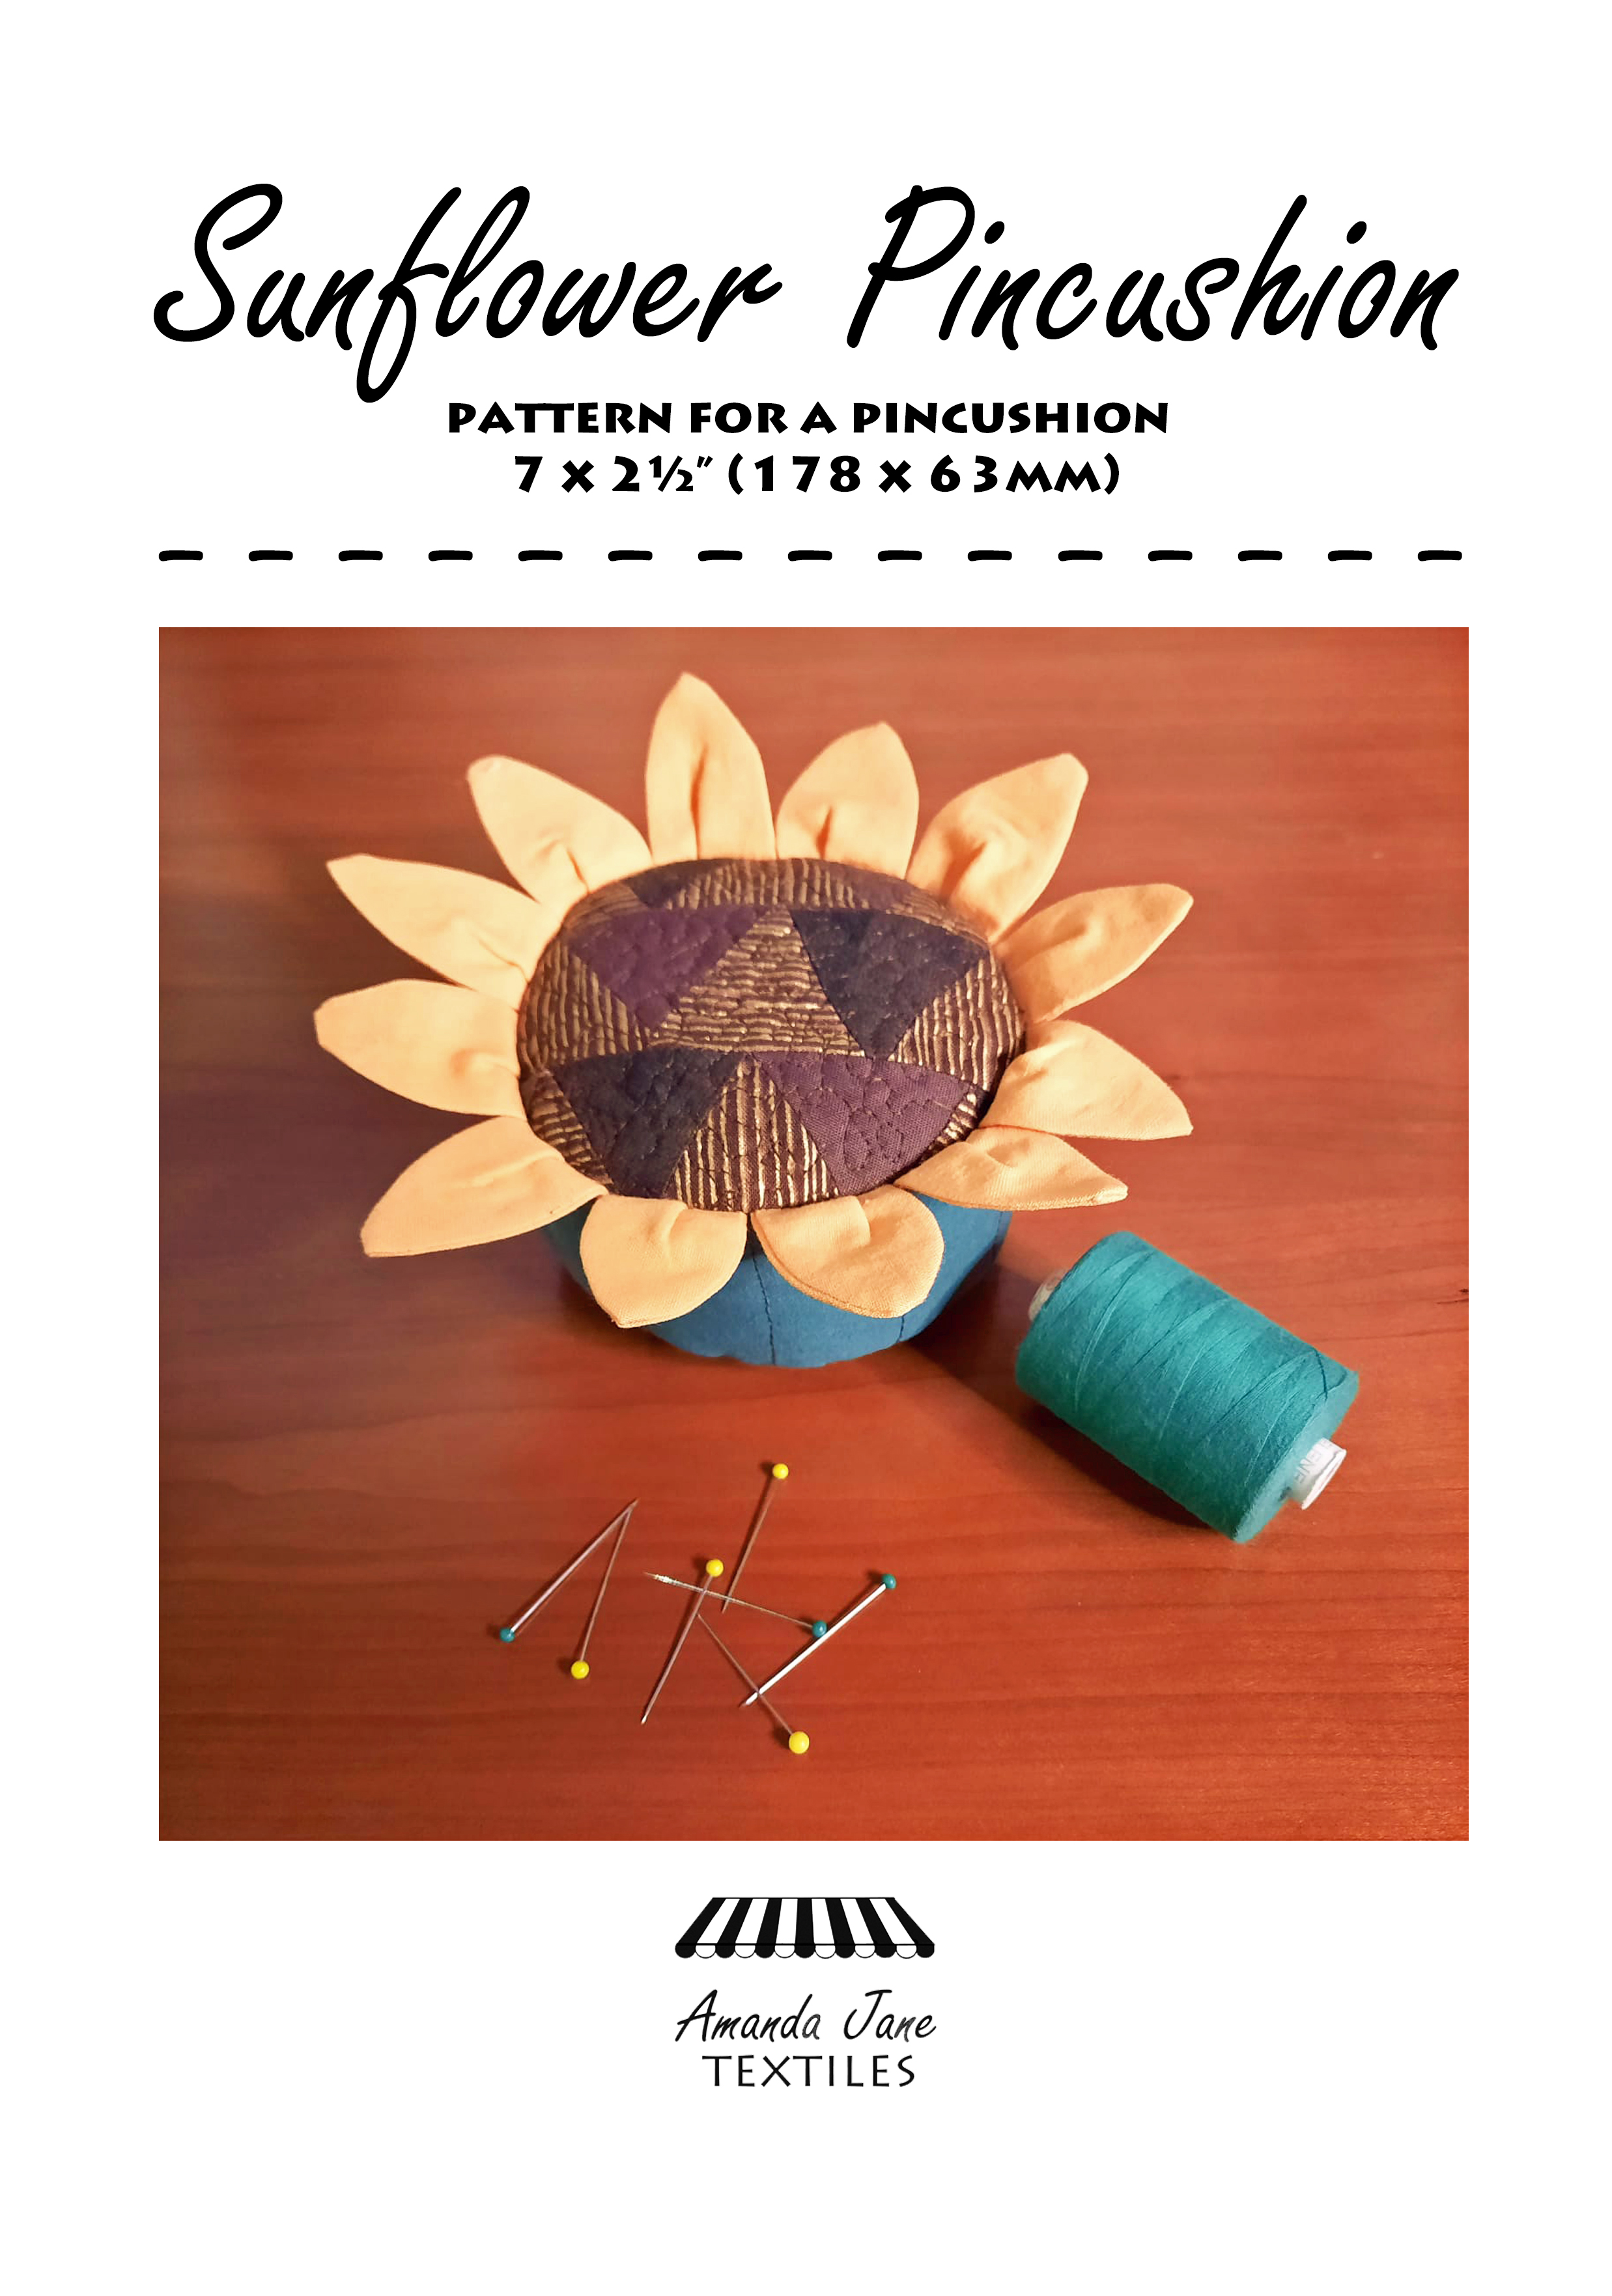
‘Sunflower Pincushion’ is a useful, large pincushion with a summery feel. Get the pattern here
‘Holiday Roses’ is a simple pattern for making a scarf using my own ‘Holiday Roses’ fabric. The pattern is here and the fabric is here

Thank you for reading my blog. Quilt patterns are here, Fabrics are here, Classes are here.
Click the ‘Follow’ button to get a blog-post by email each Monday and click here if you would like the monthly newsletter with design and colour inspiration, etc.
