
The origins of St Valentine’s day may well be based in martyrdom in the 3rd century AD of either one individual (or two separate individuals) named ‘Valentine’. You can check the useful information provided by the BBC here. According to the BBC ‘It’s the day when people show their affection for another person or people by sending cards, flowers or chocolate with messages of love. I like the idea of sending cards in the name of affection – maybe a friend would like one?
Make a Valentine’s Day card
So, with the reverse appliqué piece that you made last week from the tutorial here, I’m going to show you how to transform it into a card to send. (Other options for using your piece are below.)
You will need: the reverse appliqué piece a piece of light card 14 x 7″ (35.6 x 17.8cm) pencil, ruler, paper scissors and glue
1 Mark out on a piece of light card, a rectangle 13½ x 6″ (34.3 x 15.2cm).

2 Divide the long side into three sections, each 6½ (16.5cm) wide.
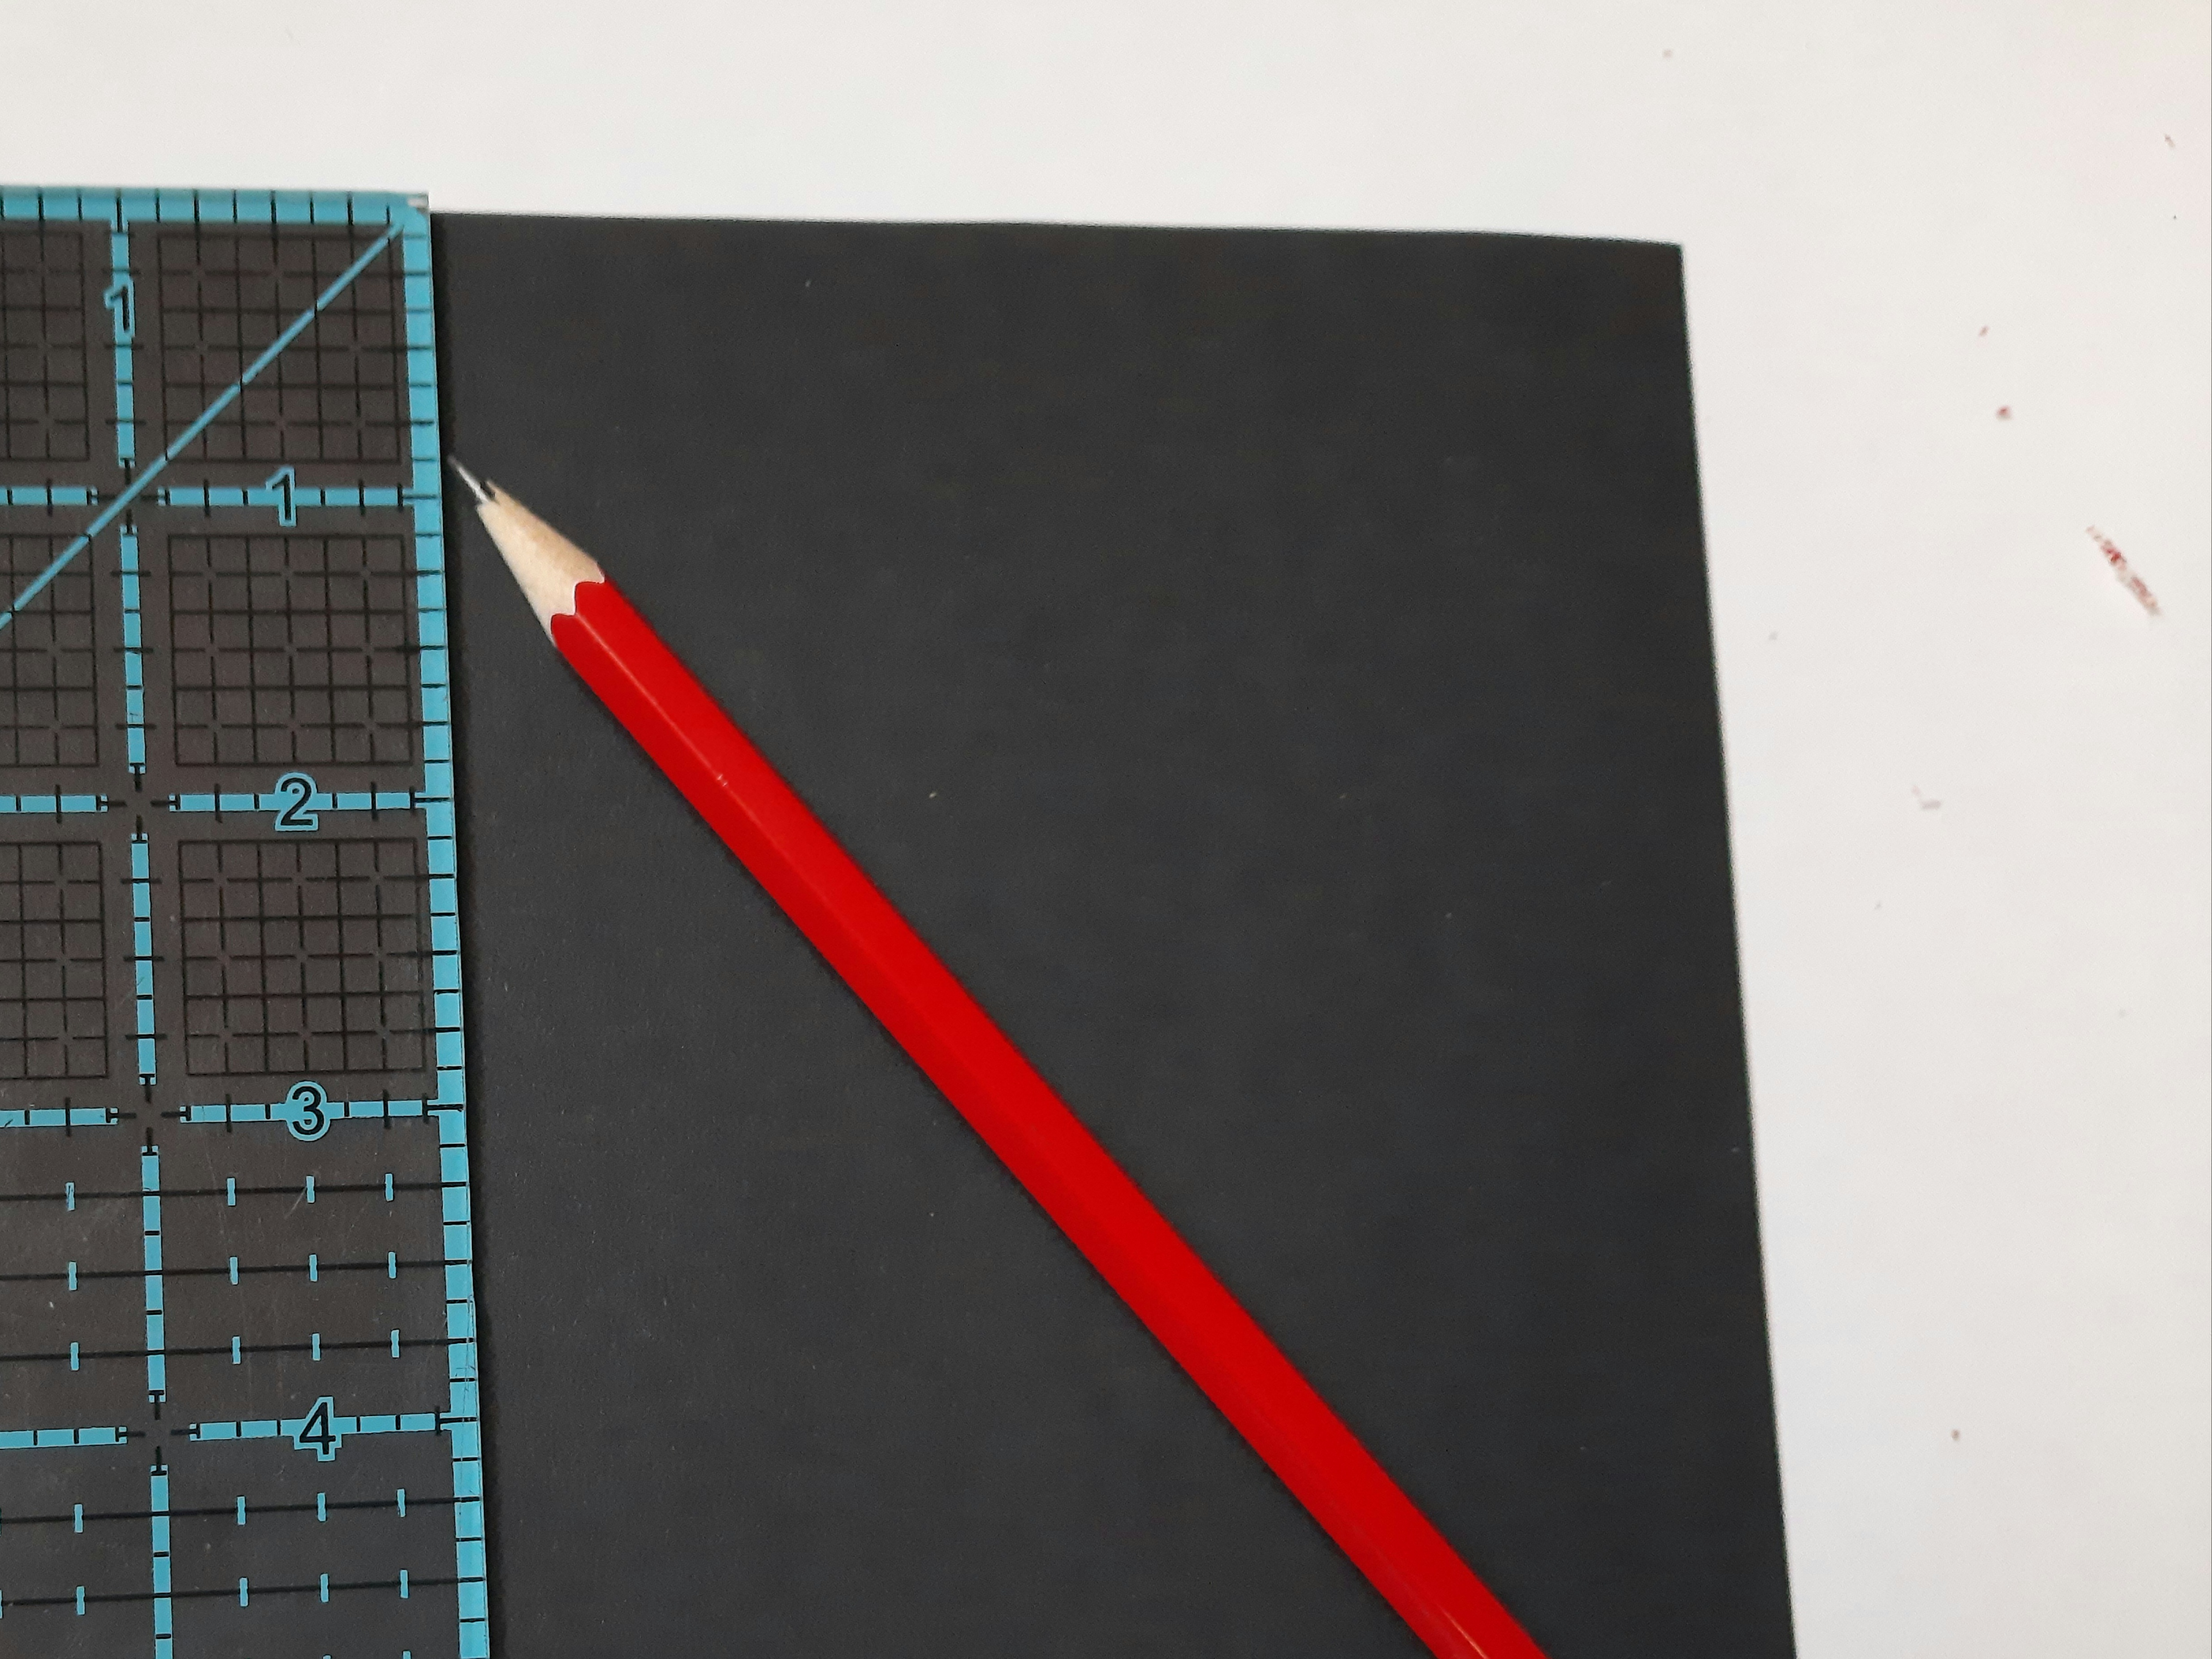
3 Make a fold on each of these pencil lines. Mark out a square ½” (12mm) from the top and from the sides of the central section and 2½” (6.3cm) from the bottom. Cut out the square as shown.

4 With sharp scissors trim back the excess fabric on the back of your appliqué piece as shown.

5 Tape the appliqué piece to the middle section of the card. Narrow masking tape was used here. The tape should not extend beyond the pencilled line between sections. Then add glue on top of the tape and add glue to the card below the textile – in the middle section only.

6 Fold the left-hand hand section in on top of the middle section.
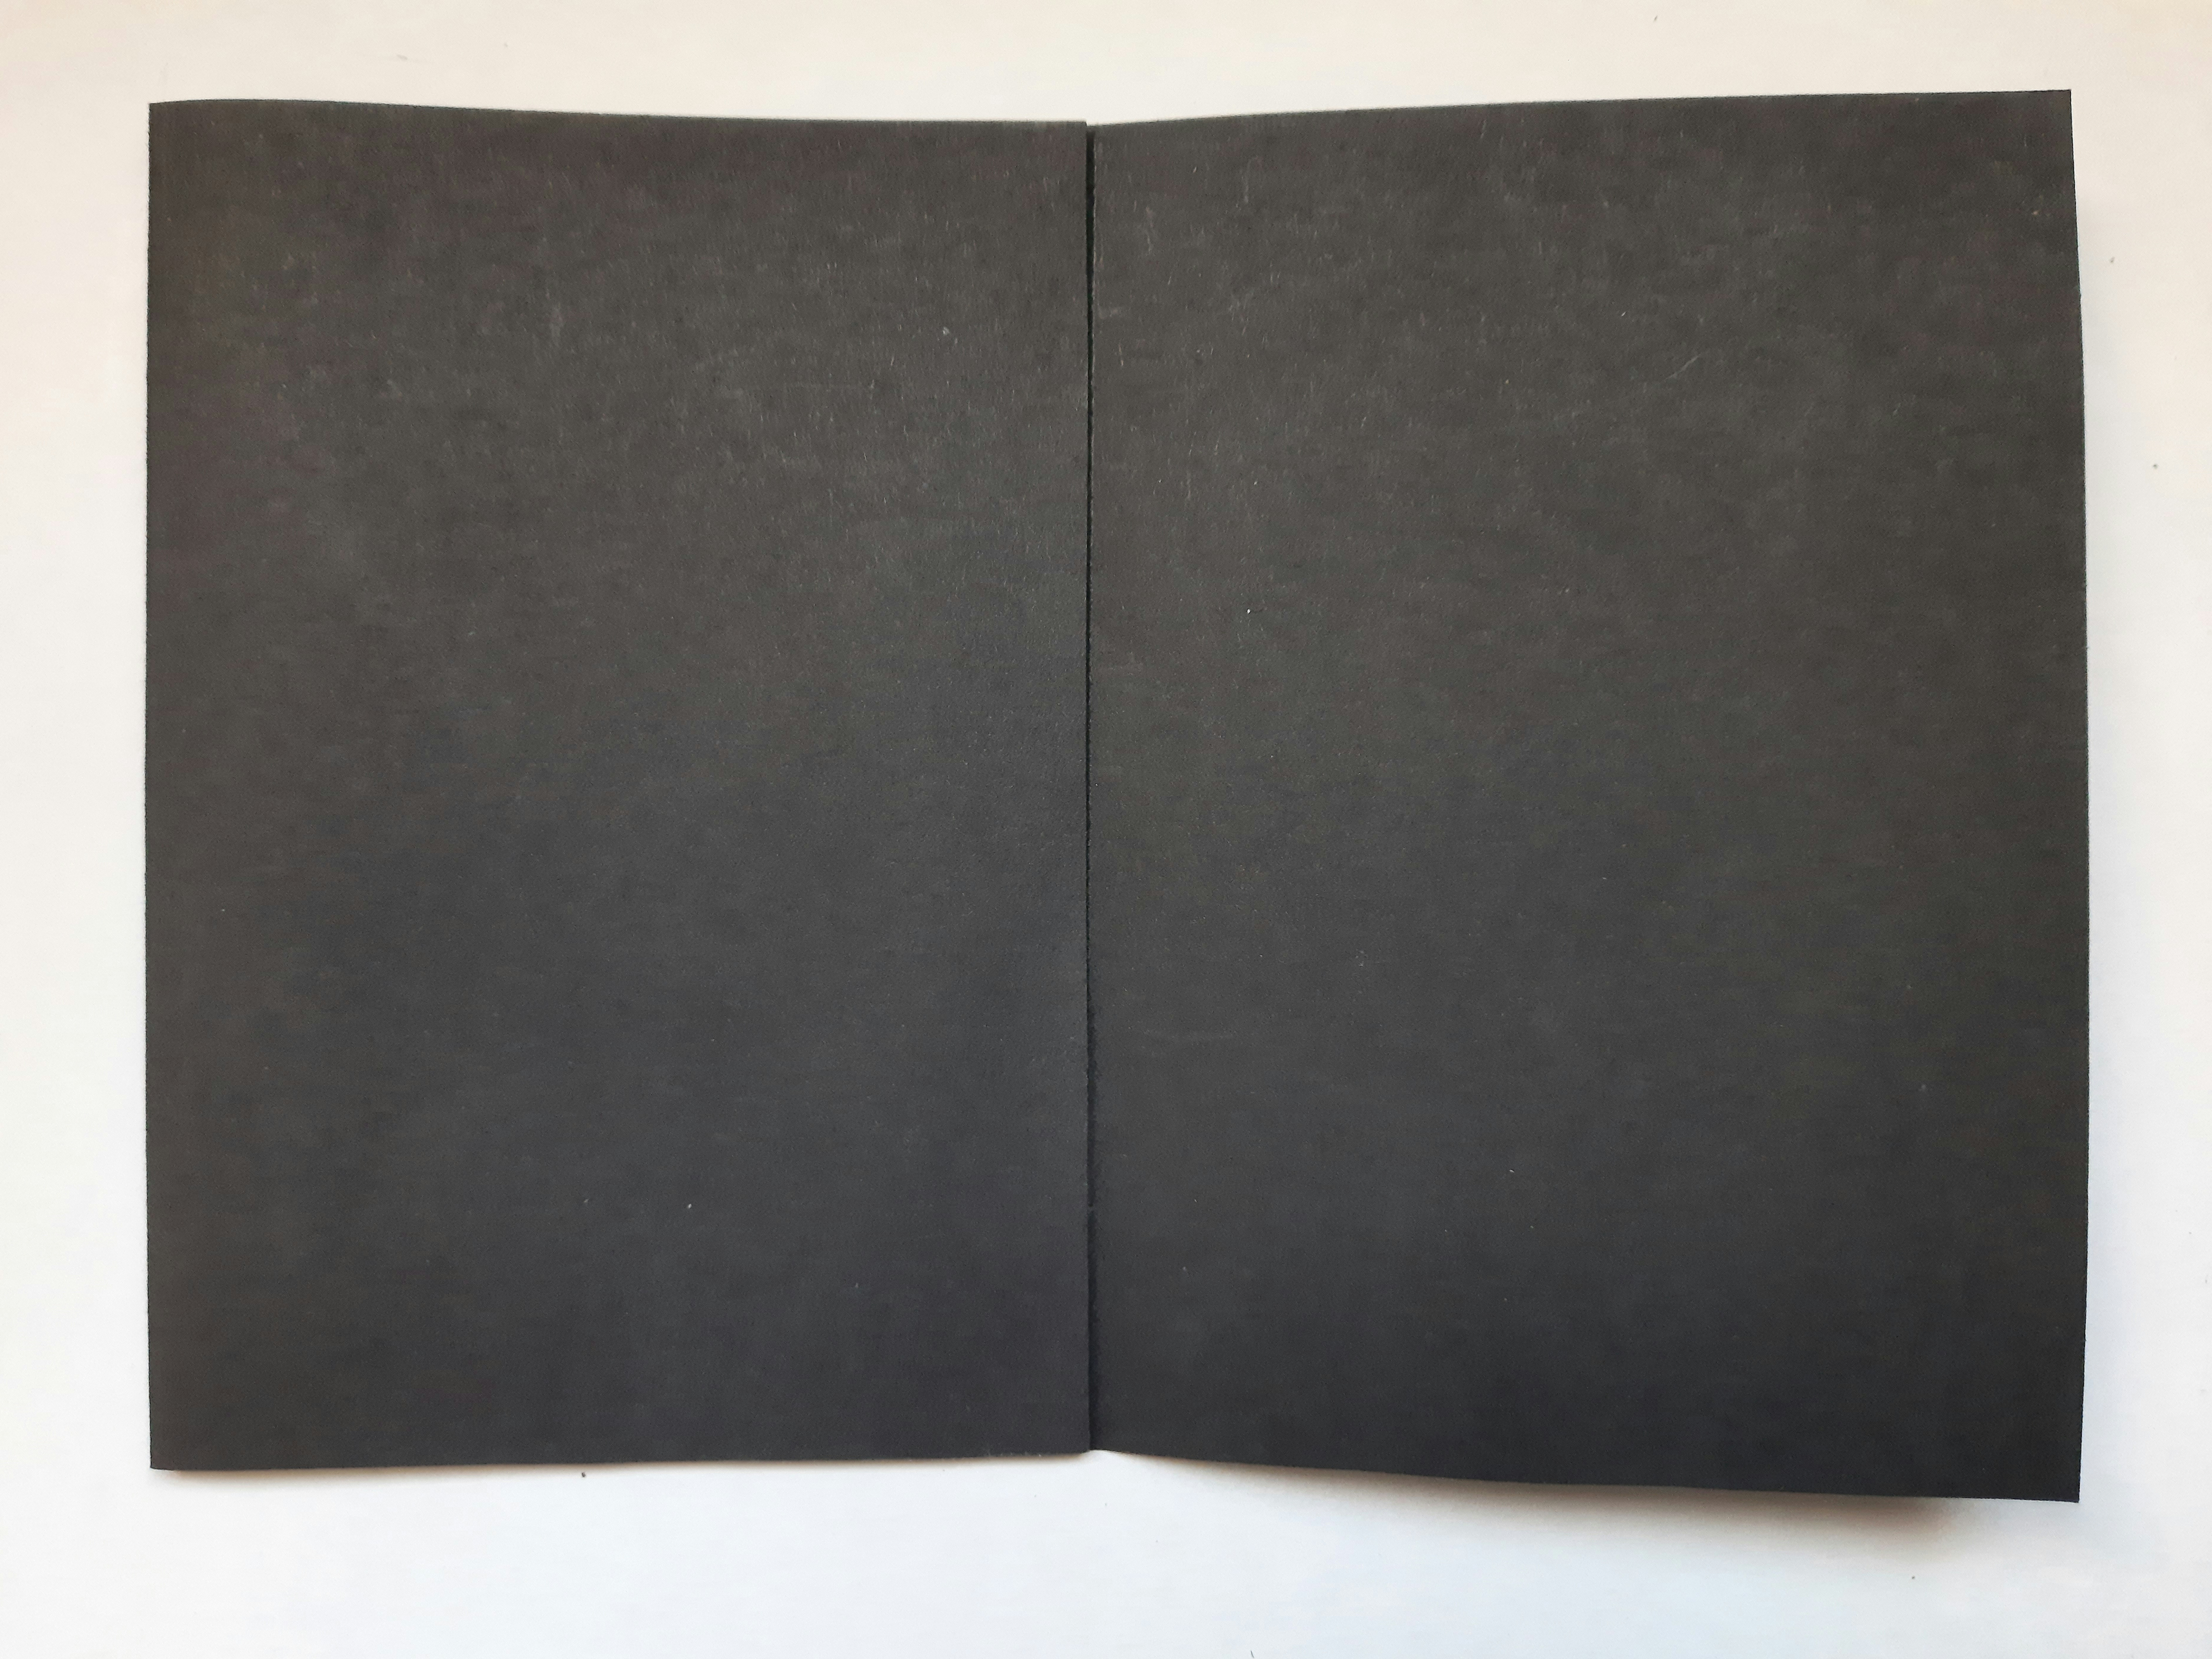
7 The card is complete. Add your greeting.

Other ideas for your reverse appliqué piece
- You could make a sweet-smelling bag to hang in the wardrobe. Cut a piece of cotton fabric the same size as your appliqué piece, put them right sides together and stitch round all four sides, leaving a small opening at the top. Turn through to the right side and fill with dried lavender or cinnamon sticks. Insert the ends of a loop of ribbon into the gap and stitch the gap closed neatly.
- You could make another appliqué piece, but this time cut the fabrics slightly larger and use the piece for one side of a zip-up purse like this one:

- You could use the technique for dressmaking, for example on the yoke of a dress for a little girl or the pocket of trousers for a boy. In this case, you might choose not to trim back the excess fabric on the lower layer but keep it as a double layer of fabric.
#100daysproject I’m taking part in this project on Instagram in my ‘arty’ account @amanda_jane_ogden (you can find it here). My textile-y Instagram account is @amanda_jane_textiles and you can find that one here.
Next week on the blog: cutting instructions for the Summer Bouquets quiltalong – see you then.
Thank you for reading my blog. Quilt patterns are here, Fabrics are here, Classes are here.
Click the ‘Follow’ button to get a blog-post by email each Monday and click here if you would like the monthly newsletter with design and colour inspiration, etc.
