
Introduction to the mystery quilt
Welcome to Part 1 of the ‘Watch the Stars’ mystery quilt. Every month this year, I will be giving you the fabric requirements for the star (or stars) for that month. Below are ‘how-to’ instructions for making the first star quilt-block. There will be stars of all shapes and sizes. At the end of the year I will reveal the way they all fit together. The finished quilt top will be 48 x 72″ (122 x 183cm). However, at the end of the year, I will be giving suggestions for changing this into a larger size if you wish.
Choosing your quilt colours
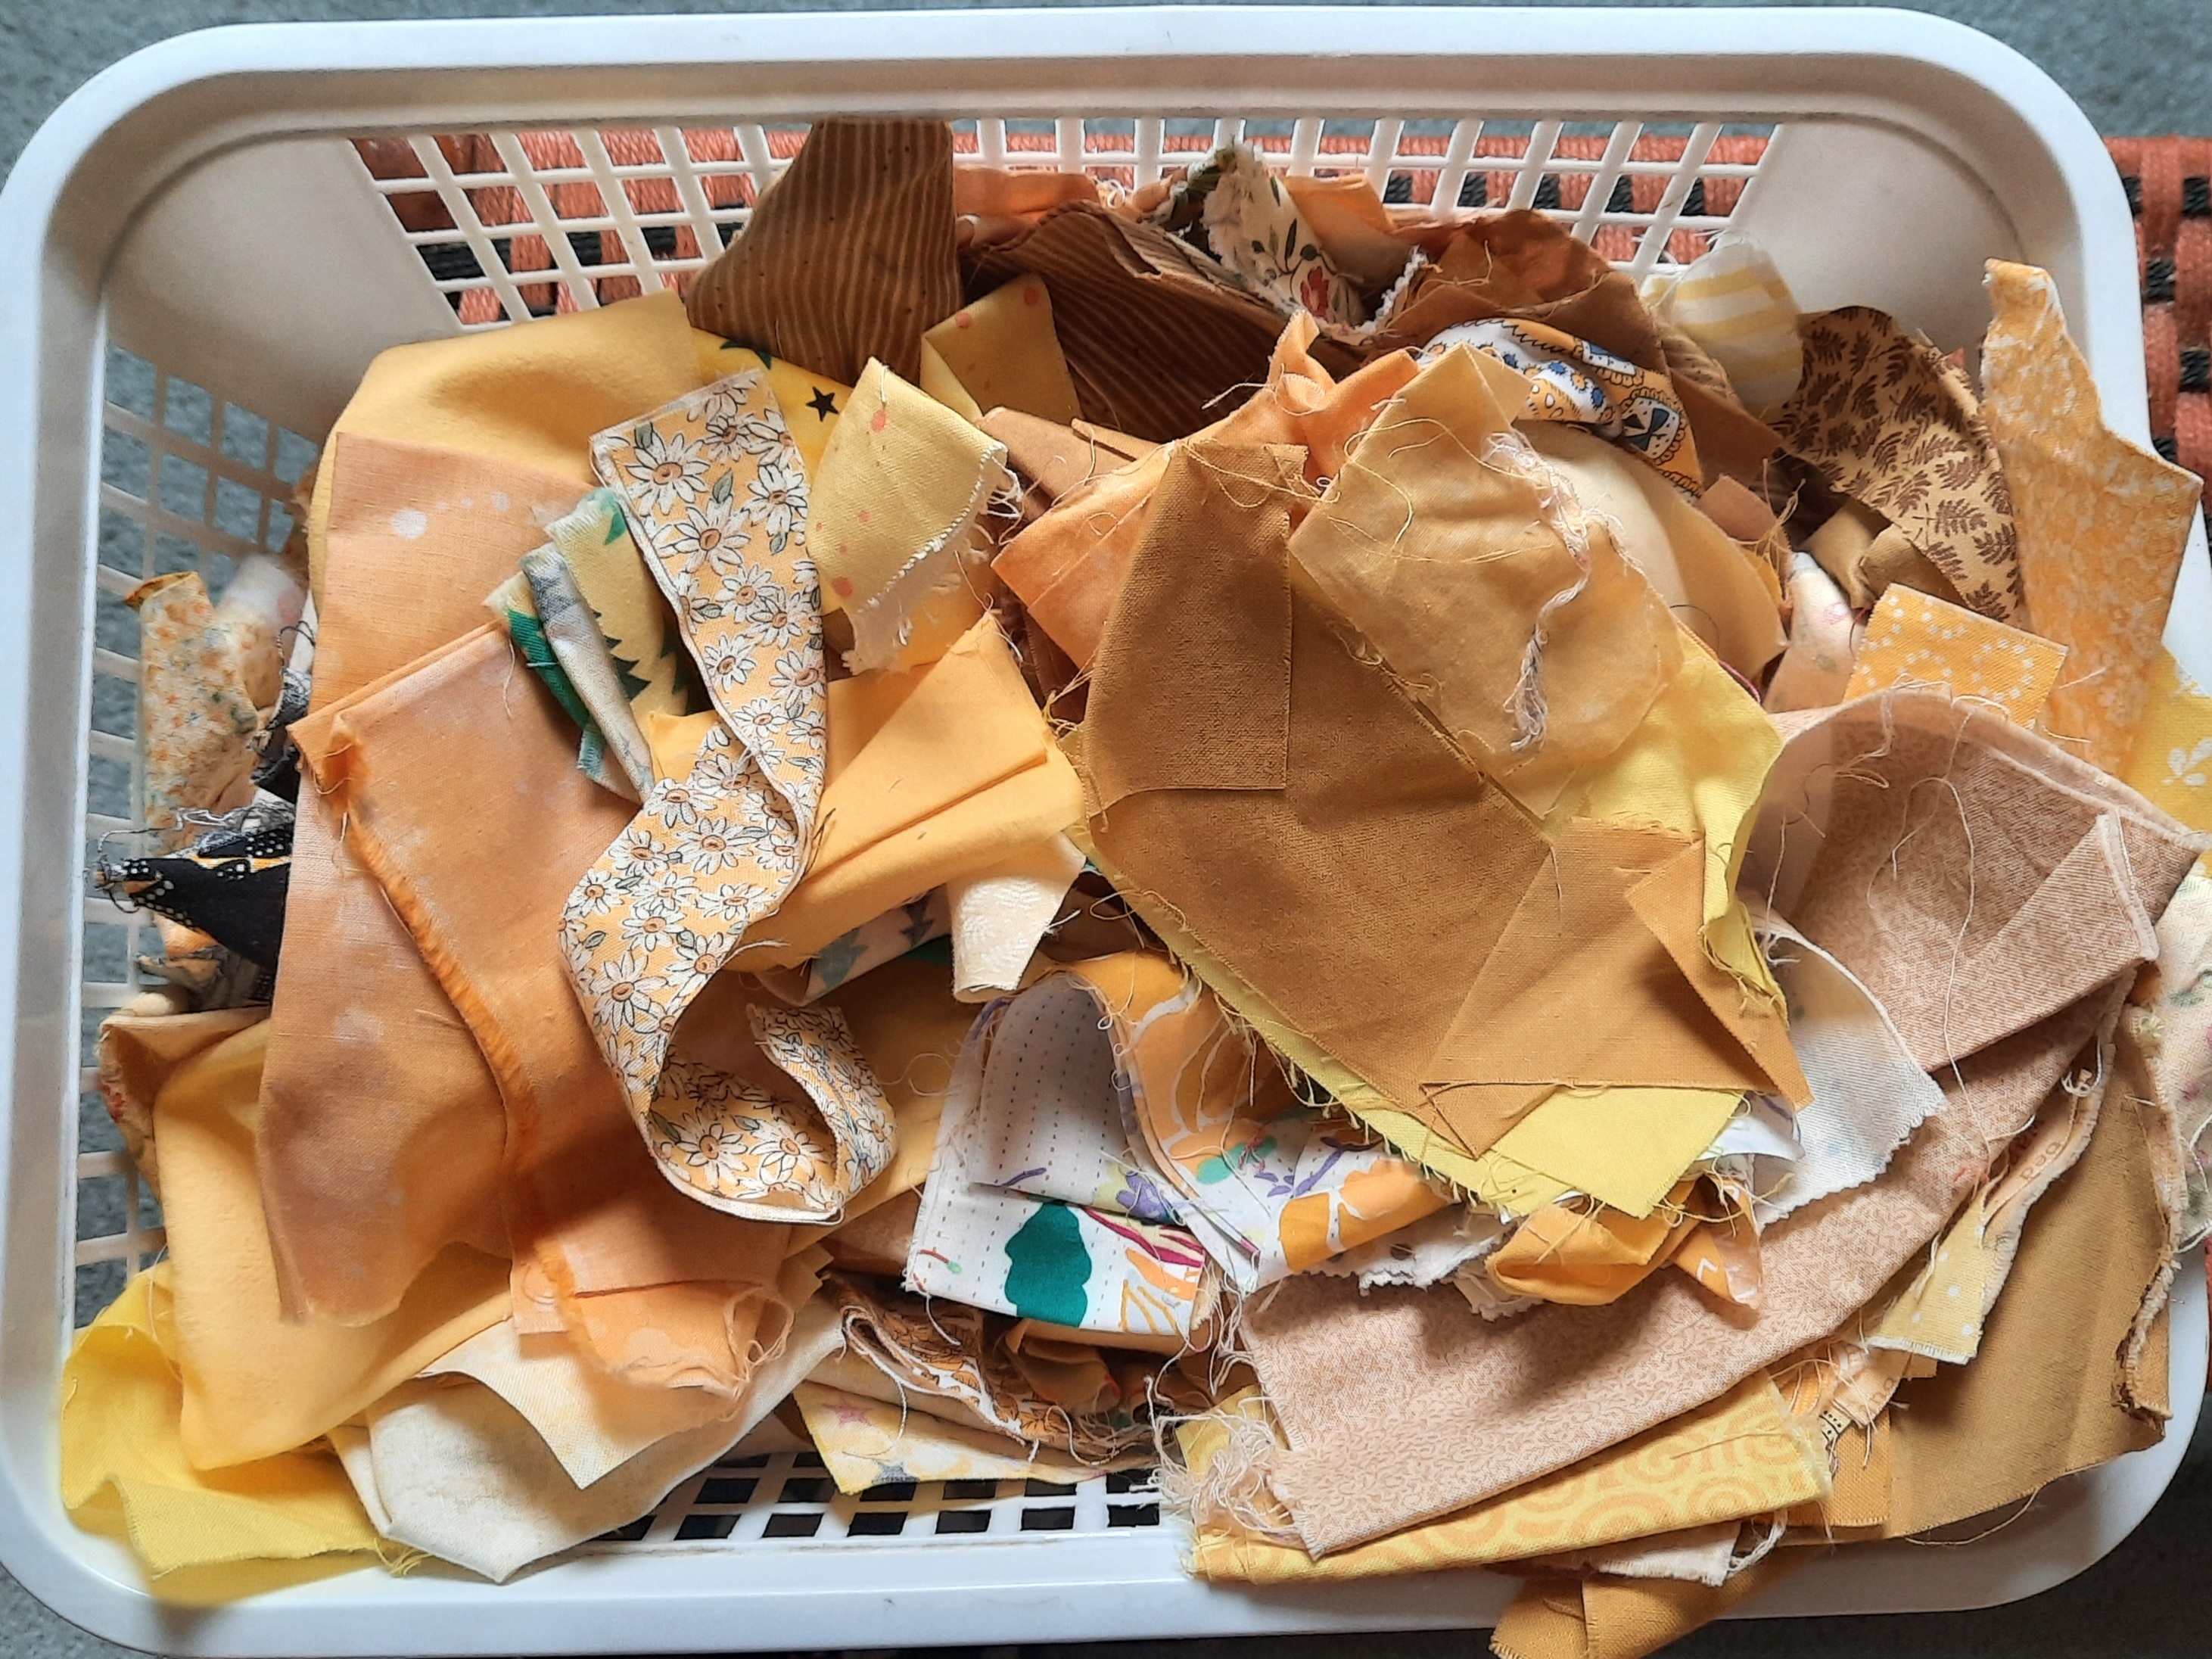
You can – of course – make your quilt in any colourway you choose. I’m making mine with yellow stars (with some white highlights) on a dark blue background. My plan is to make it a ‘scrappy’ quilt, using lots of off-cuts and remainders left over from other projects. These are the fabrics I’ve set aside at the start of the year, some solid white and low-volume white prints, some mid-tone yellow fabrics and some paler yellow fabrics:

In addition, this is the collection of dark blue fabrics:

I not only raided my larger tray of fabrics in these colours, I also checked my scrap baskets. I tend to save anything bigger than 1½ x 1½” (38 x 38cm)! To encourage you to use your scraps, The instructions will give individual measurements (rather than the total for the block), so you can use up lots of small pieces. Here is my yellow scrap basket:
Instructions for the January stars
For each star, you will need to cut:
Four squares 2½ x 2½” (63 x 63mm) of navy fabric
Four squares 2⅞ x 2⅞” (73 x 73mm) of navy fabric
One square 2½ x 2½” (63 x 63mm) of mid or pale yellow fabric
Four squares 2⅞ x 2⅞” (73 x 73mm) of mid or pale fabric
Making the star
1 Make a half-square triangle unit Take one of the 2⅞ x 2⅞” (73 x 73mm) yellow squares and draw a line with a ruler and an erasable fabric marker or pencil from one corner to the other on the wrong side.

2 Lay this piece right sides together on top of a navy square the same size. Put pins in the un-marked areas to hold them in place. Stitch across the diagonal, ¼” (6mm) away from the marked line, on both sides of the line. (NB take the piece out of the machine and re-insert it for the second line of stitching, so both lines are stitched in the same direction.)

3 Take the piece out of the machine and then cut along the marked line with scissors.

4 Press the seam, then open up the triangles and press again. Press the seam allowances over to the navy side. You now have two squares.

5 Repeat steps 1 to 5 to make two more yellow/navy squares.

6 Make row 1: Join a 2½ x 2½” (63 x 63mm) navy square to a yellow/navy square, so that the yellow triangle slopes down to the right, as shown in the photo. Then add another 2½ x 2½” (63 x 63mm) navy square. Press each seam, then press the seam allowances to the right.

7 Make row 2: Join a navy/yellow square with the yellow triangle sloping up to the right to a 2½ x 2½” (63 x 63mm) yellow square. Then add another navy/yellow square with the yellow triangle sloping up to the right. Press each seam, then press the seam allowances to the left.
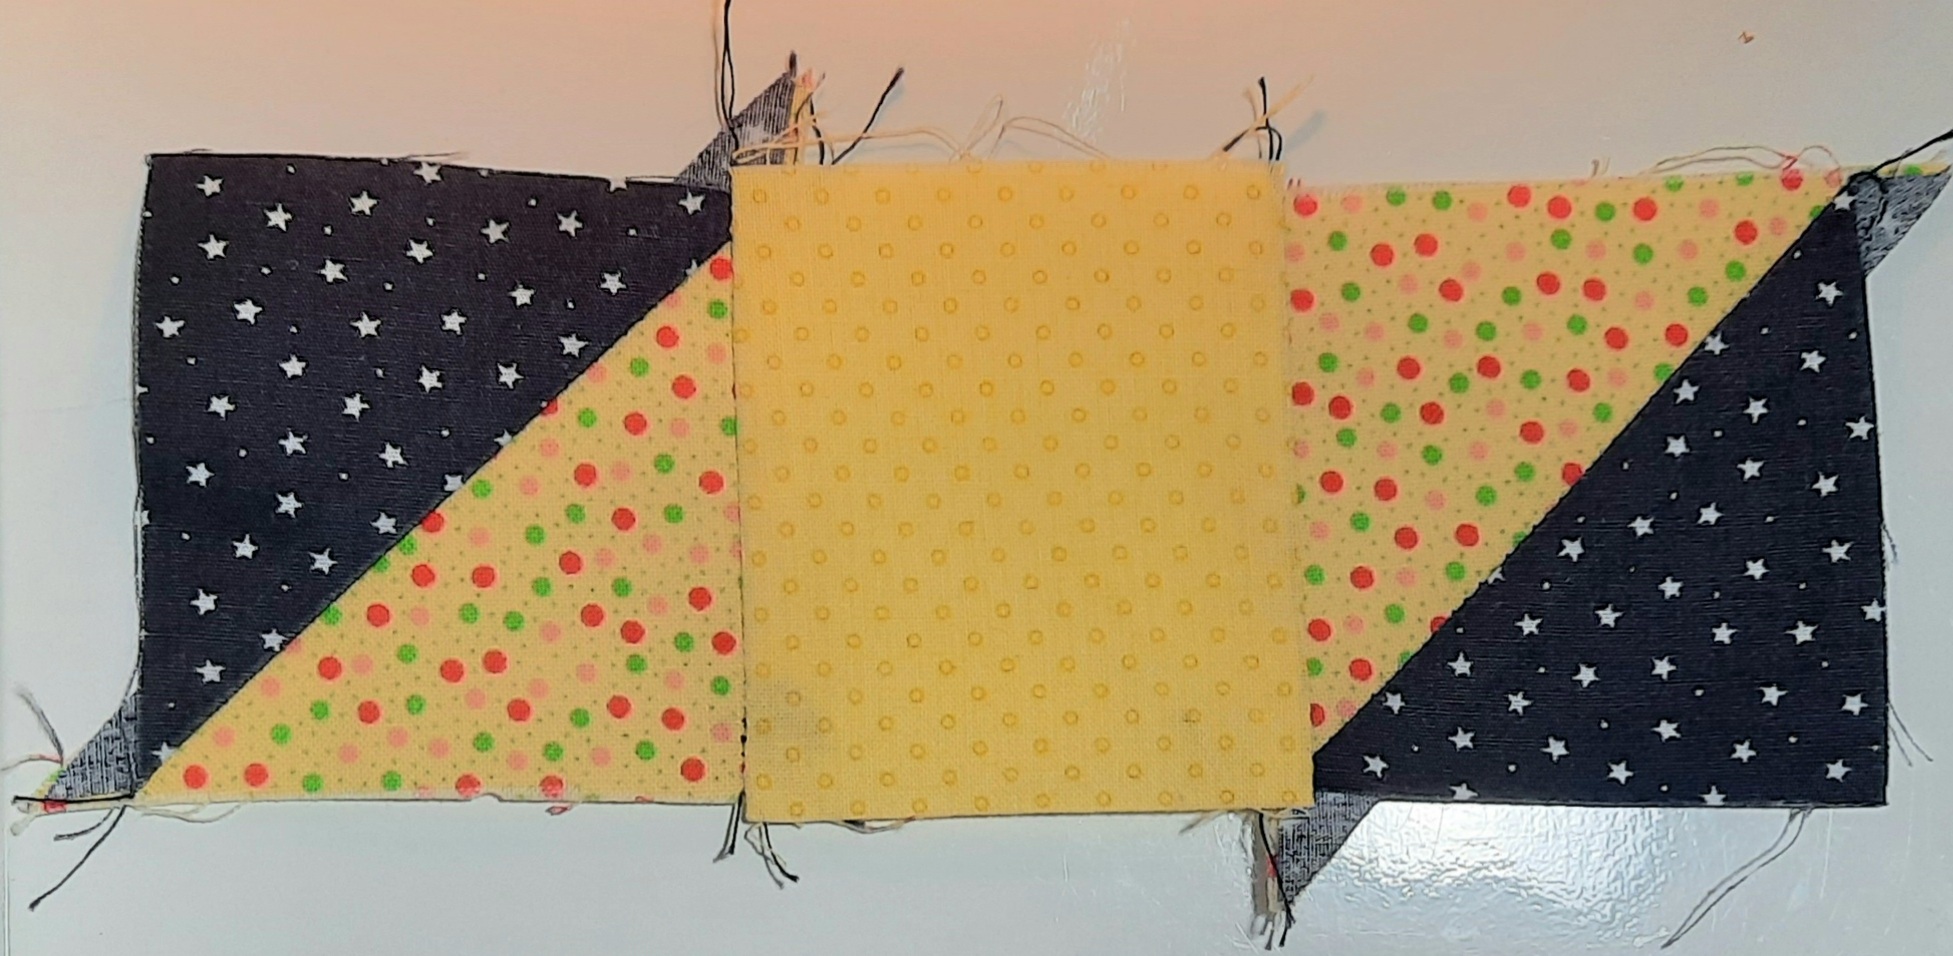
8 Make row 3: Join a 2½ x 2½” (63 x 63mm) navy square to a yellow/navy square, so that the yellow triangle slopes down to the right, as shown in the photo. Then add another 2½ x 2½” (63 x 63mm) navy square. Press each seam, then press the seam allowances to the right.
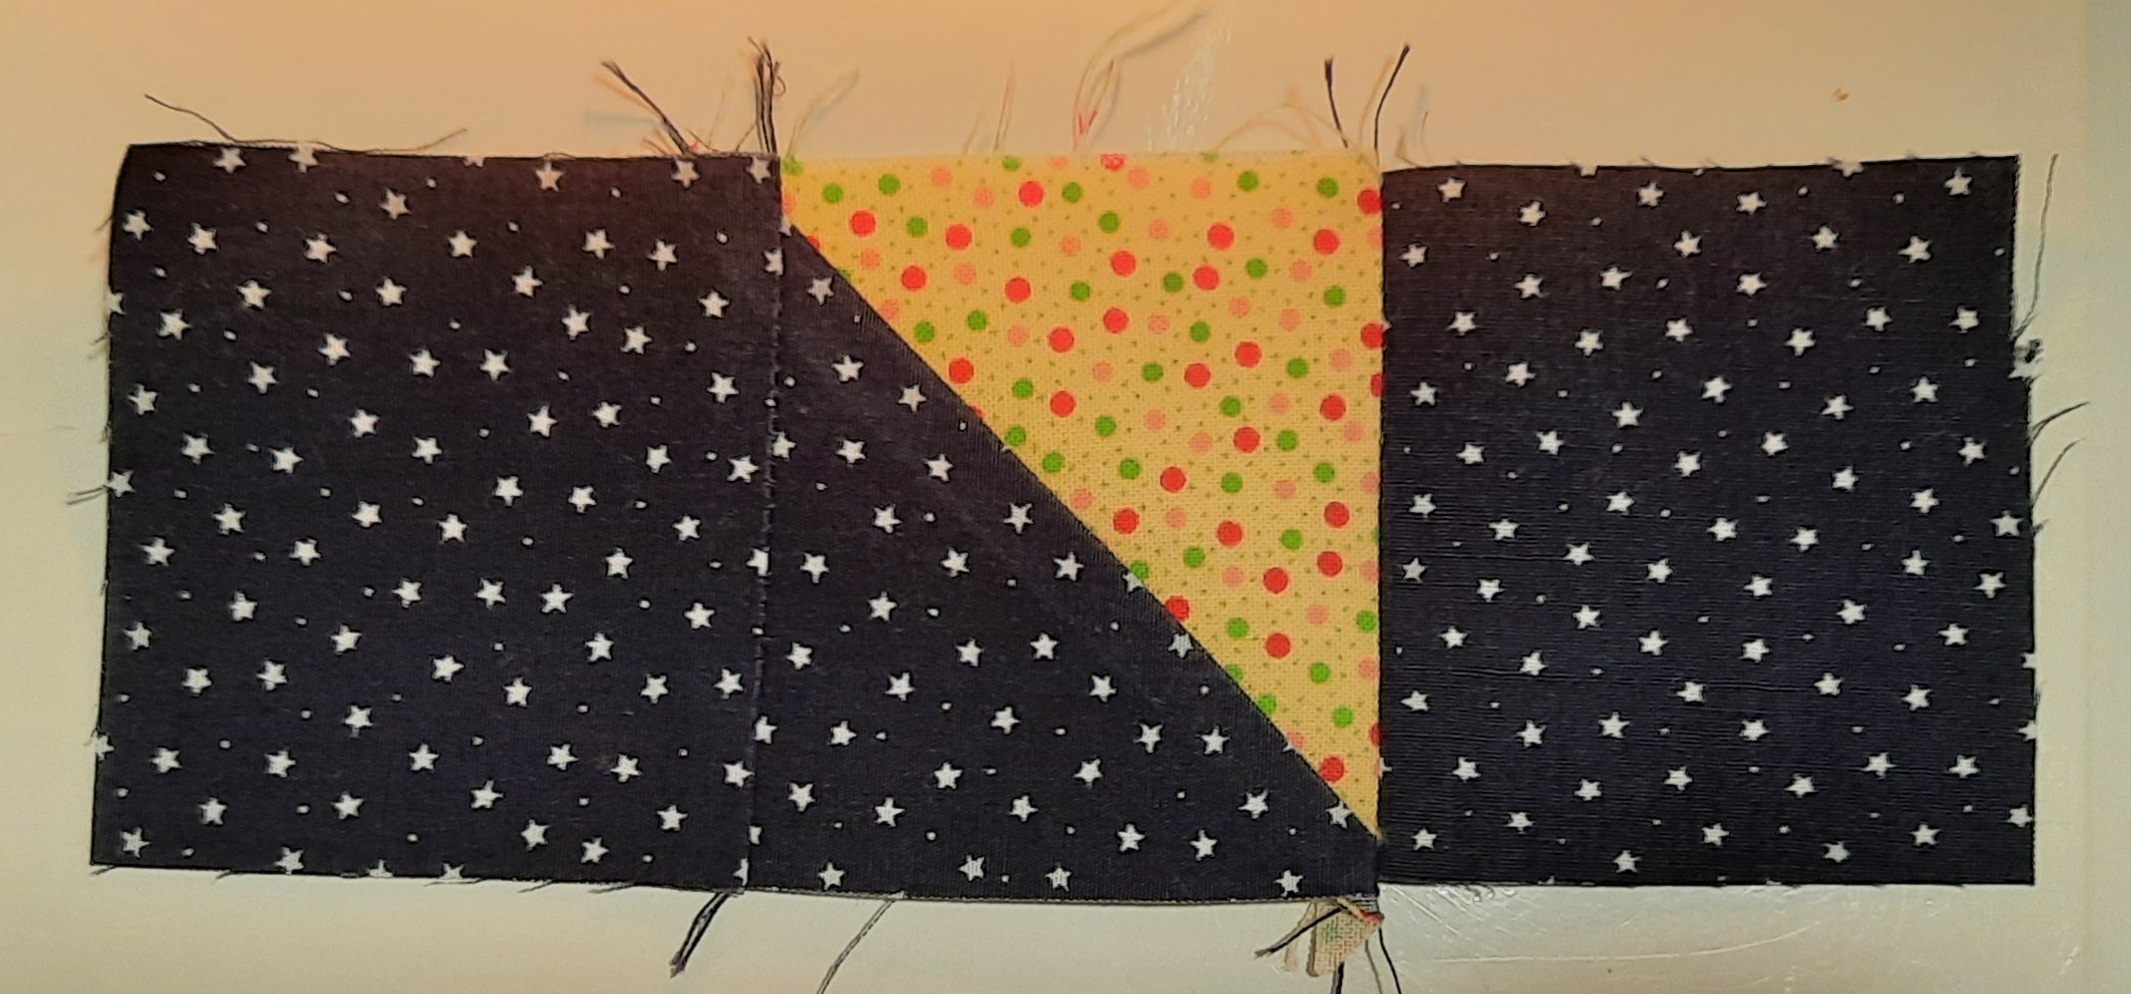
9 Join row 1 to row 2 and press. Pin the rows carefully as shown, Make sure that the vertical seams align and ensure that the two sets of seam allowances are going in opposite directions.

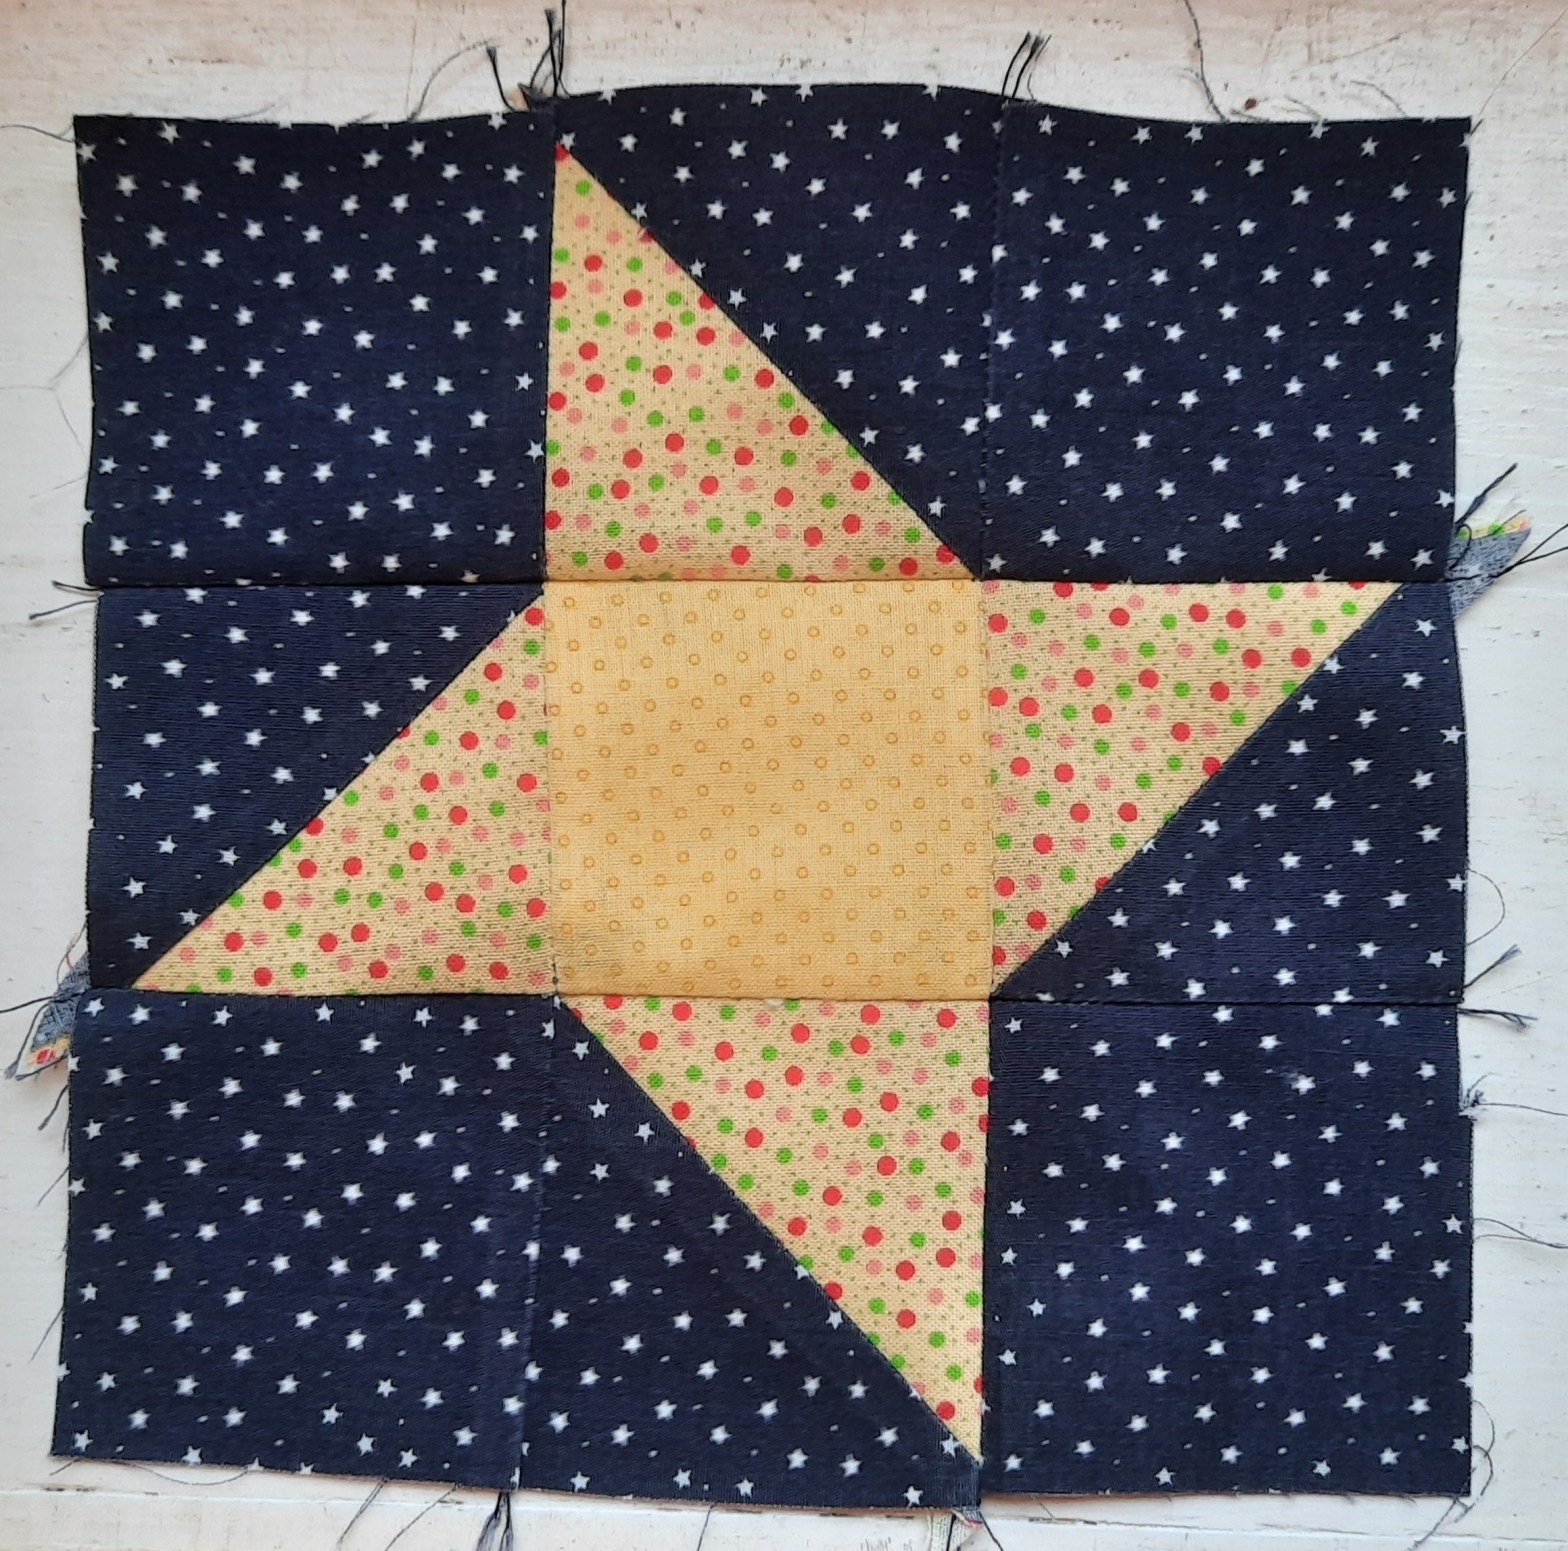
10 Then add row 3 in the same way. Press well. The first star block is complete.

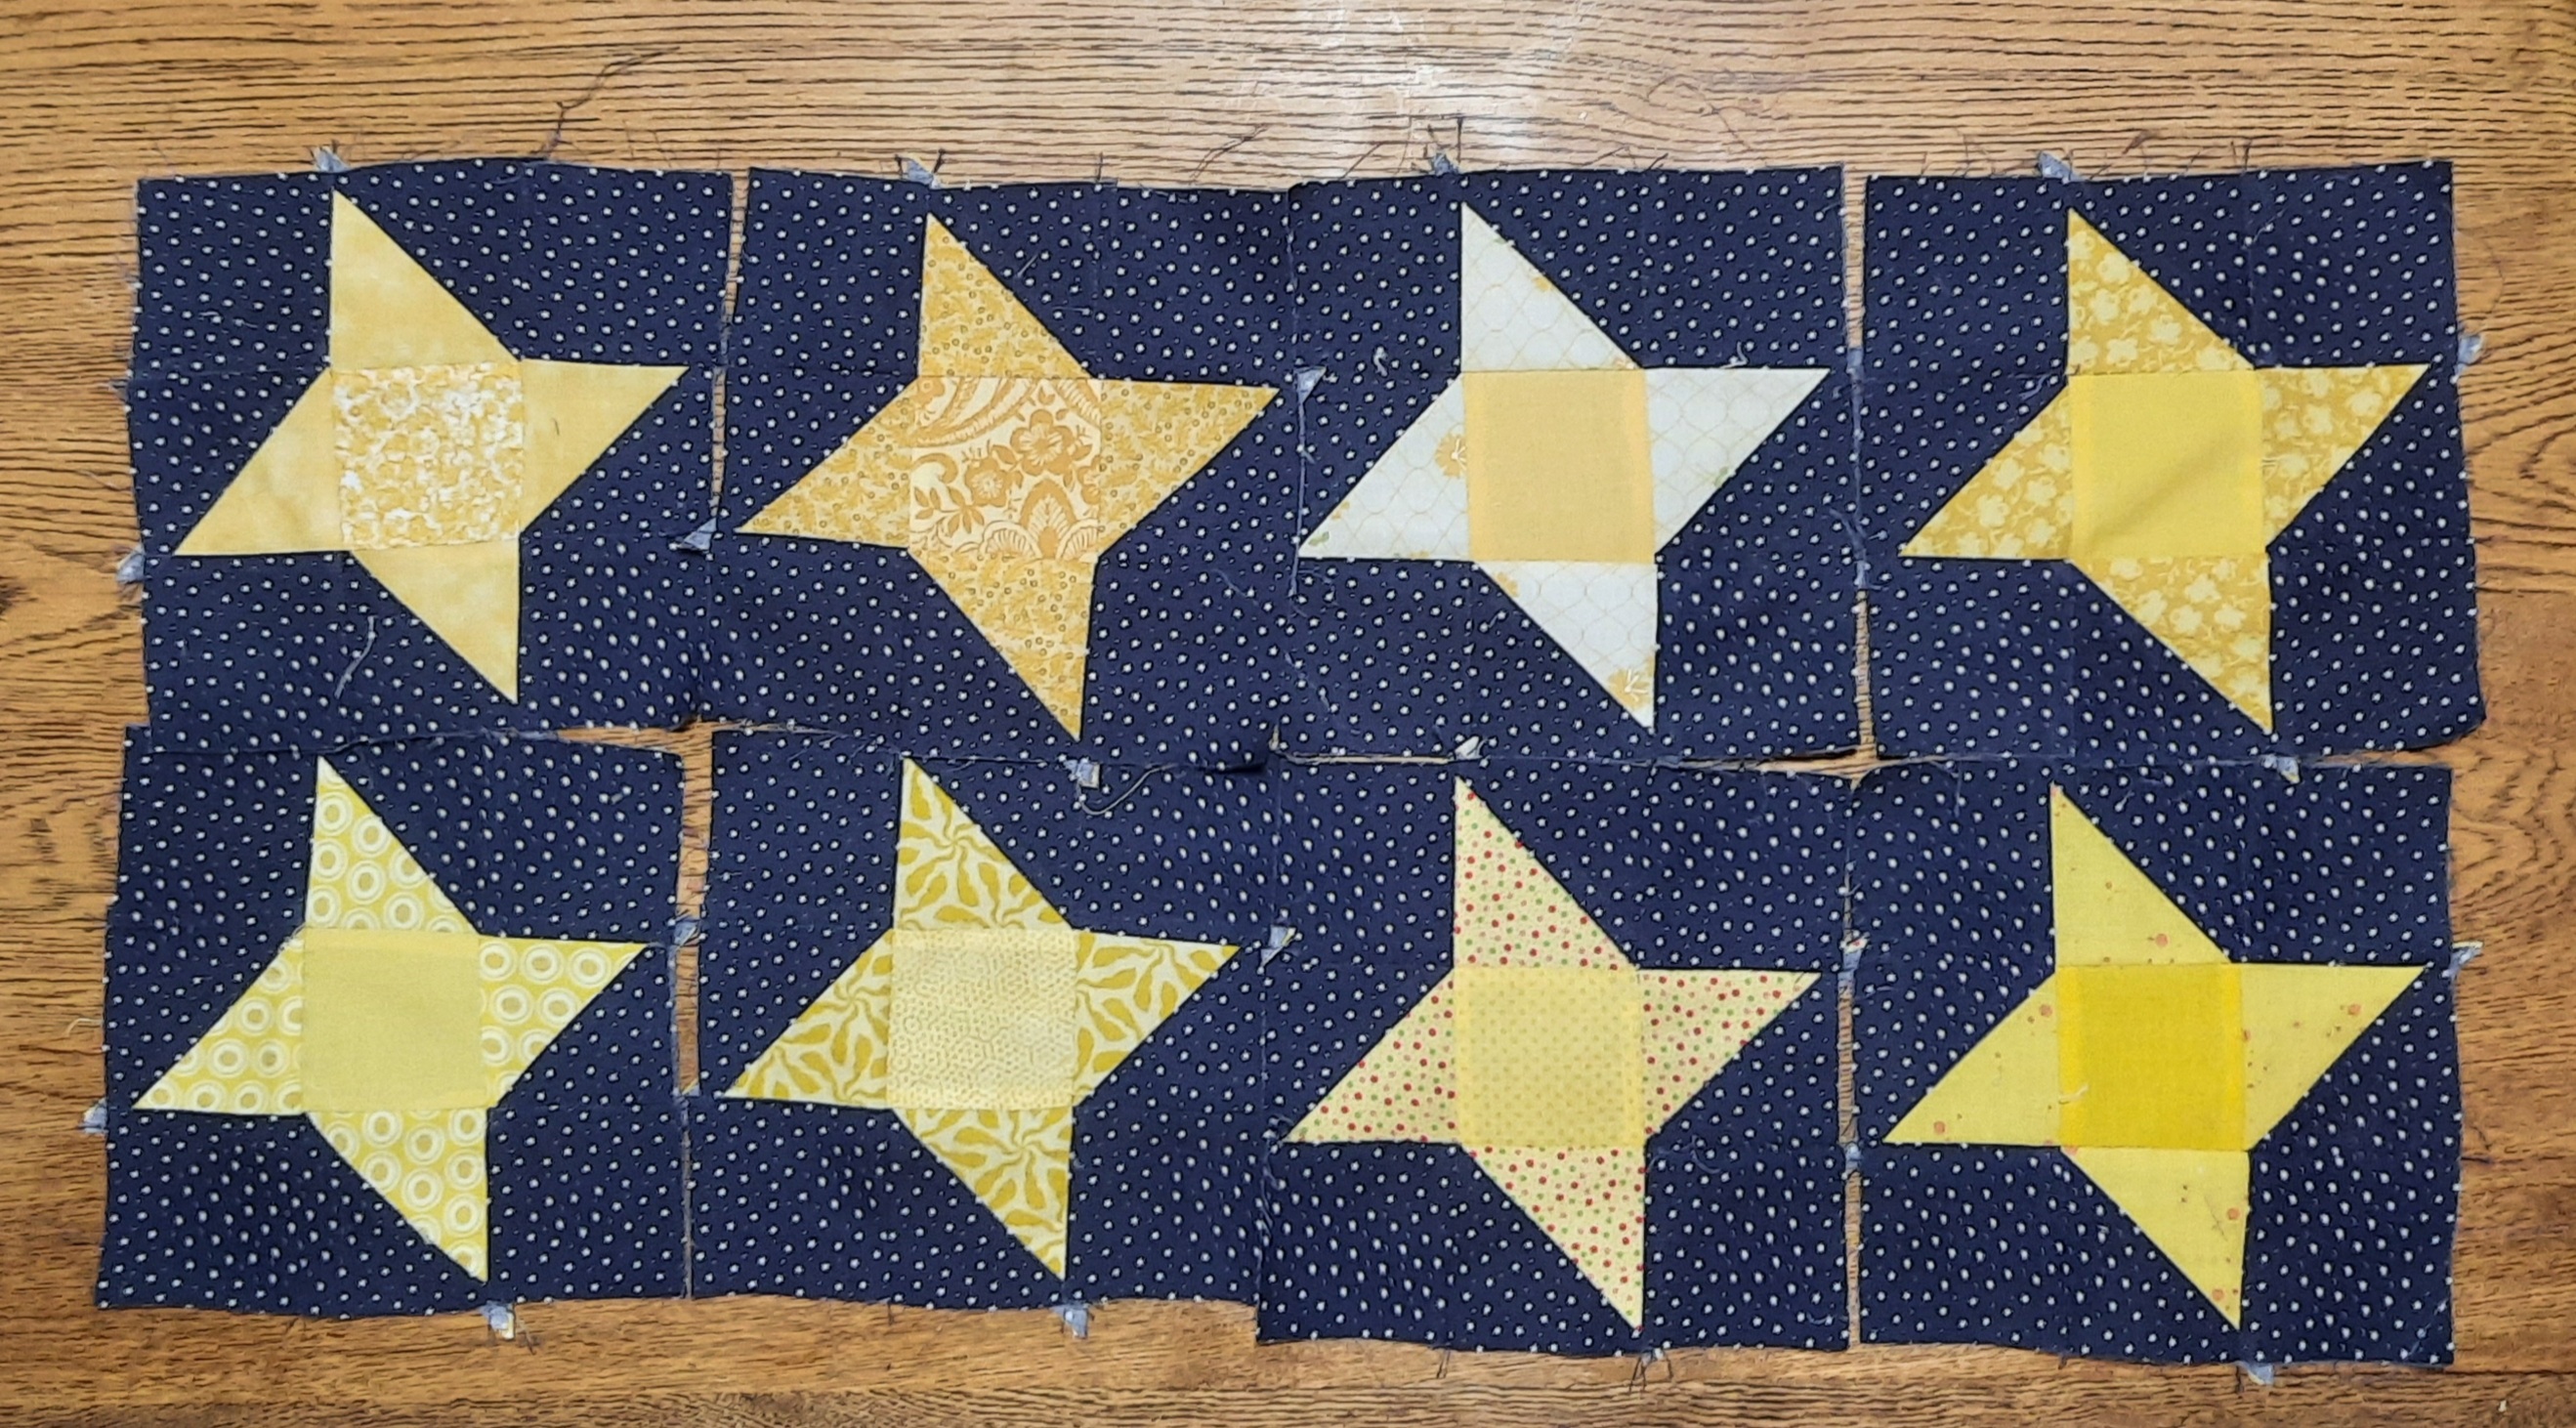
Blocks needed for ‘Watch the Stars’ quilt
You need to make eight January blocks for the quilt. Press them well and keep them safe.
You can see in the photo below how I have used the same background for this set of stars (I had lots of off-cuts of this navy/tiny white stars print), but varied the centres and the arms of the yellow stars. You could go much ‘scrappier’ and use a different fabric for any one of those parts…
I would love to see what colours you choose. If you have an Instagram account, please do tag your photos
#watchthestars
I will be looking out for your work.
February’s block will be quite different. Look out for the blog post on Monday 7th February for the next instalment of ‘Watch the Stars’.
Thank you for reading my blog. Quilt patterns are here, Fabrics are here, Classes are here.
Click the ‘Follow’ button to get a blog-post by email each Monday and click here if you would like the monthly newsletter with design and colour inspiration, etc.
If you are keen to make a starry quilt before the end of the year(!), take a look at the ‘Starstruck’ pattern, available here


8 thoughts on “‘Watch the Stars’ quilt – January star quilt-block”