
Welcome to the August block for the ‘Watch the Stars’ 2022 mystery quilt.

I hope you are enjoying making your star blocks month by month. It has been great to hear from readers who have contacted me about ‘Watch the Stars’. Just look at these beautiful blocks made by Ruth Jones from Edinburgh:

The description of the mystery quilt project is here
The January block is here
The February block is here
The March block is here
The April block is here
The May block is here
The June block is here
The July block is here
And now for the August block instructions…
A quarter-inch seam is used throughout.
Materials
3 x 3″ white/gold print fabric
4 x 7″ light yellow/white print fabric
6 x 12″ dark yellow print fabric
10 x 6″ navy blue solid fabric
10 x 18″ navy/white print fabric
Cutting
from the white/gold print fabric, cut one square 2½ x 2½”
from the light yellow/white print fabric, cut two squares each 3¼ x 3¼”
from the darker yellow print fabric, cut four squares 2½ x 2½”, four squares each 2⅞ x 2⅞”
from the navy solid fabric, cut four rectangles, each 4½ x 2½”
from the navy/white print fabric, cut two strips each 10½ x 1½”, two strips each 12½ x 1½”, two squares each 3¼ x 3¼”and four squares each 2½ x 2½”
Making the Block
After stitching, press each seam to set the stitches. Then press the seam allowances to one side, as directed below.
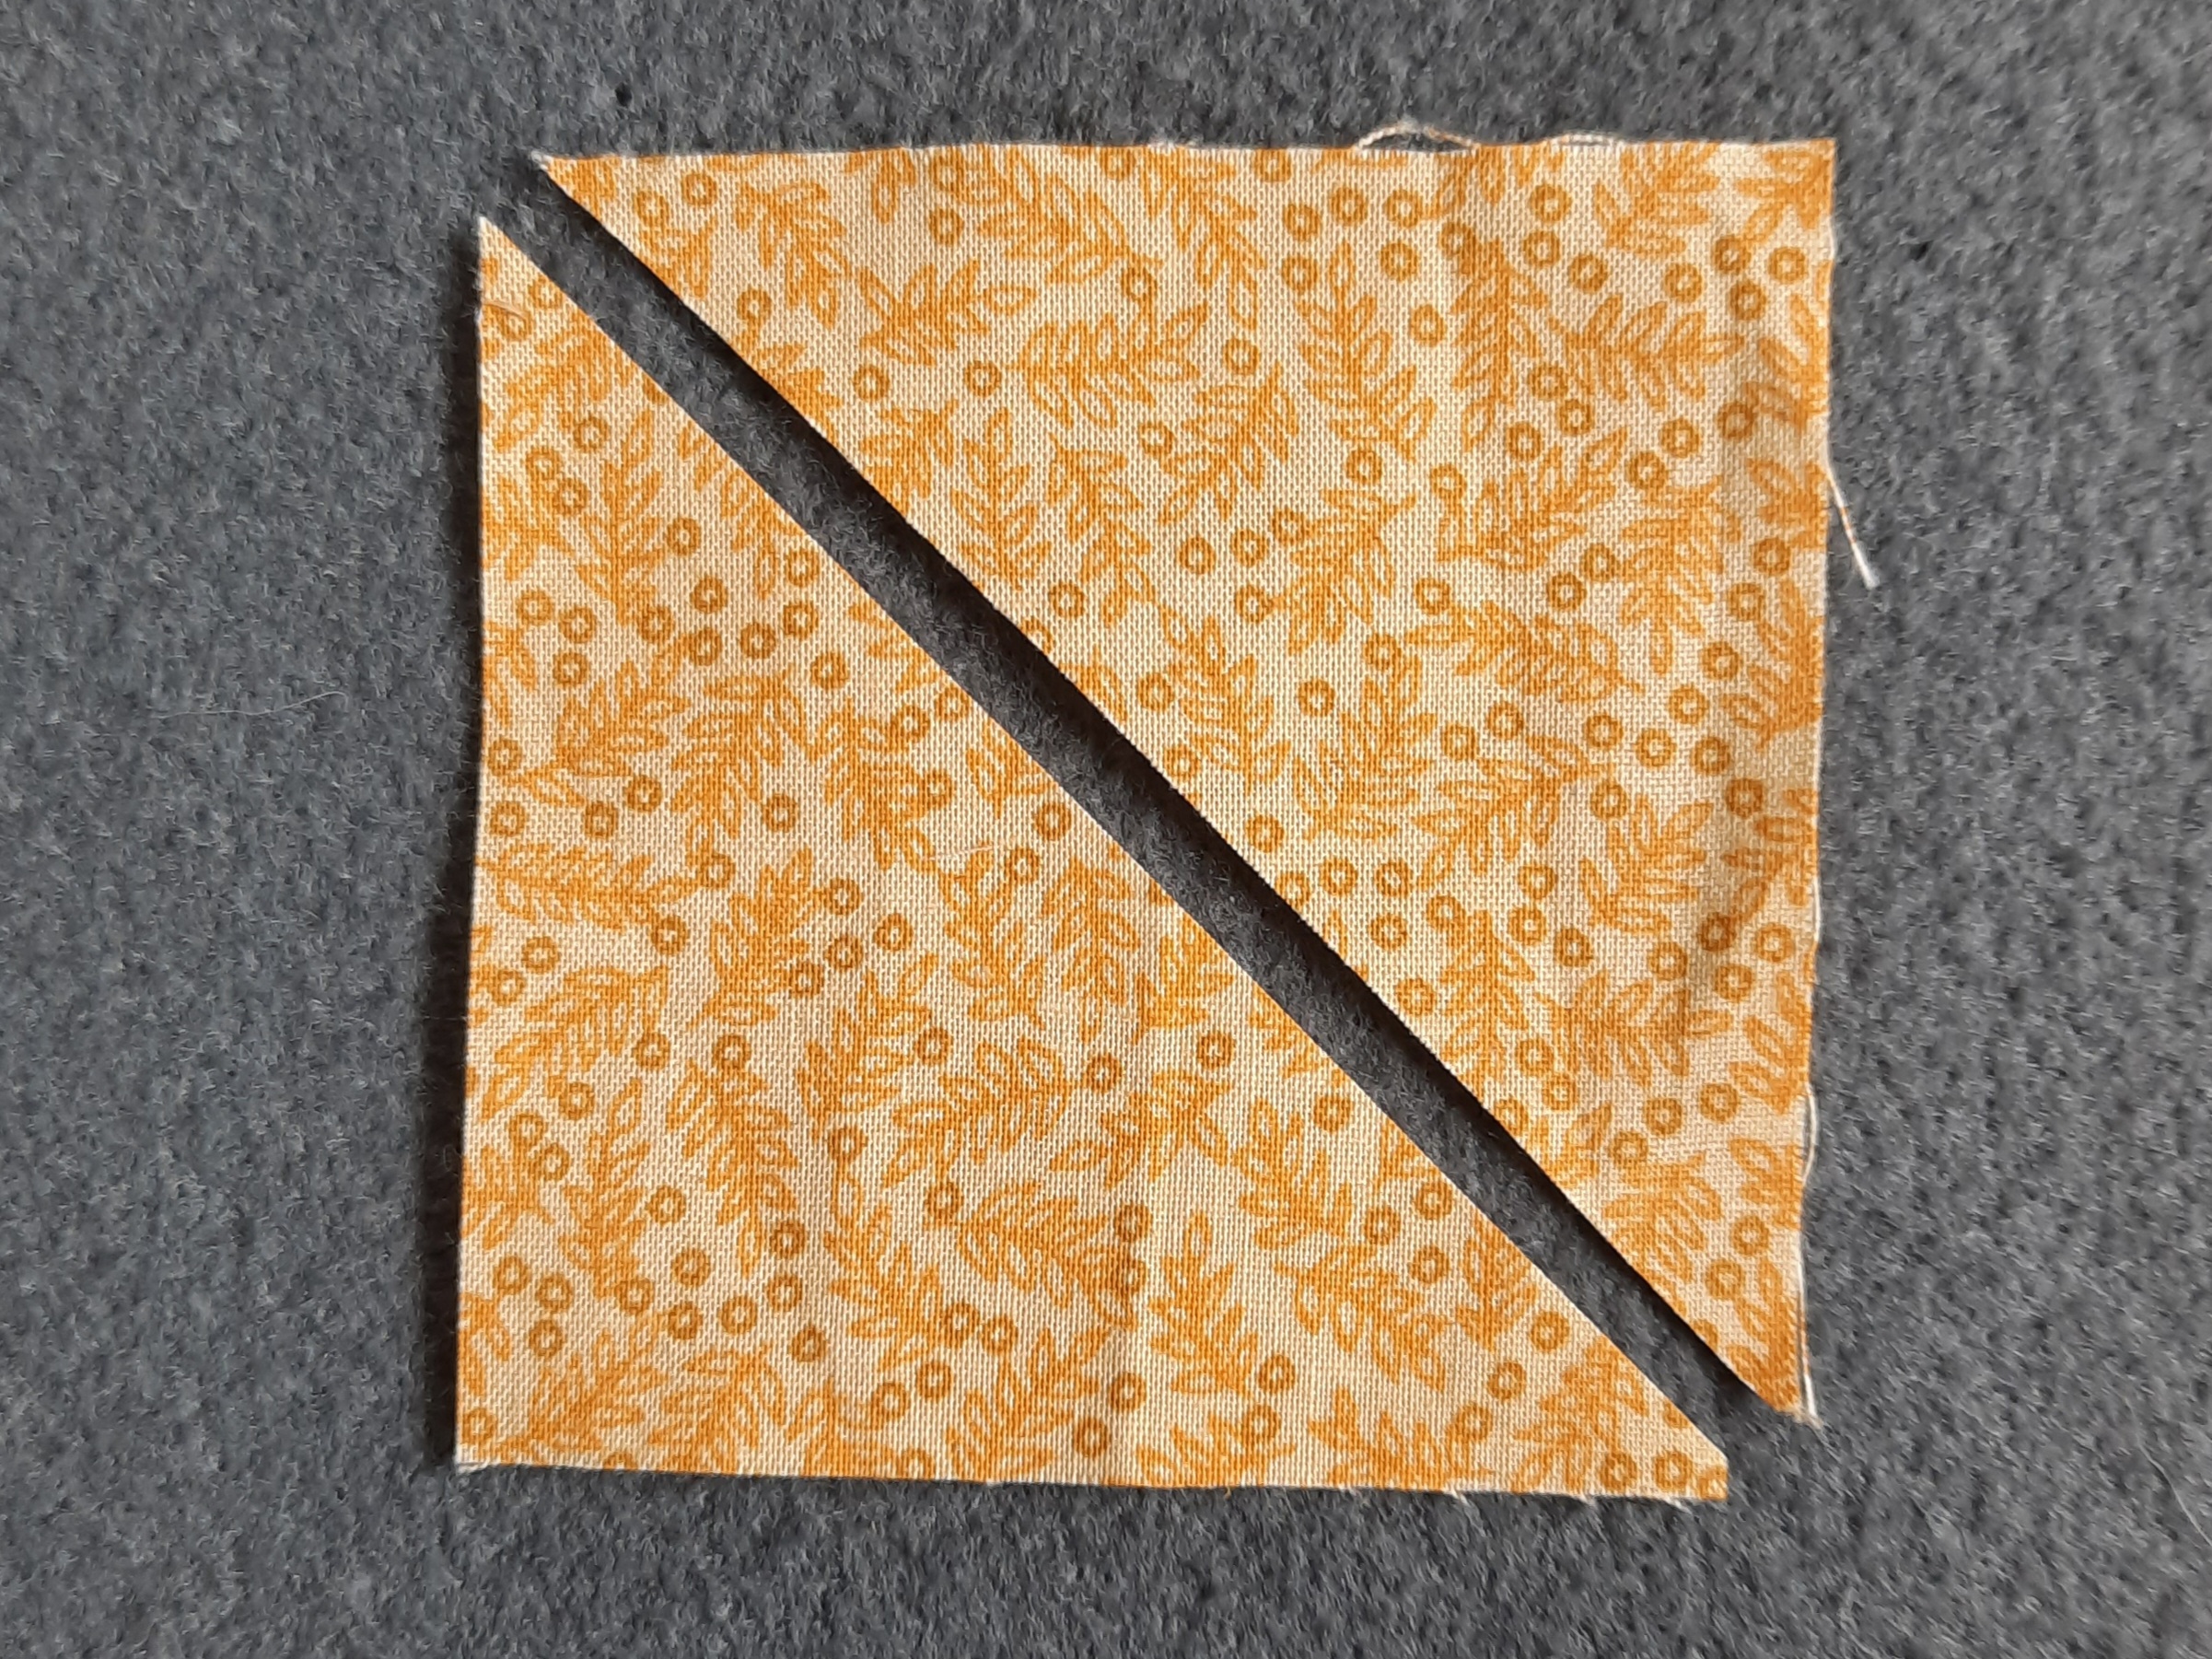
1 Cut each of the darker yellow 2⅞ x 2⅞” squares in half, across the diagonal, to create two medium triangles.
2 Cut each of the 3¼ x 3¼” light yellow/white print squares across the diagonal in both directions, to create four small triangles. Cut each of the 3¼ x 3¼” navy/white print squares in the same way.

3 Stitch one small pale yellow/white print triangle to the left of a small blue print triangle. Press the seam allowances to the blue side.

4 Stitch one small pale yellow/white print triangle to the right of a small blue print triangle. Press the seam allowances to the blue side.

5 Join the unit made in step 3 to a medium dark yellow triangle. Press to the dark yellow side.

6 Join the unit made in step 4 to a medium dark yellow triangle. Press to the dark yellow side.
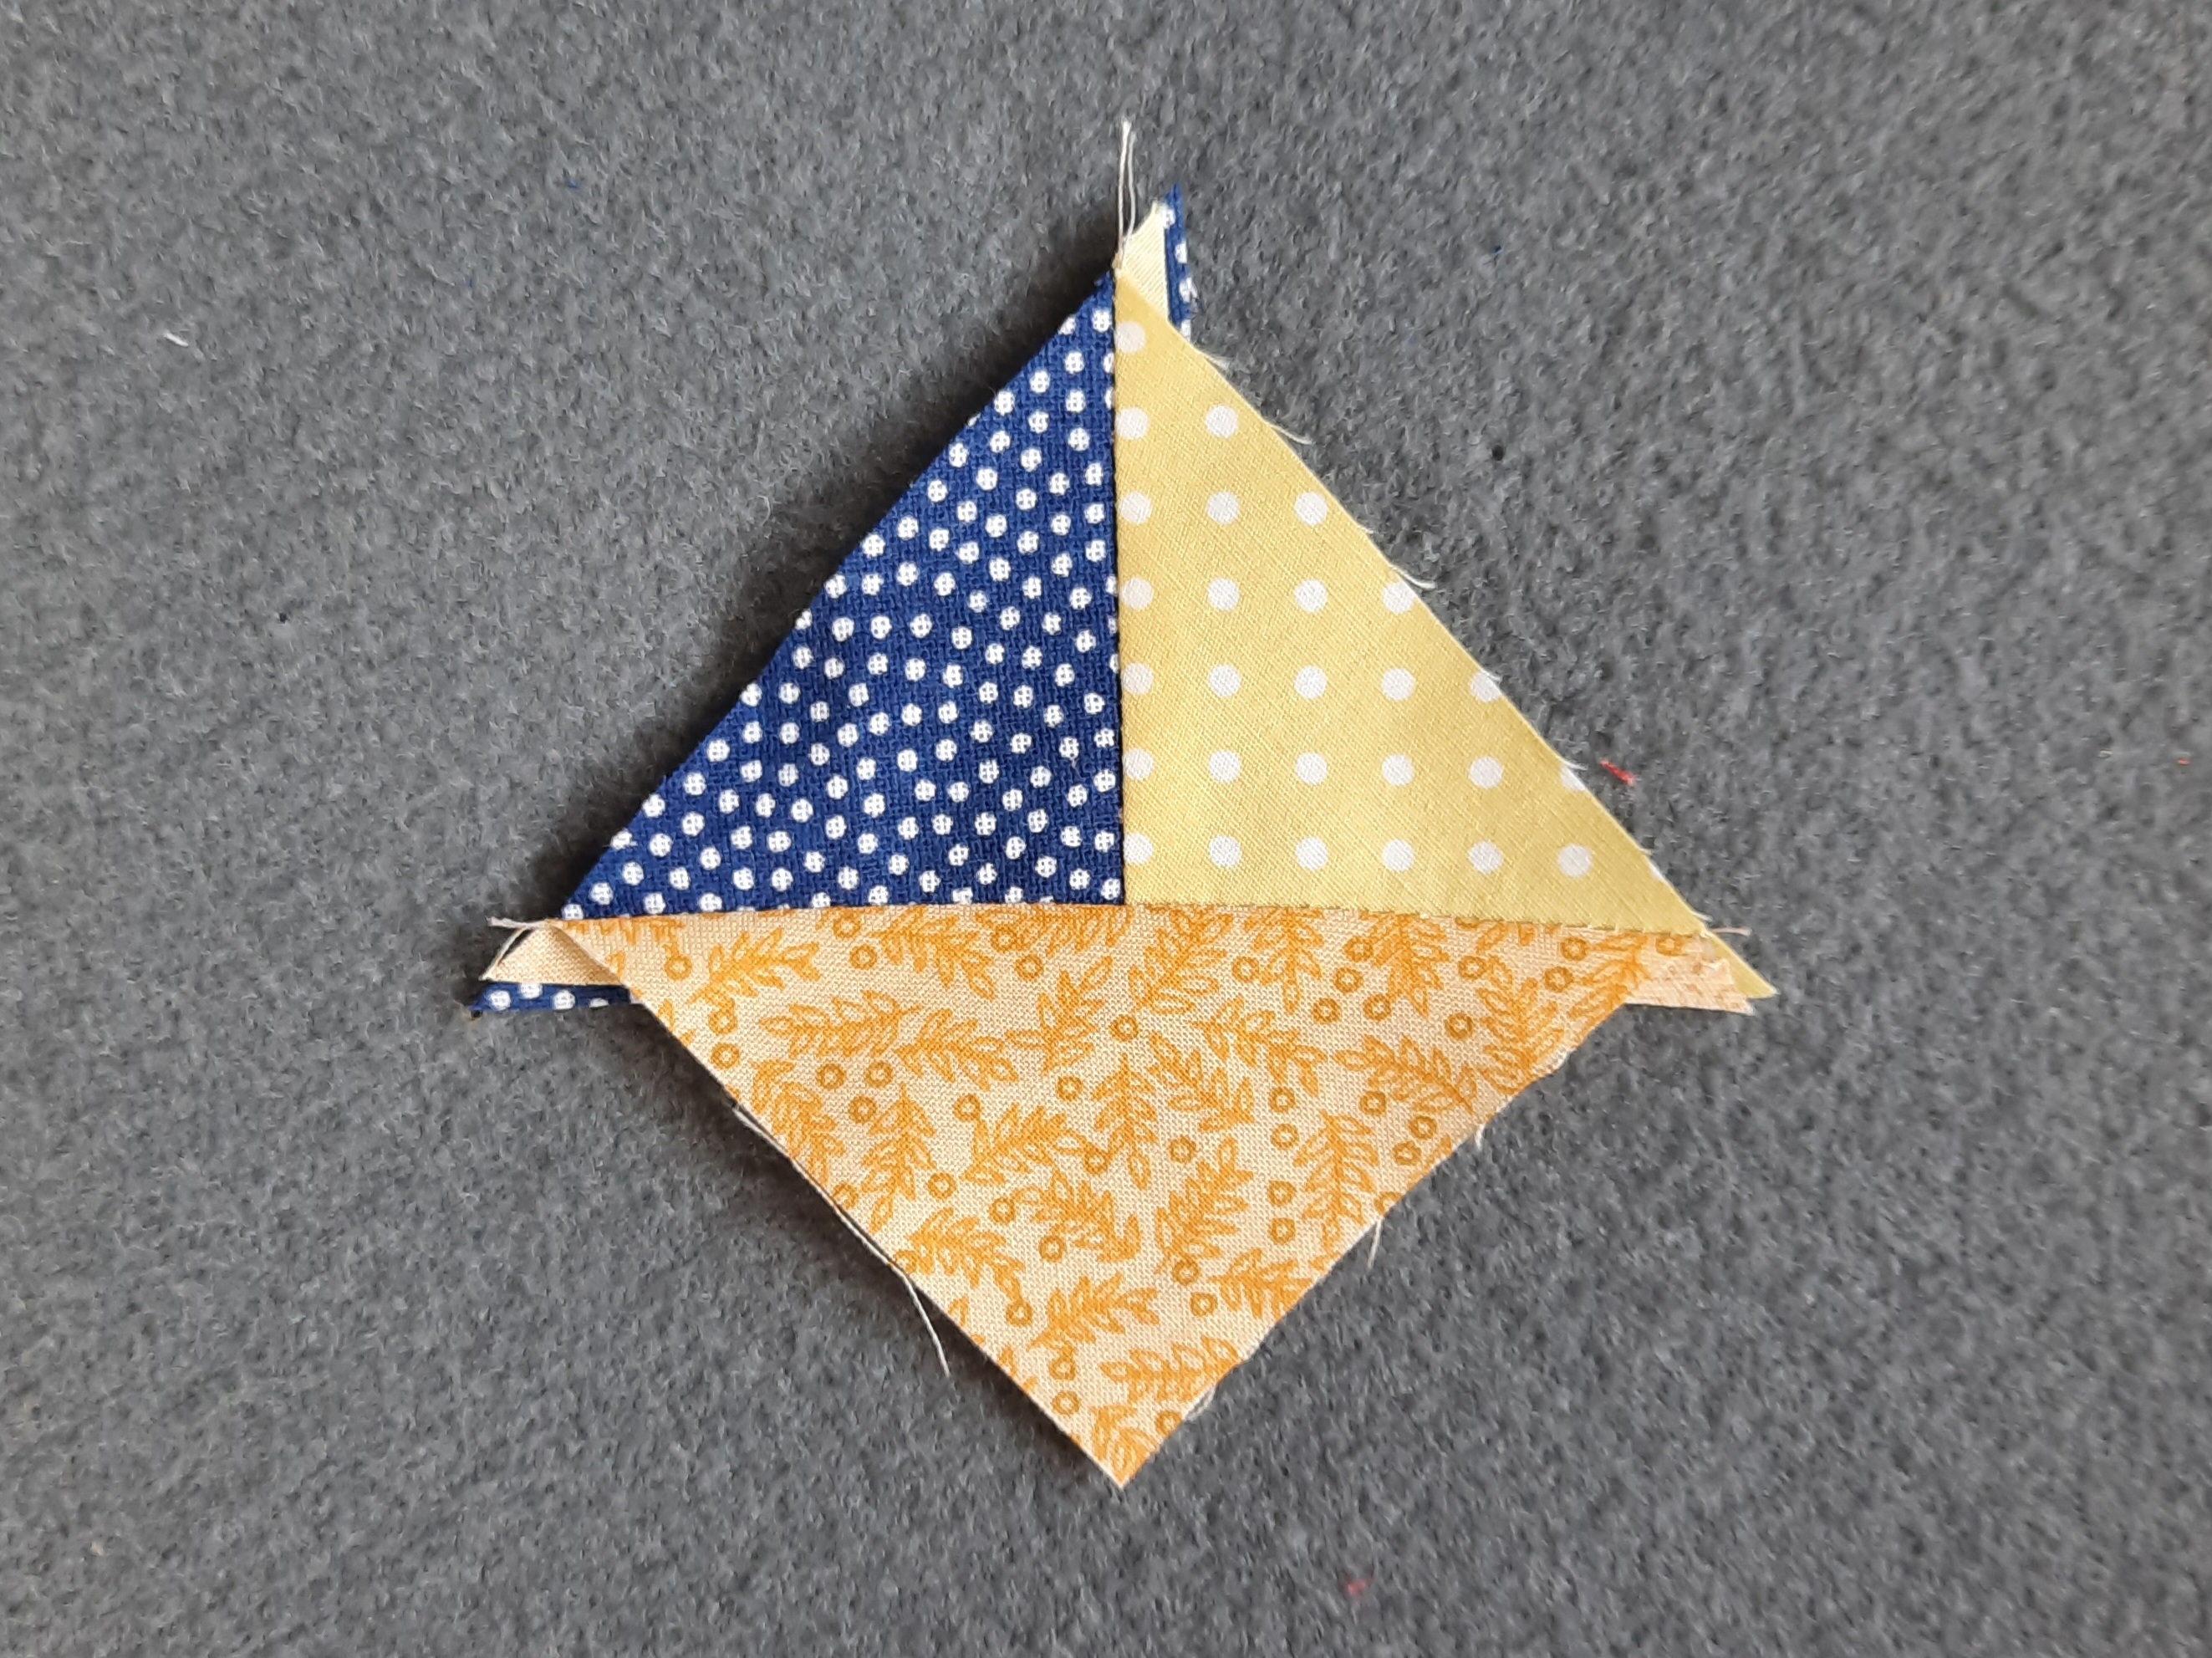
7 Take the unit made in step 5 and join it to the right of a 2½ x 2½” navy/white print square. Press towards the navy square.

8 Take the unit made in step 6 and join it to the left of a darker yellow 2½ x 2½” square. Press towards the darker yellow square.

9 Join the piece made in step 7 to the piece made in step 8. Press towards the navy print square.

10 Join the unit made in step 9 to the left of a 4½ x 2½” navy oblong. Press towards the navy solid.

11 Repeat steps 1-9. Rotate this unit through 90 degrees and join it to the right of the piece completed in step 10. Press towards the navy solid.
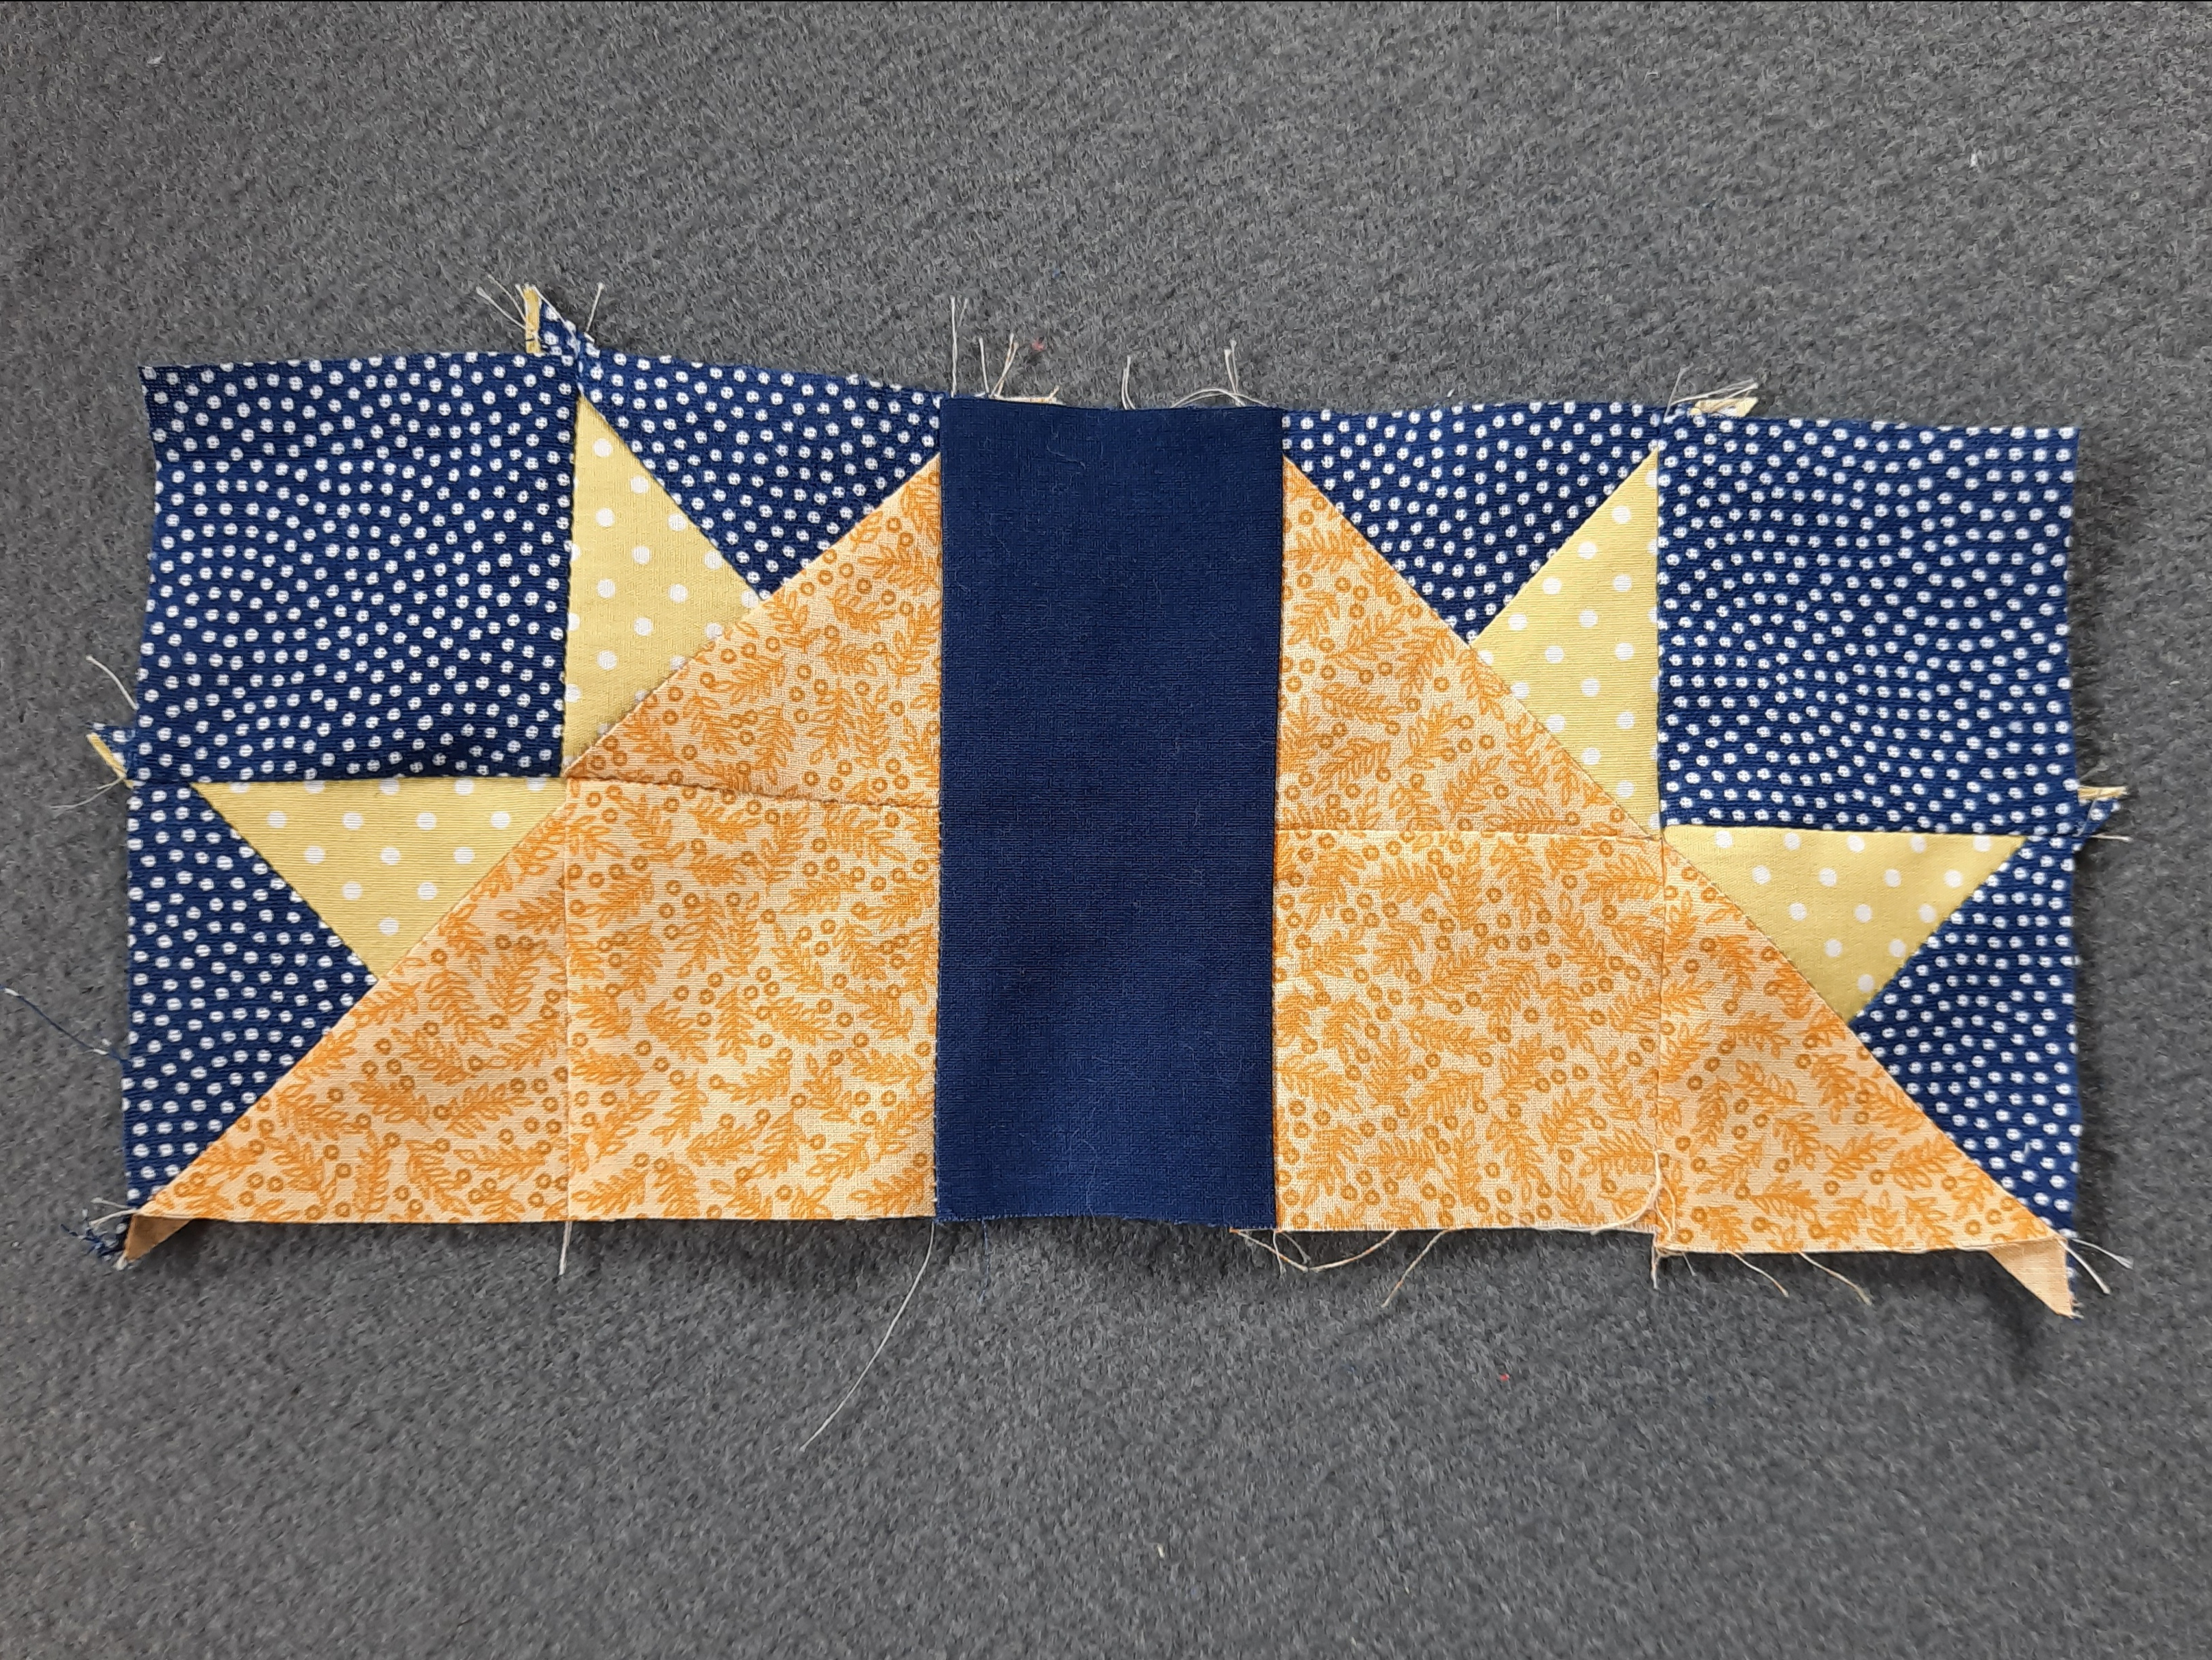
12 Join a 4½ x 2½” navy oblong at the short end to a 2½ x 2½” white/gold print square. Add a second 4½ x 2½” navy solid oblong to the right of the white square. Press towards the navy.

13 Join the unit made in step 12 below the one completed in step 9. Press towards the centre row.

14 Repeat steps 3-11. Rotate the completed unit through 180 degrees.

15 Add the unit made in step 14 below the piece completed in step 13.
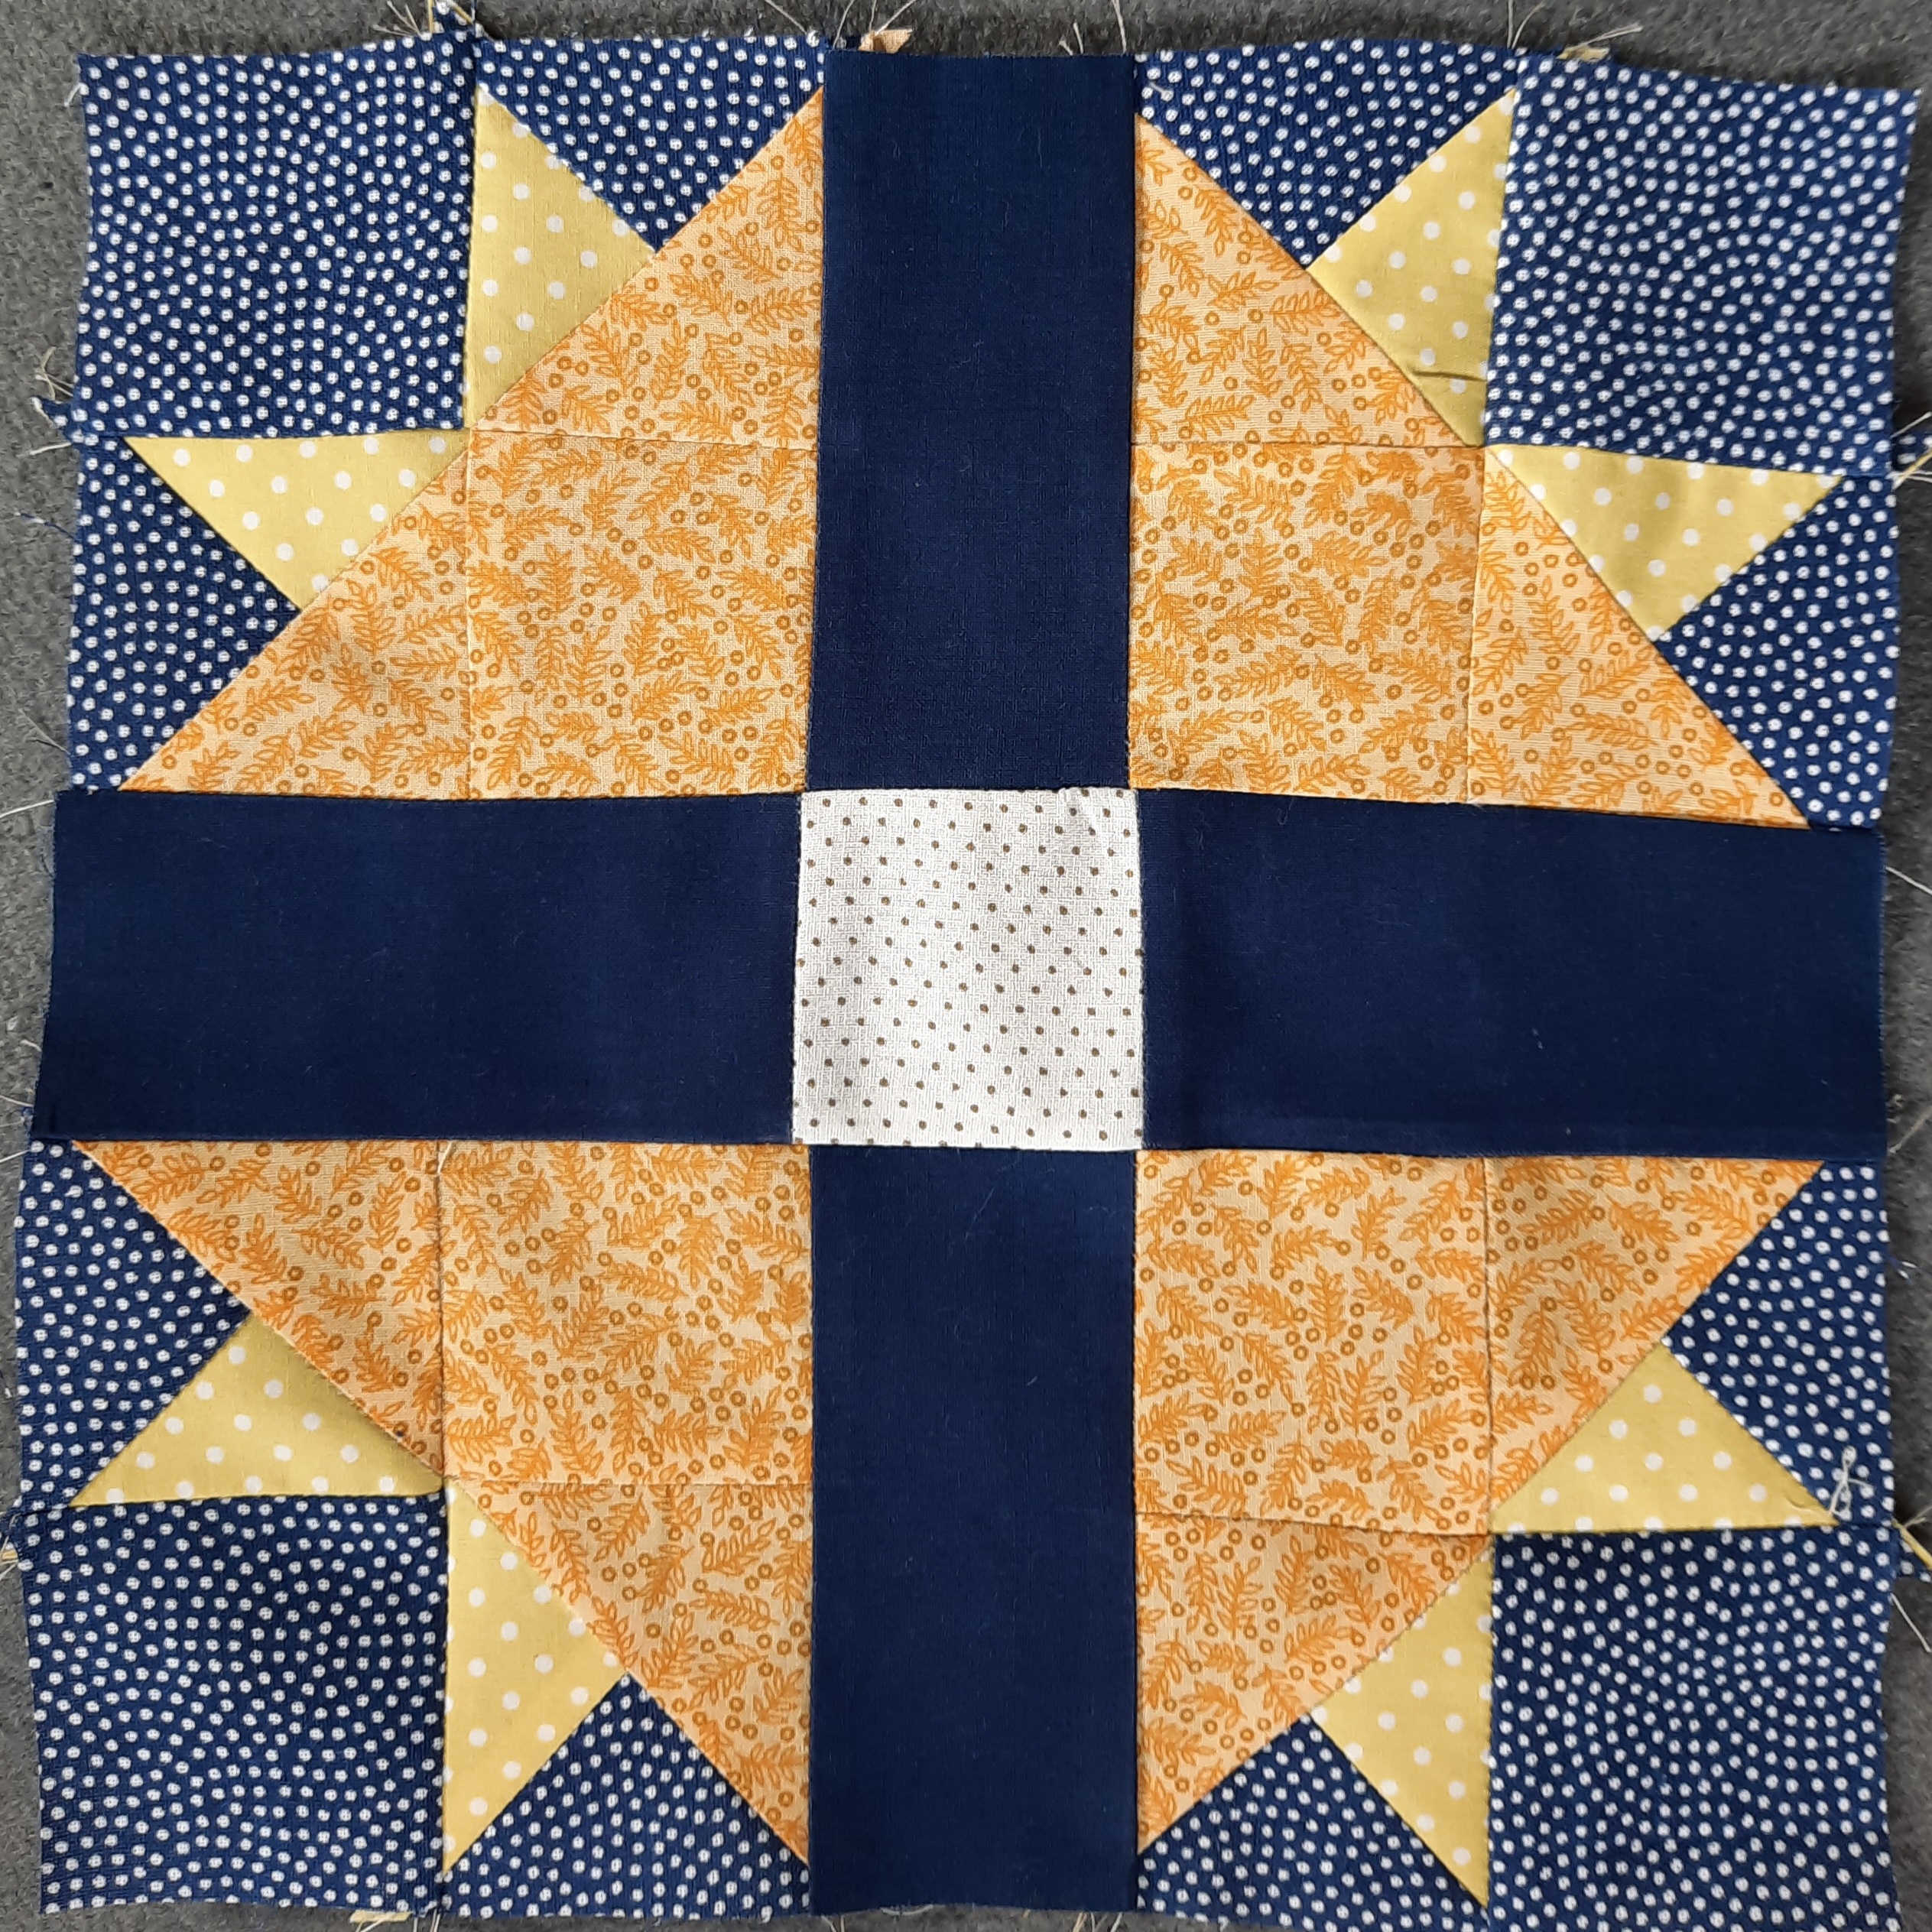
16 Join a navy 10½ x 1½” strip to each side of the patchwork. Press the seam allowances outwards. Join a navy 12½ x 1½” strip to the top and bottom of the patchwork. Press the seam allowances outwards.

Press well and set aside.
Thank you for reading my blog. Quilt patterns are here, Fabrics are here, Classes are here and quilts for sale here
Click the ‘Follow’ button to get a blog-post by email each Monday and click here if you would like the monthly newsletter with design and colour inspiration, etc.
Here is an enjoyable small project that can be used as an upcycling challenge and which is a nice activity to do with older children and young people who are new to sewing. It’s called ‘Pretty Purses’. Each purse has a strip-pieced lining and instructions are given for putting in a zip.

