
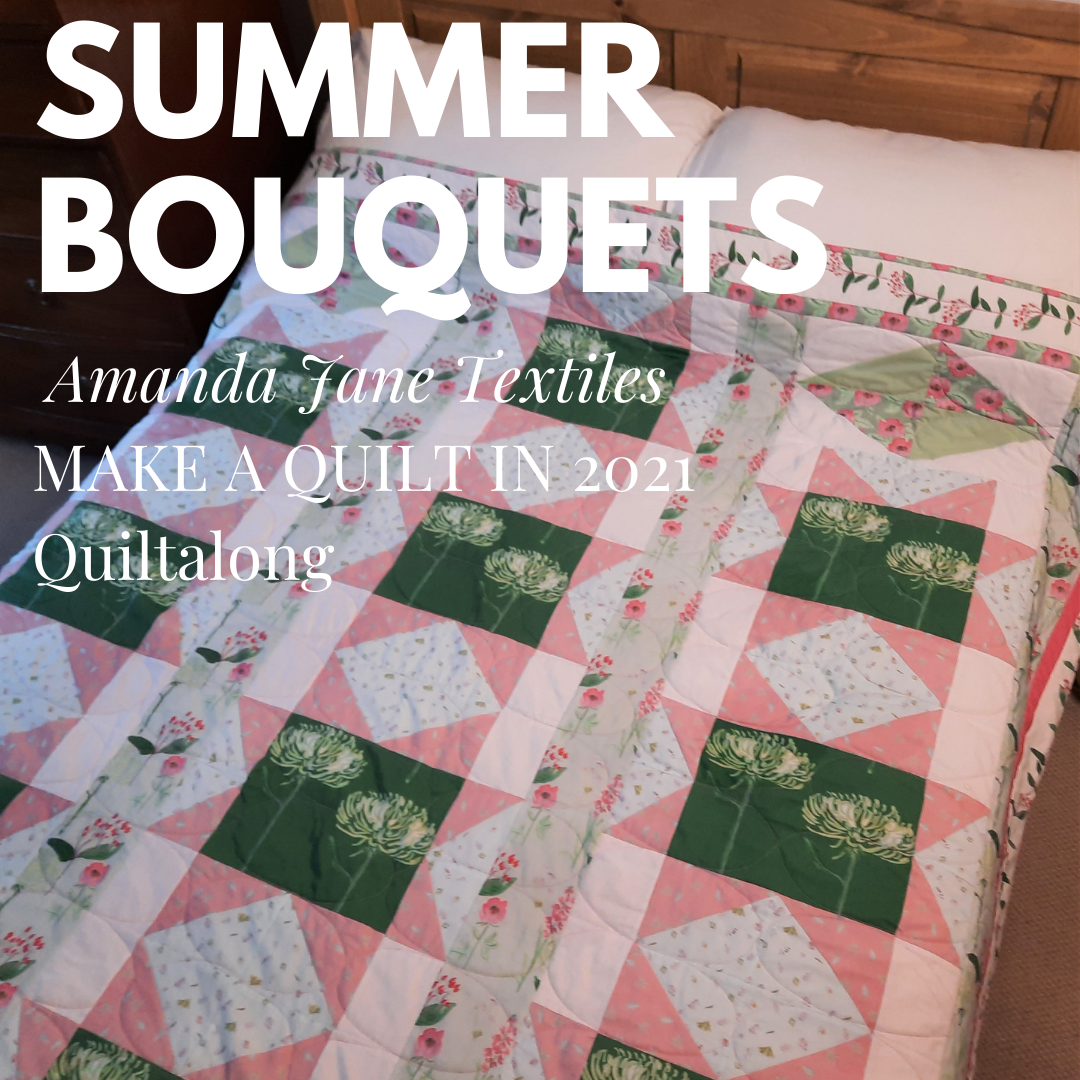
This post is the last of the 2021 ‘Summer Bouquets’ Quiltalong and is all about how (and why) to add a label to your quilt. The plan for the Quiltalong is to complete a double-bed quilt by the end of the year. The fabrics used here are from my own ‘Summer Bouquets’ collection, available from Spoonflower (here).
The starter post with all the fabric requirements is here. The cutting instructions are here. The first block is here. The second block is here. Making the columns is here. Adding the sashing is here. Adding the internal borders is here. Adding the outer borders is here. Layering up the quilt is here Adding the quilting is here. Finishing and stitching on the binding is here.
There are very good reasons for adding a label to a quilt. In the past, quilts were usually made by women and were unsigned and undated. They were works of art, full of colour, craftsmanship, intentional design and beauty – often with no reference to their maker. In the collection of The Quilters’ Guild of the British Isles, the oldest dated quilt was completed in 1718. It is know as the ‘The 1718 Coverlet’ and can be seen in here
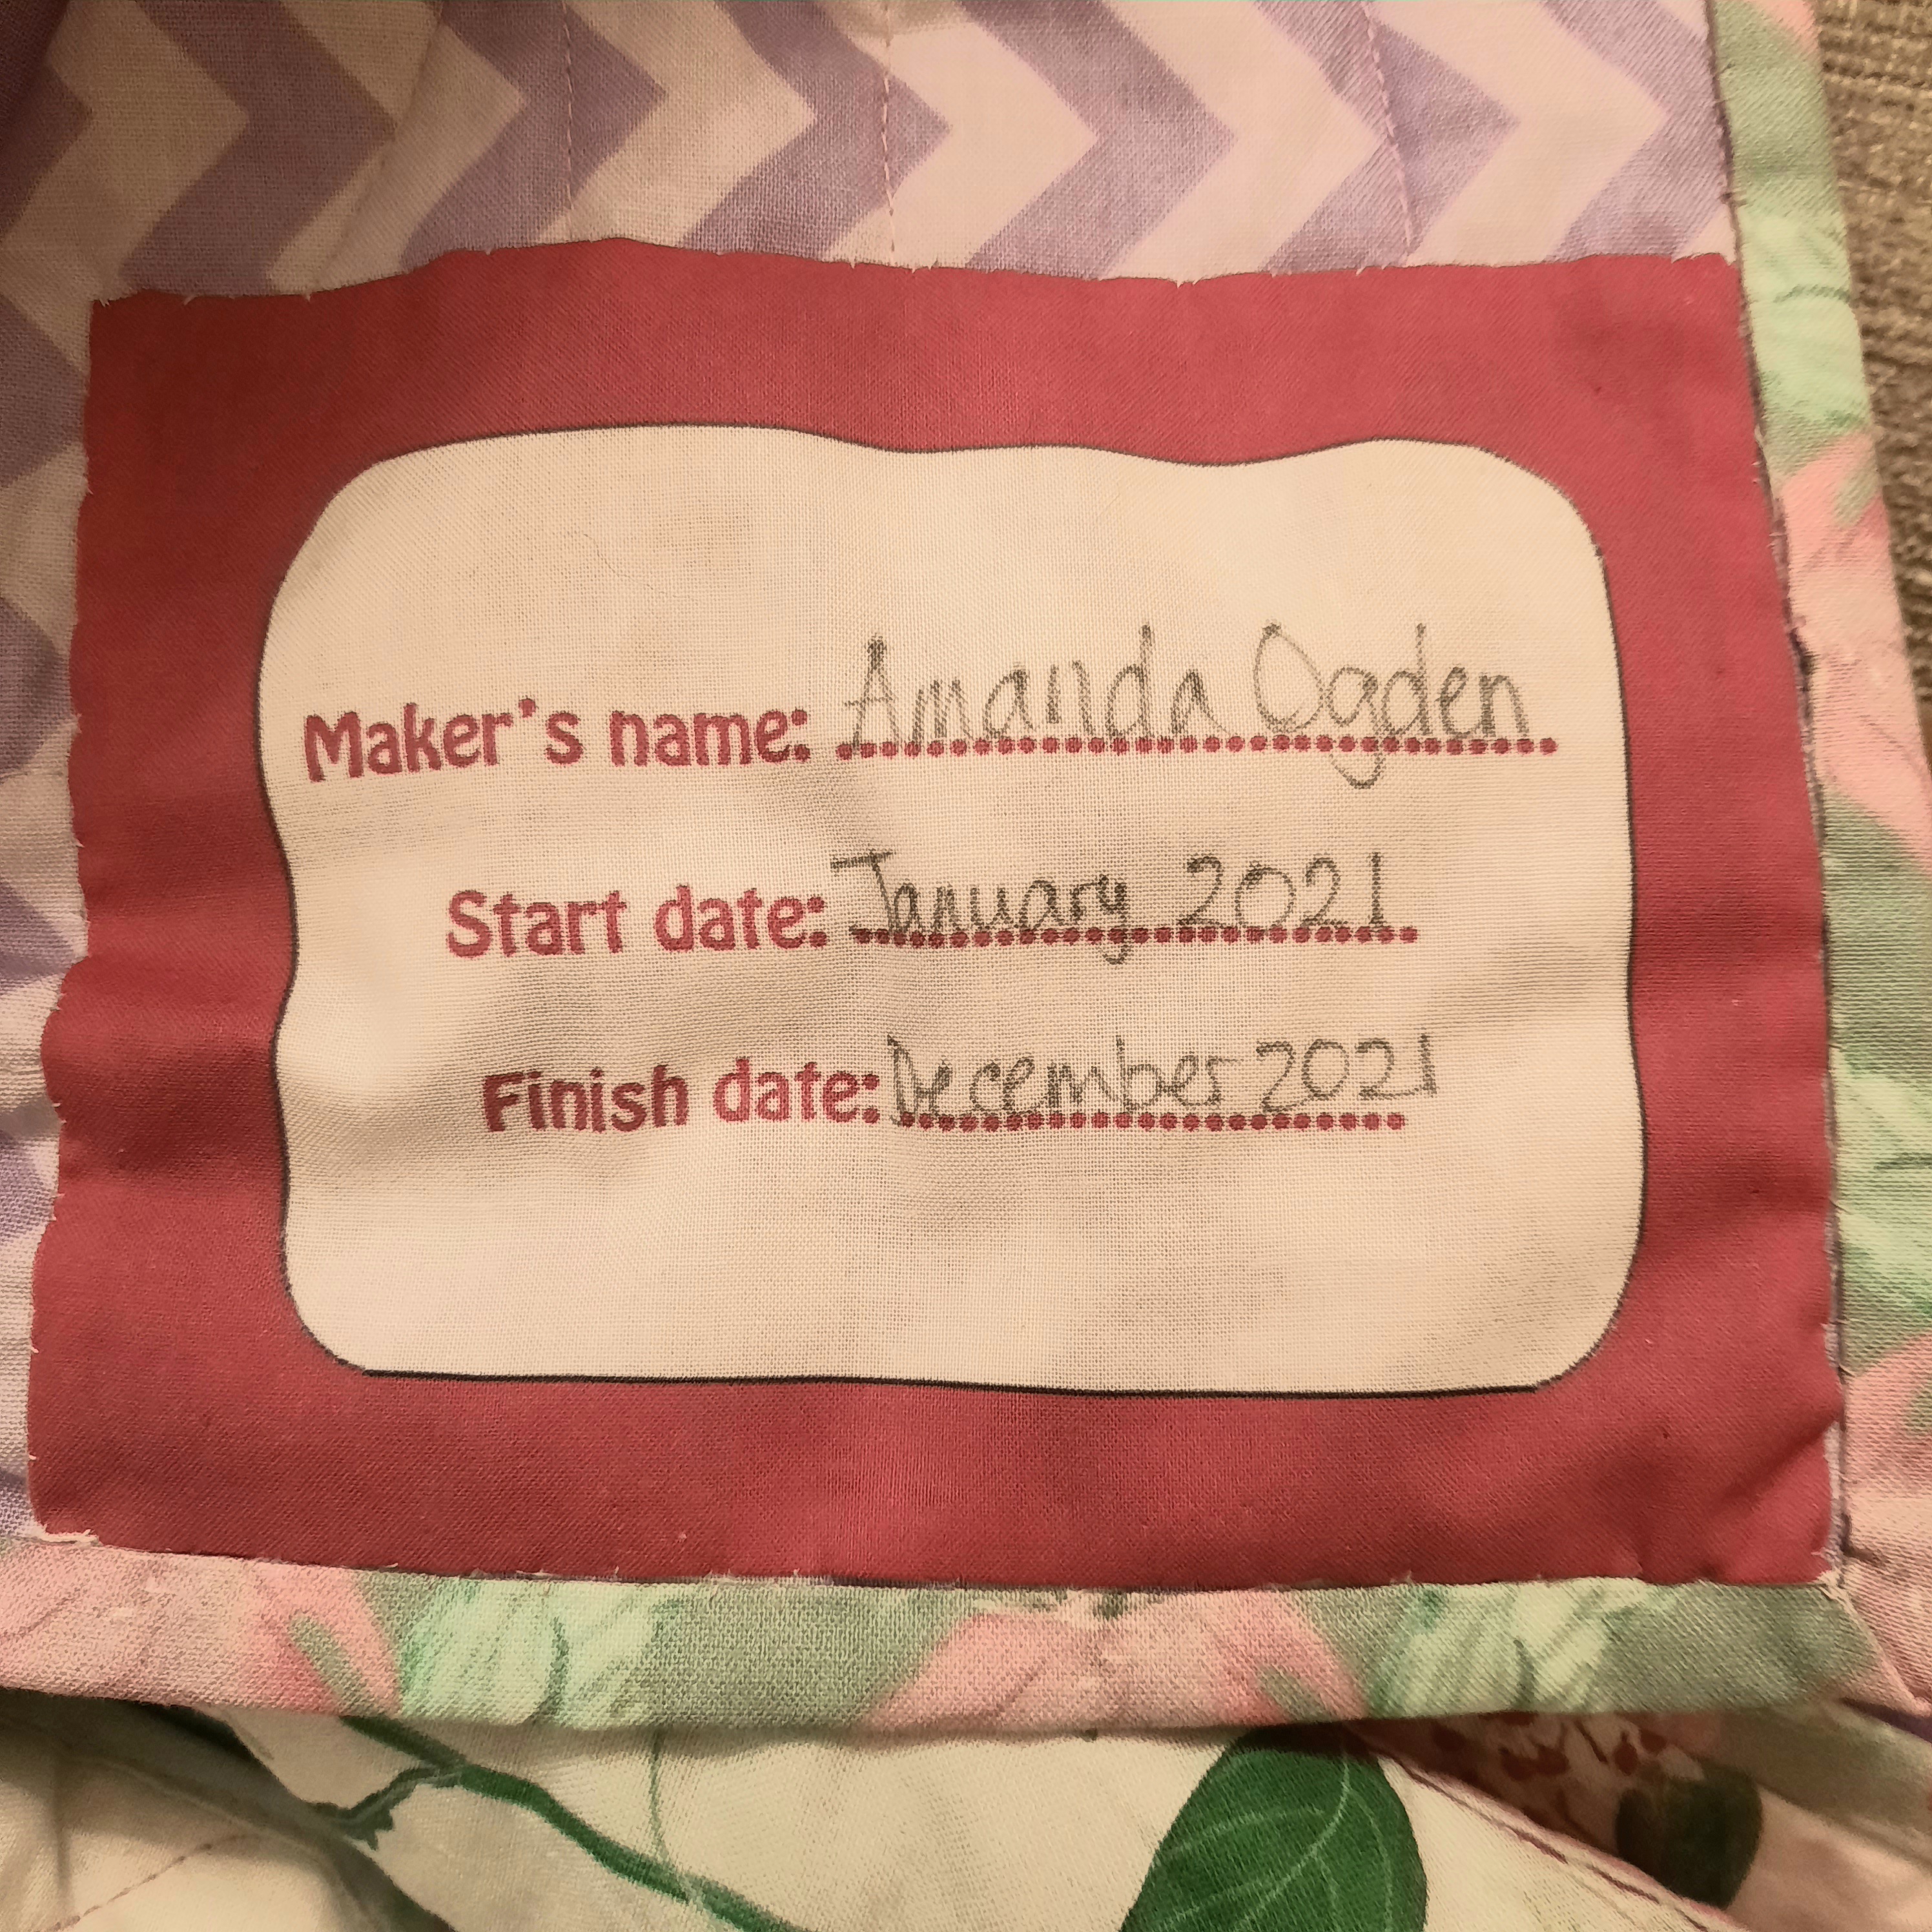
The quilt you make might also last 300 years! A lot of work goes into a quilt, so it makes sense to add your name and the date to the back. You might also choose to include information about the occasion for which the quilt was made: a new baby, a marriage, a significant birthday, for example. So, a label should be added to the ‘Summer Bouquets’ quilt.
I have designed two sets of quilt labels (so far). This is ‘Creature Families Quilt Labels’, available here These labels give you space to add your own wording.

This design is just called ‘Quilt Labels’. It’s available here

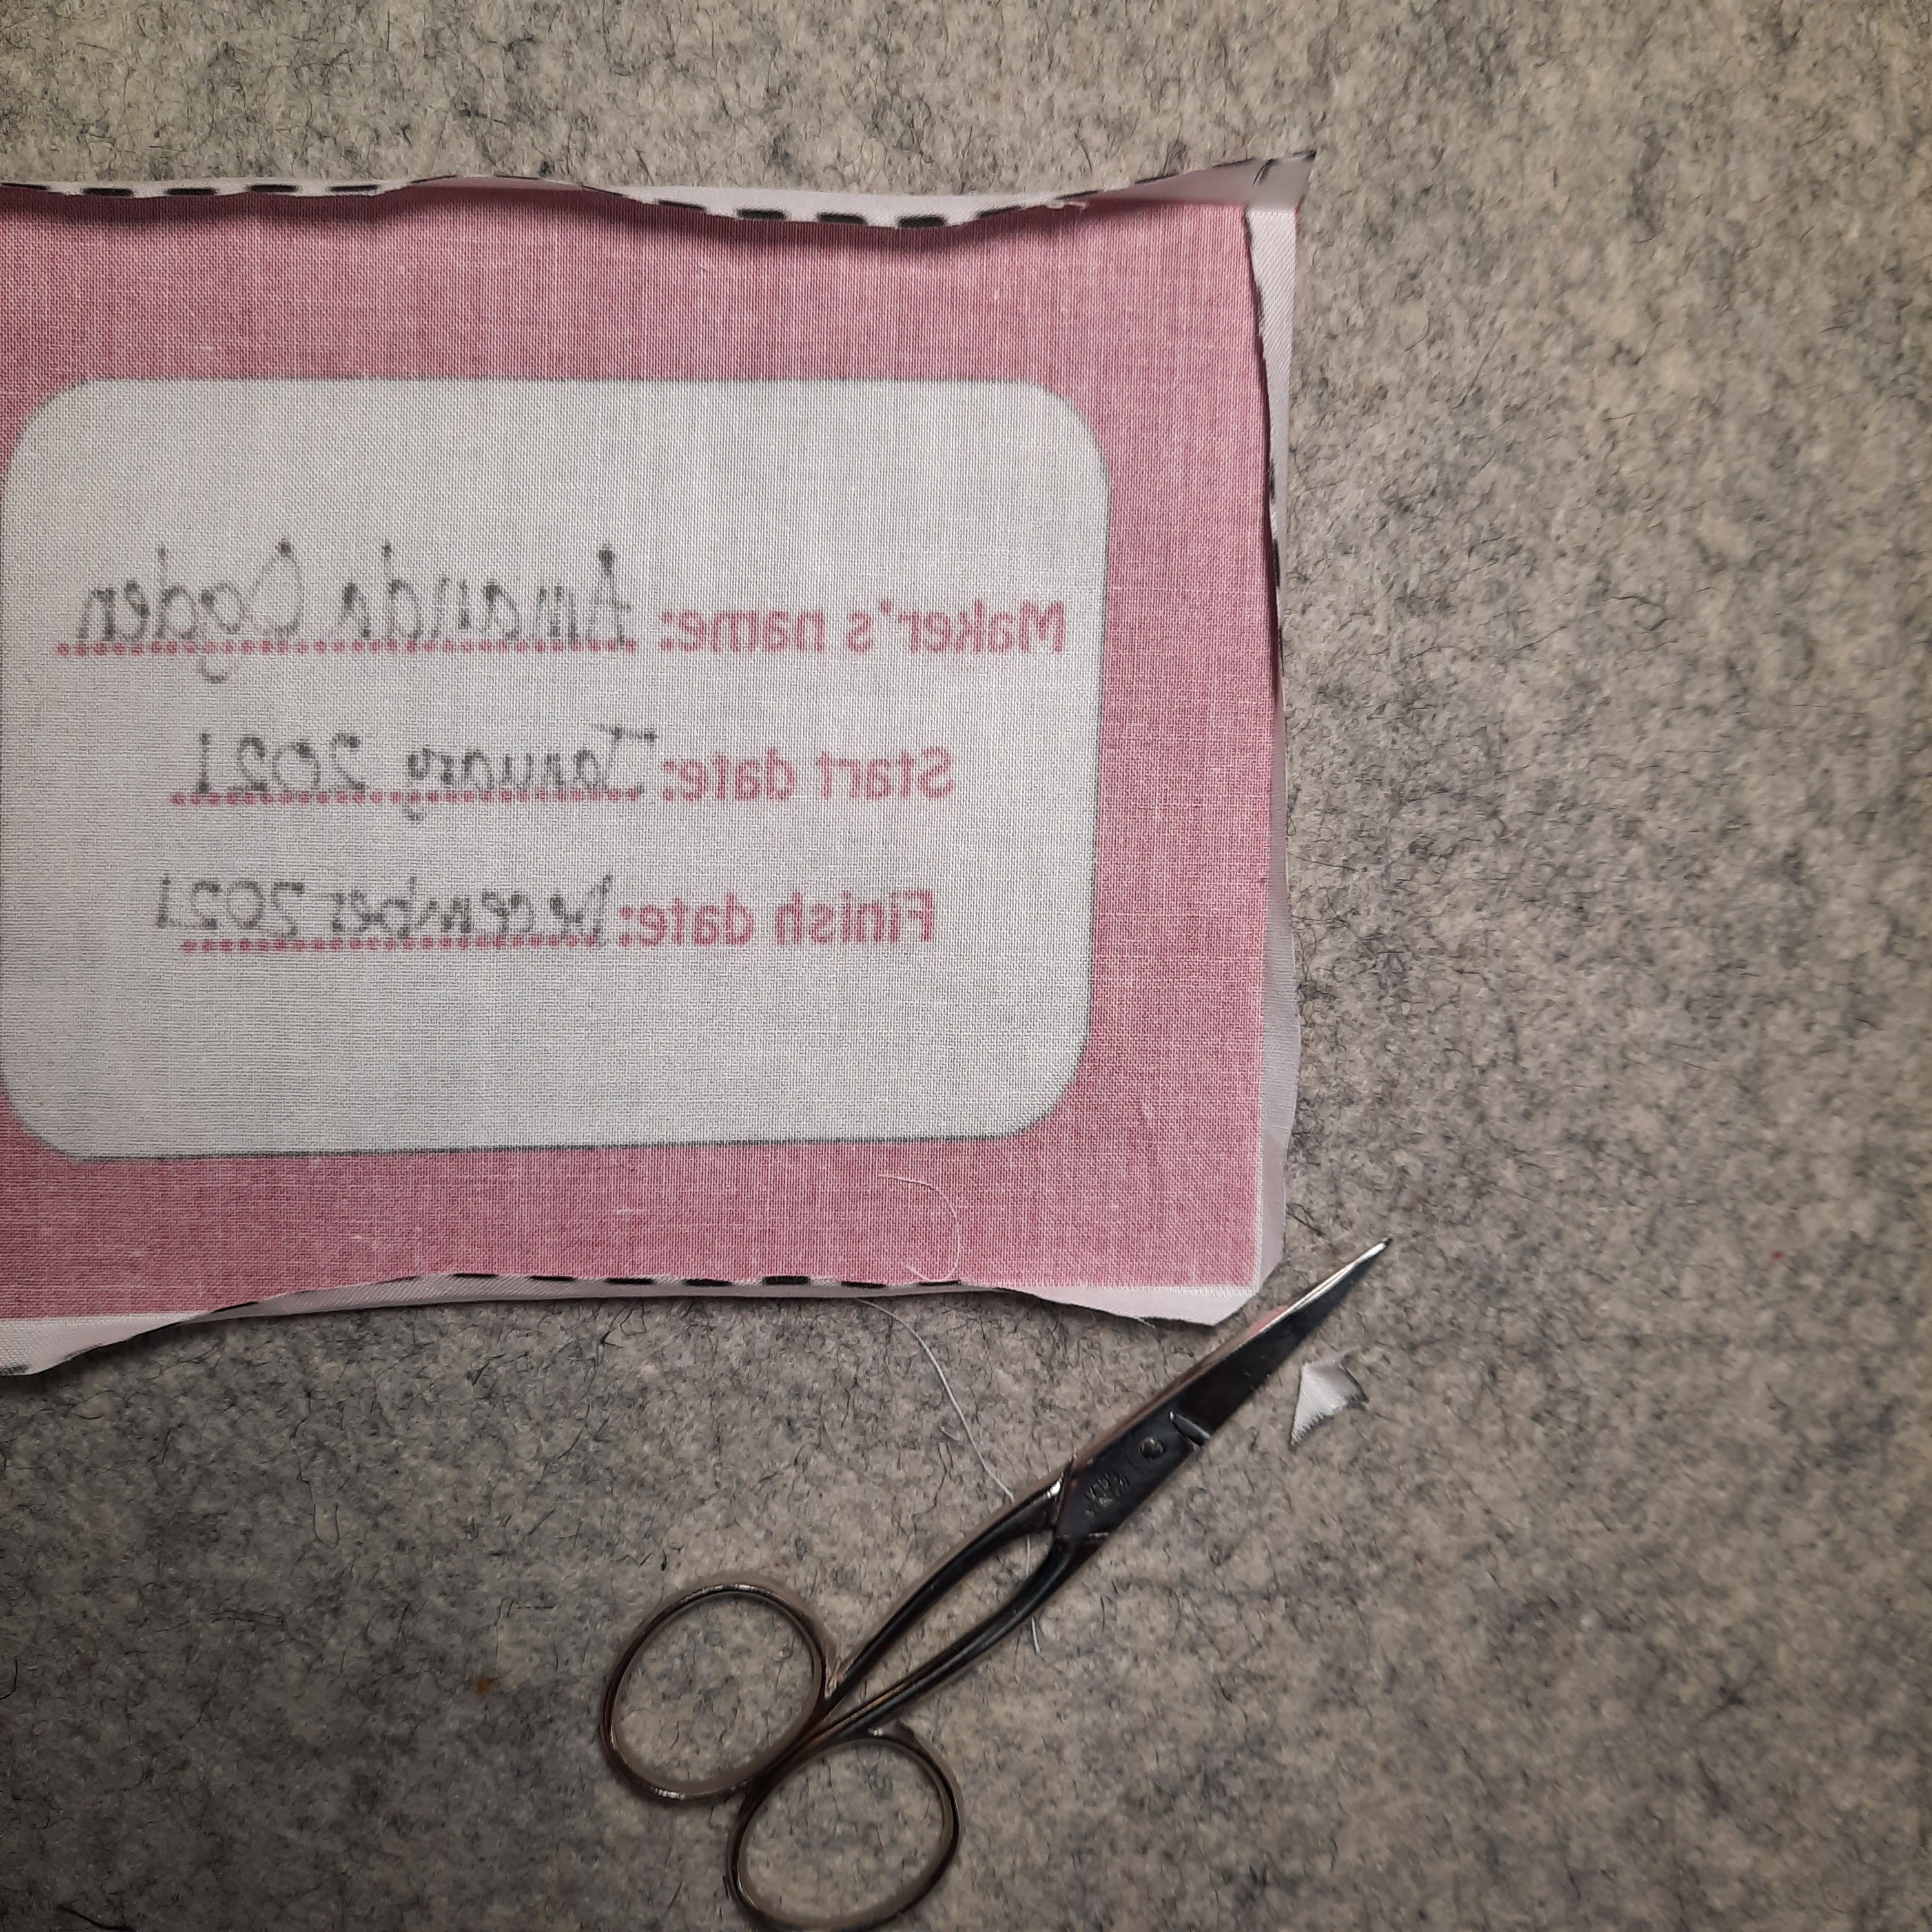
I chose the label on the bottom right for the ‘Summer Bouquets’ quilt (the eight labels shown fit on a fat quarter).
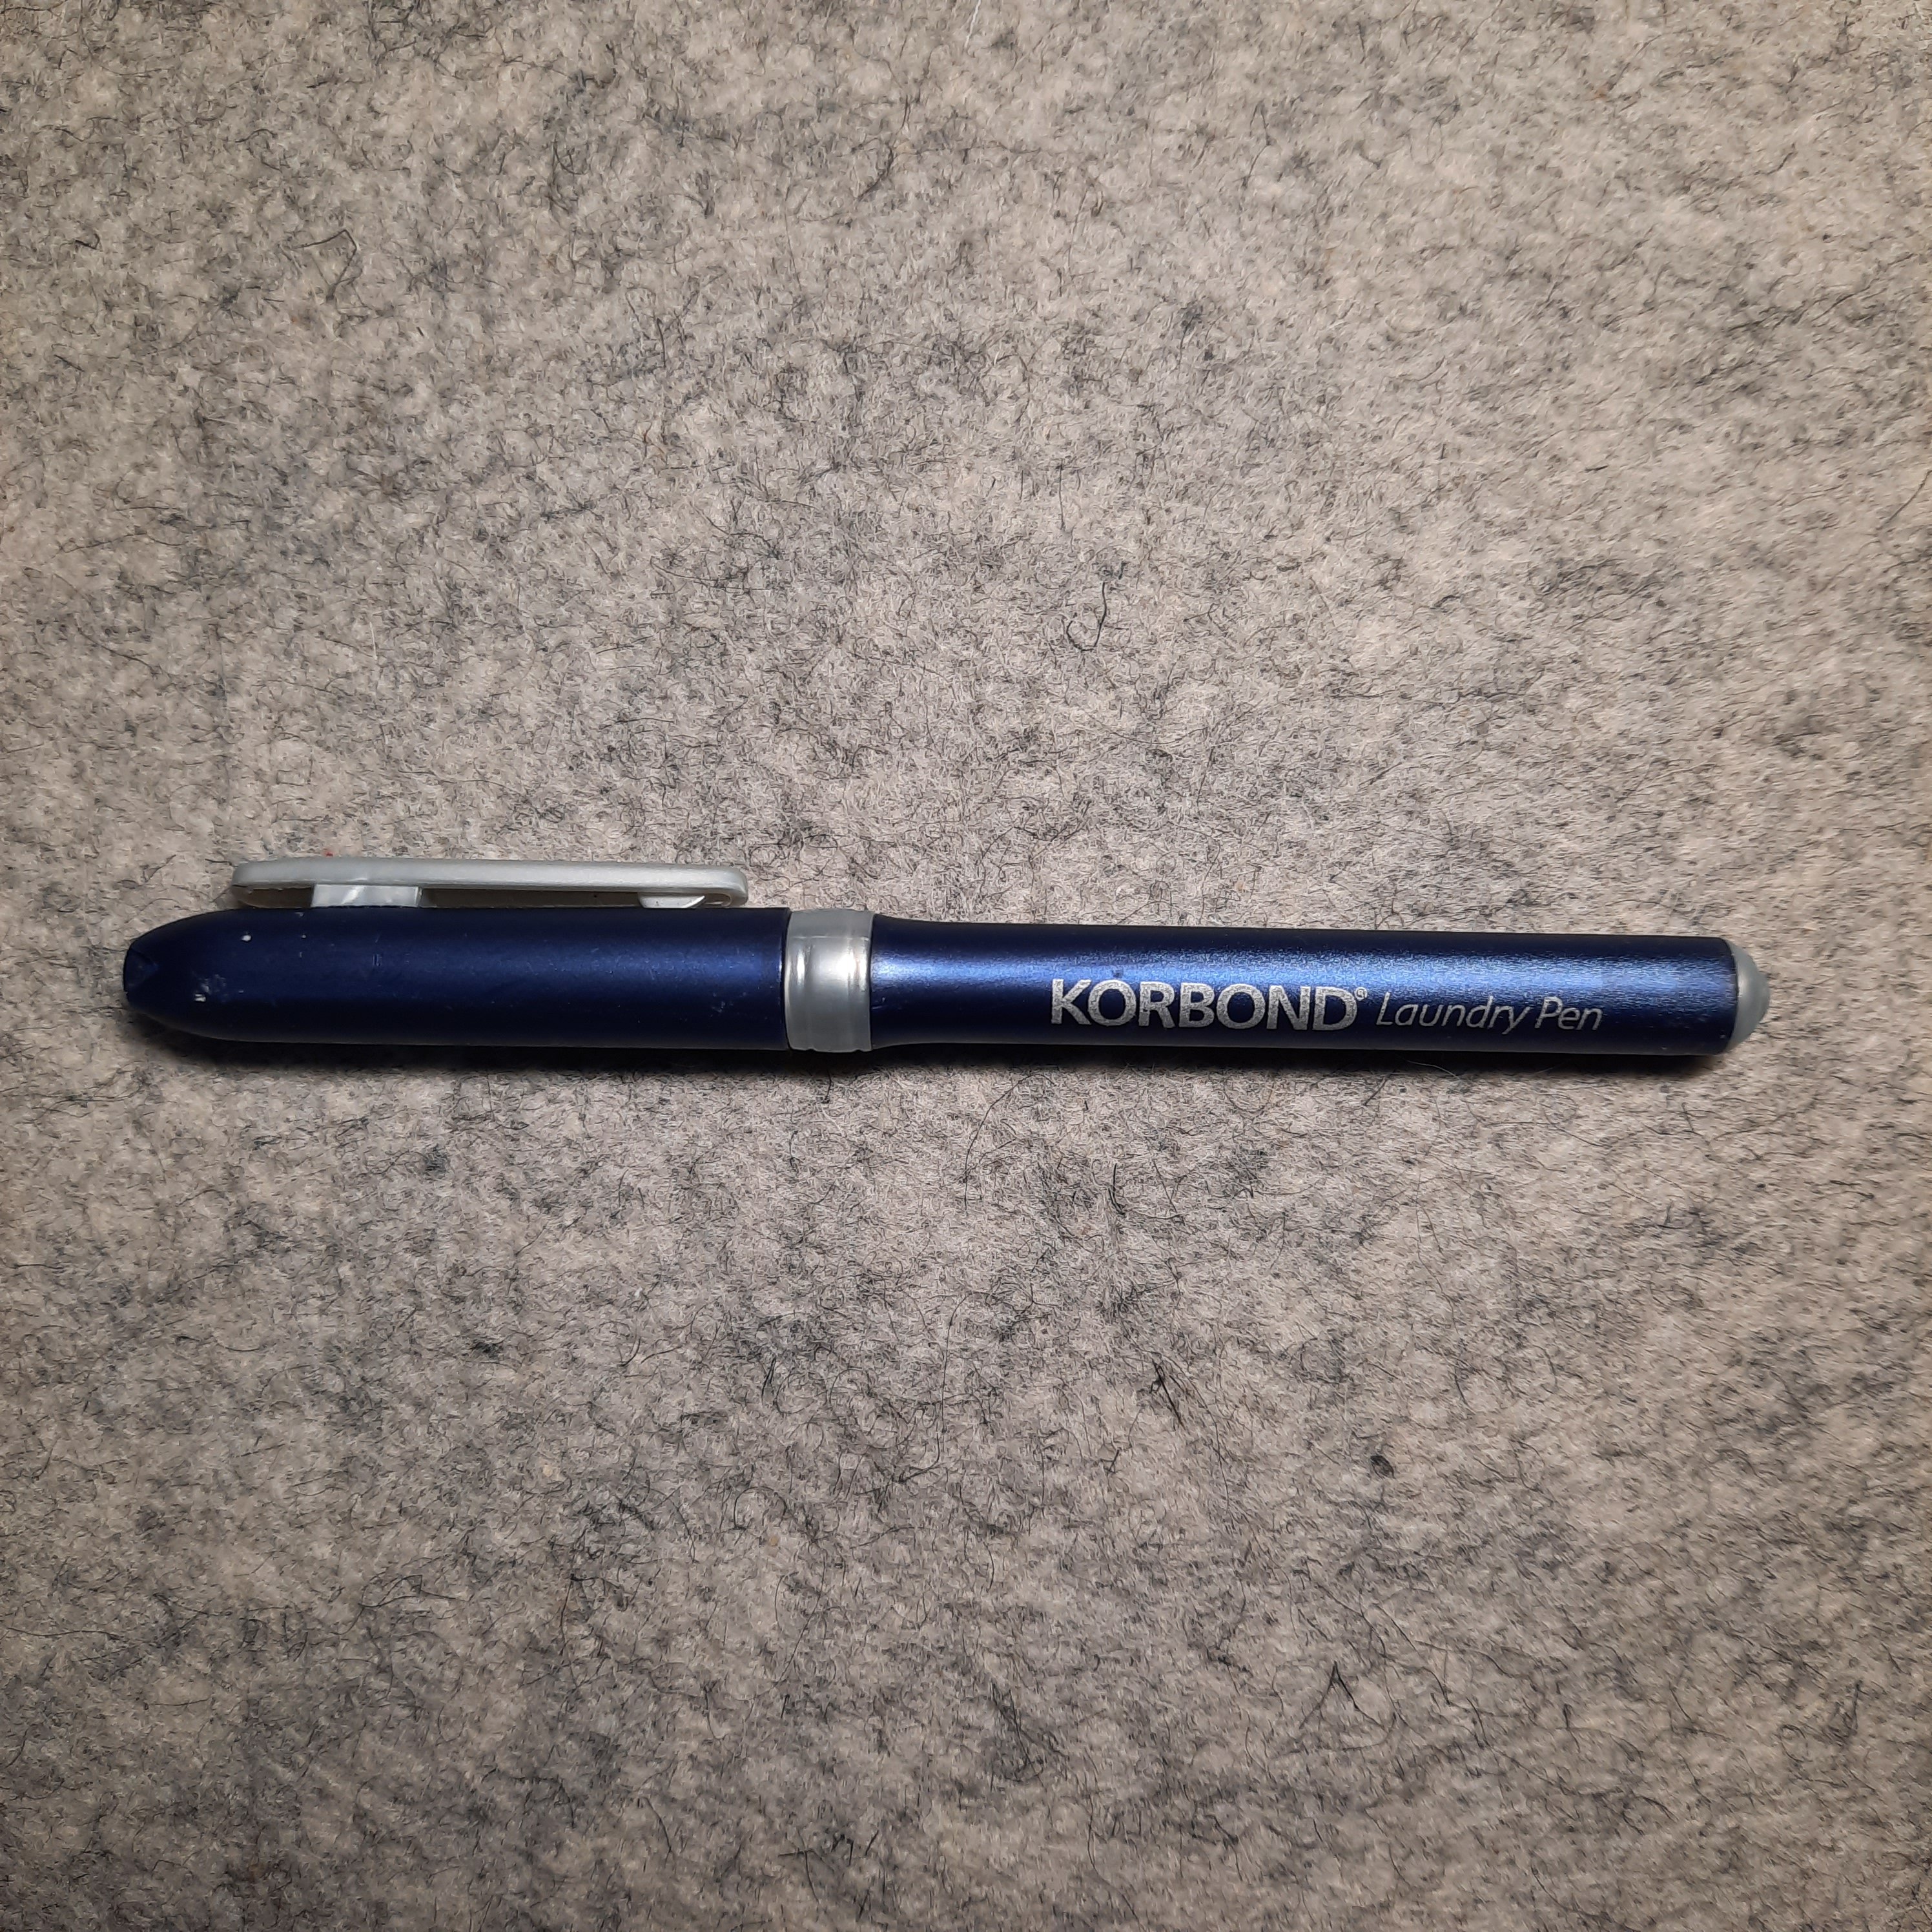
You will need a permanent pen for marking fabric like this one, described as a ‘laundry pen’:
1 Cut out the label. Write on your information, placing some protective scrap paper under the fabric (these pens will permanently mark anything!) Use an iron to fix the ink.

2 Fold under each edge of the label, as far as the beginning of the coloured area and press with a hot iron. Do the two opposite short sides first, then do the other two. The corners will fold over each other as shown in the photo.

3 Open out each folded corner and snip across the corner as shown. Repeat on the other three corners. Re-fold the sides and press in.
4 Pin the label to the quilt. For the ‘Summer Bouquets’ quilt, I have placed it in the bottom right-hand corner of the back, just inside the binding.

5 Stitch the label to the quilt back with a slip stitch. Secure your thread, then take a small stitch in the backing fabric.
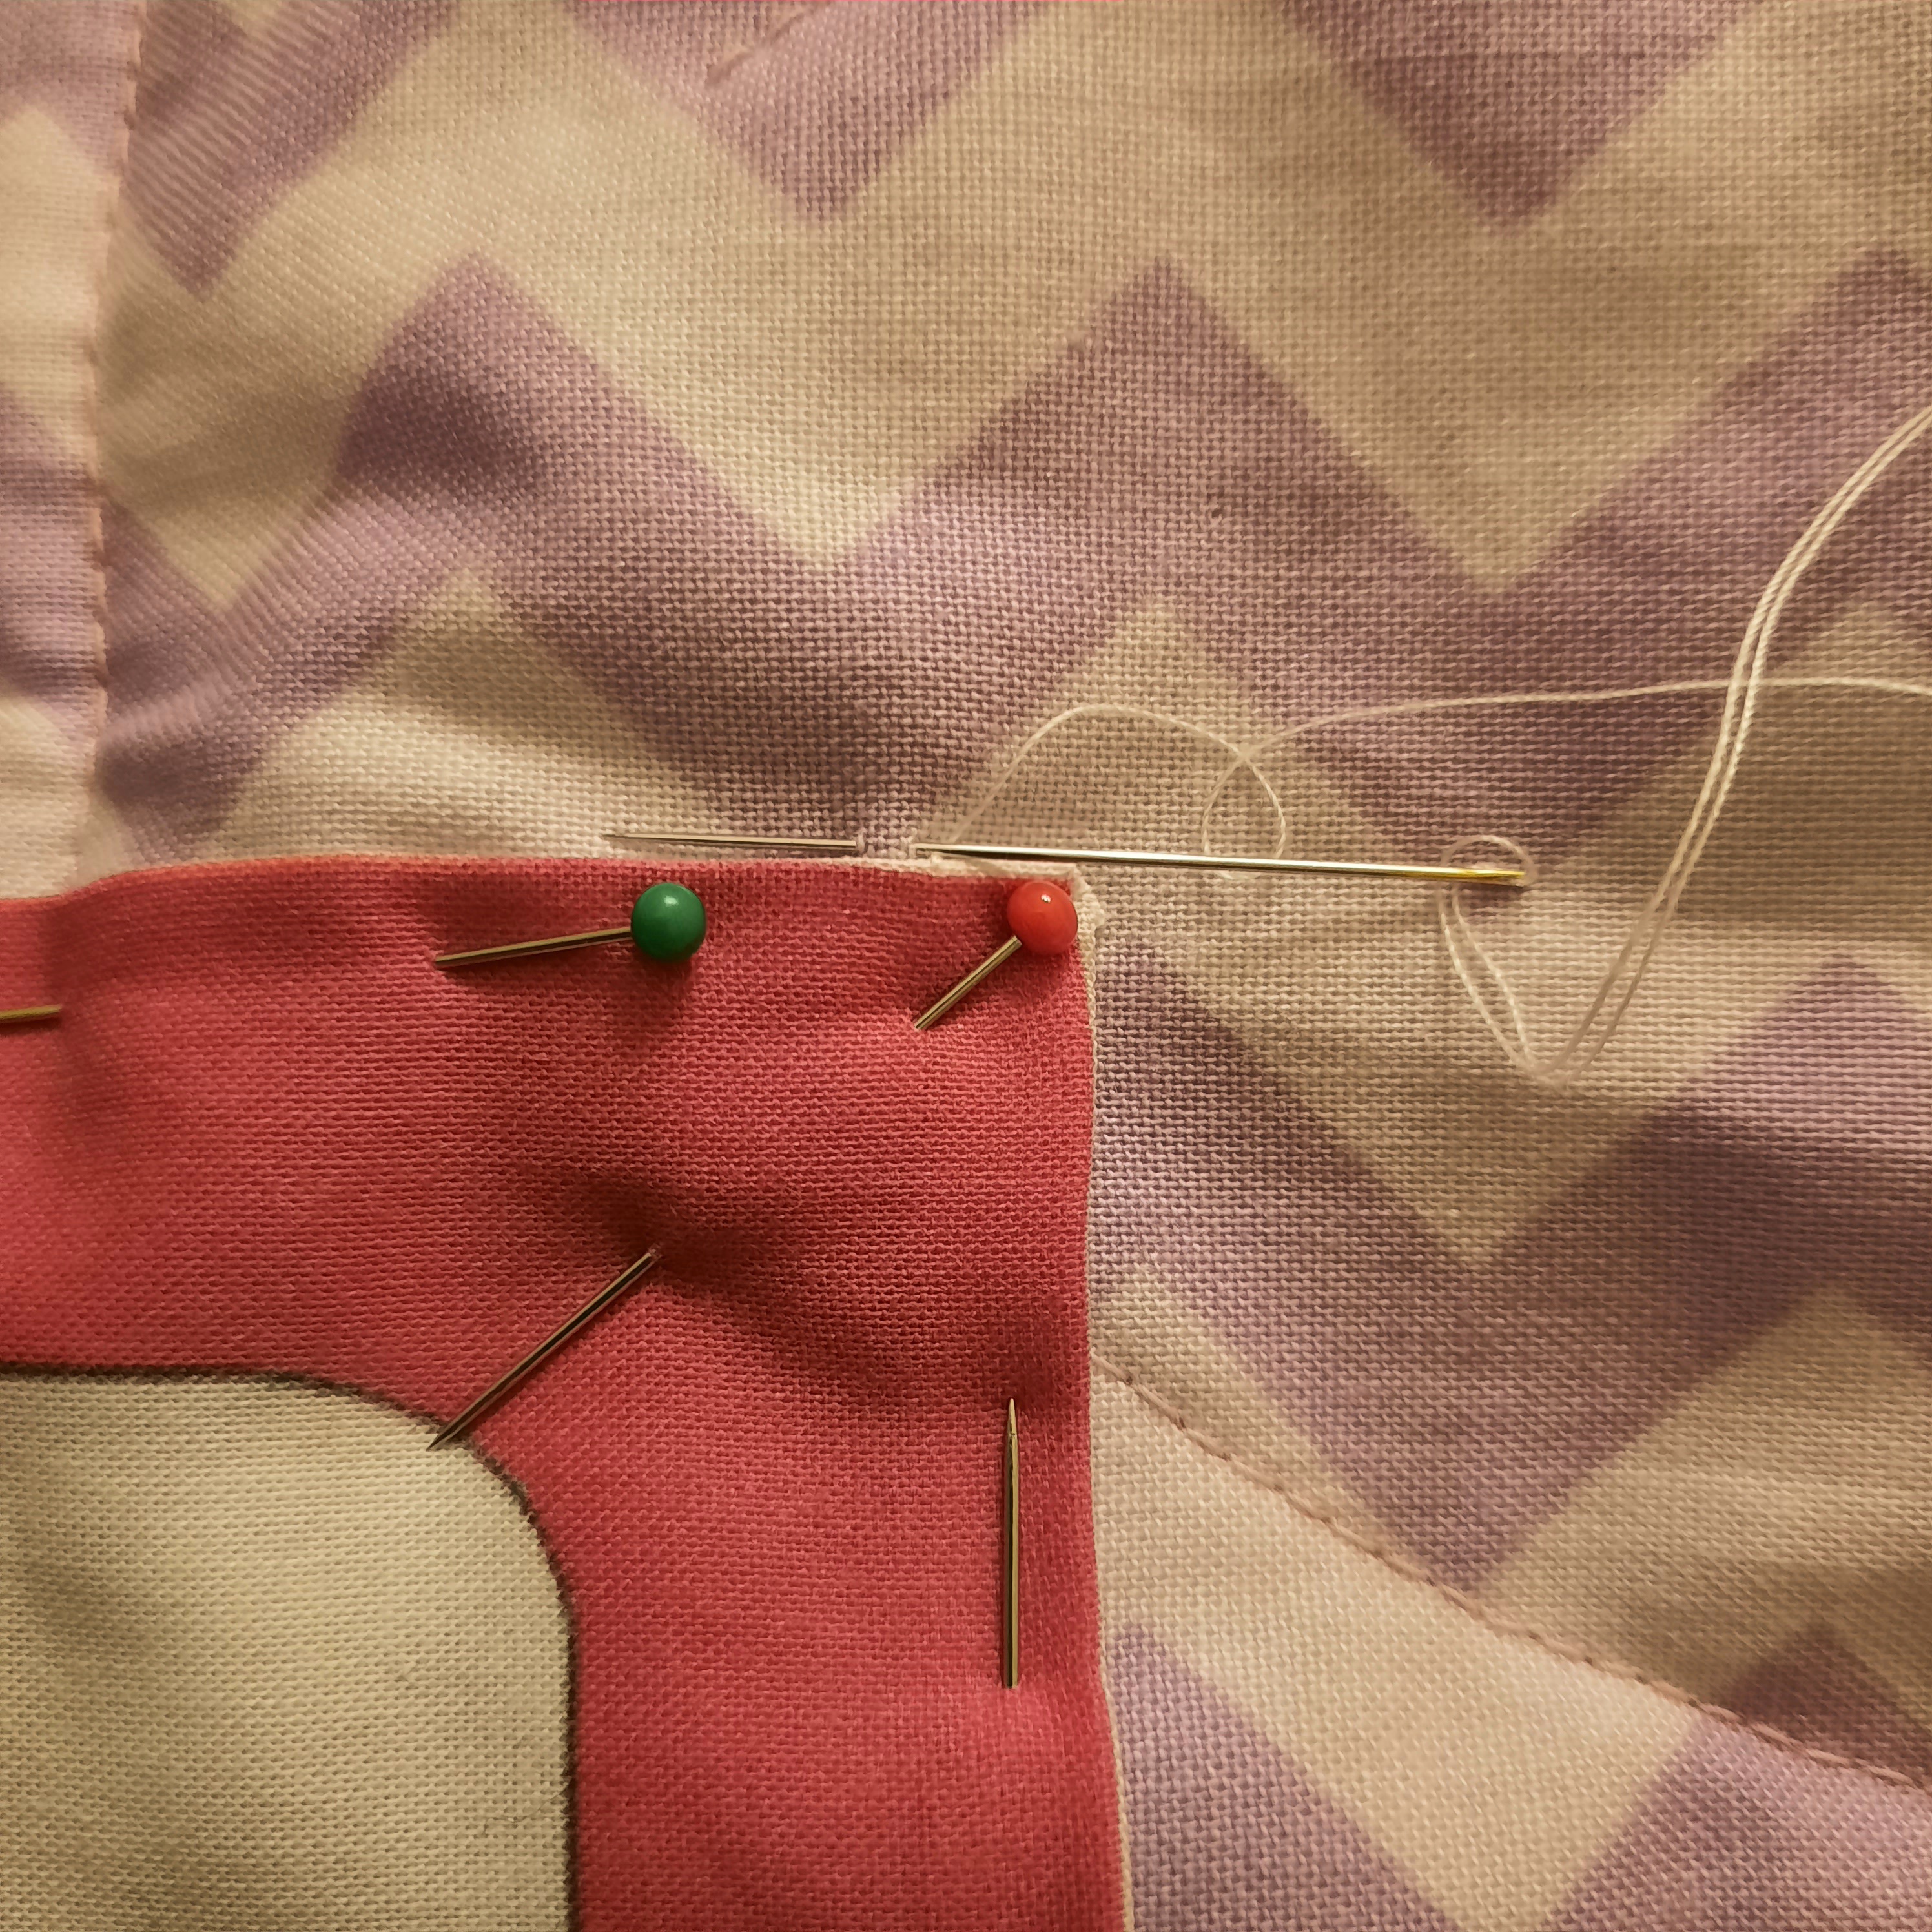
6 Then run your thread through the fold of the label.
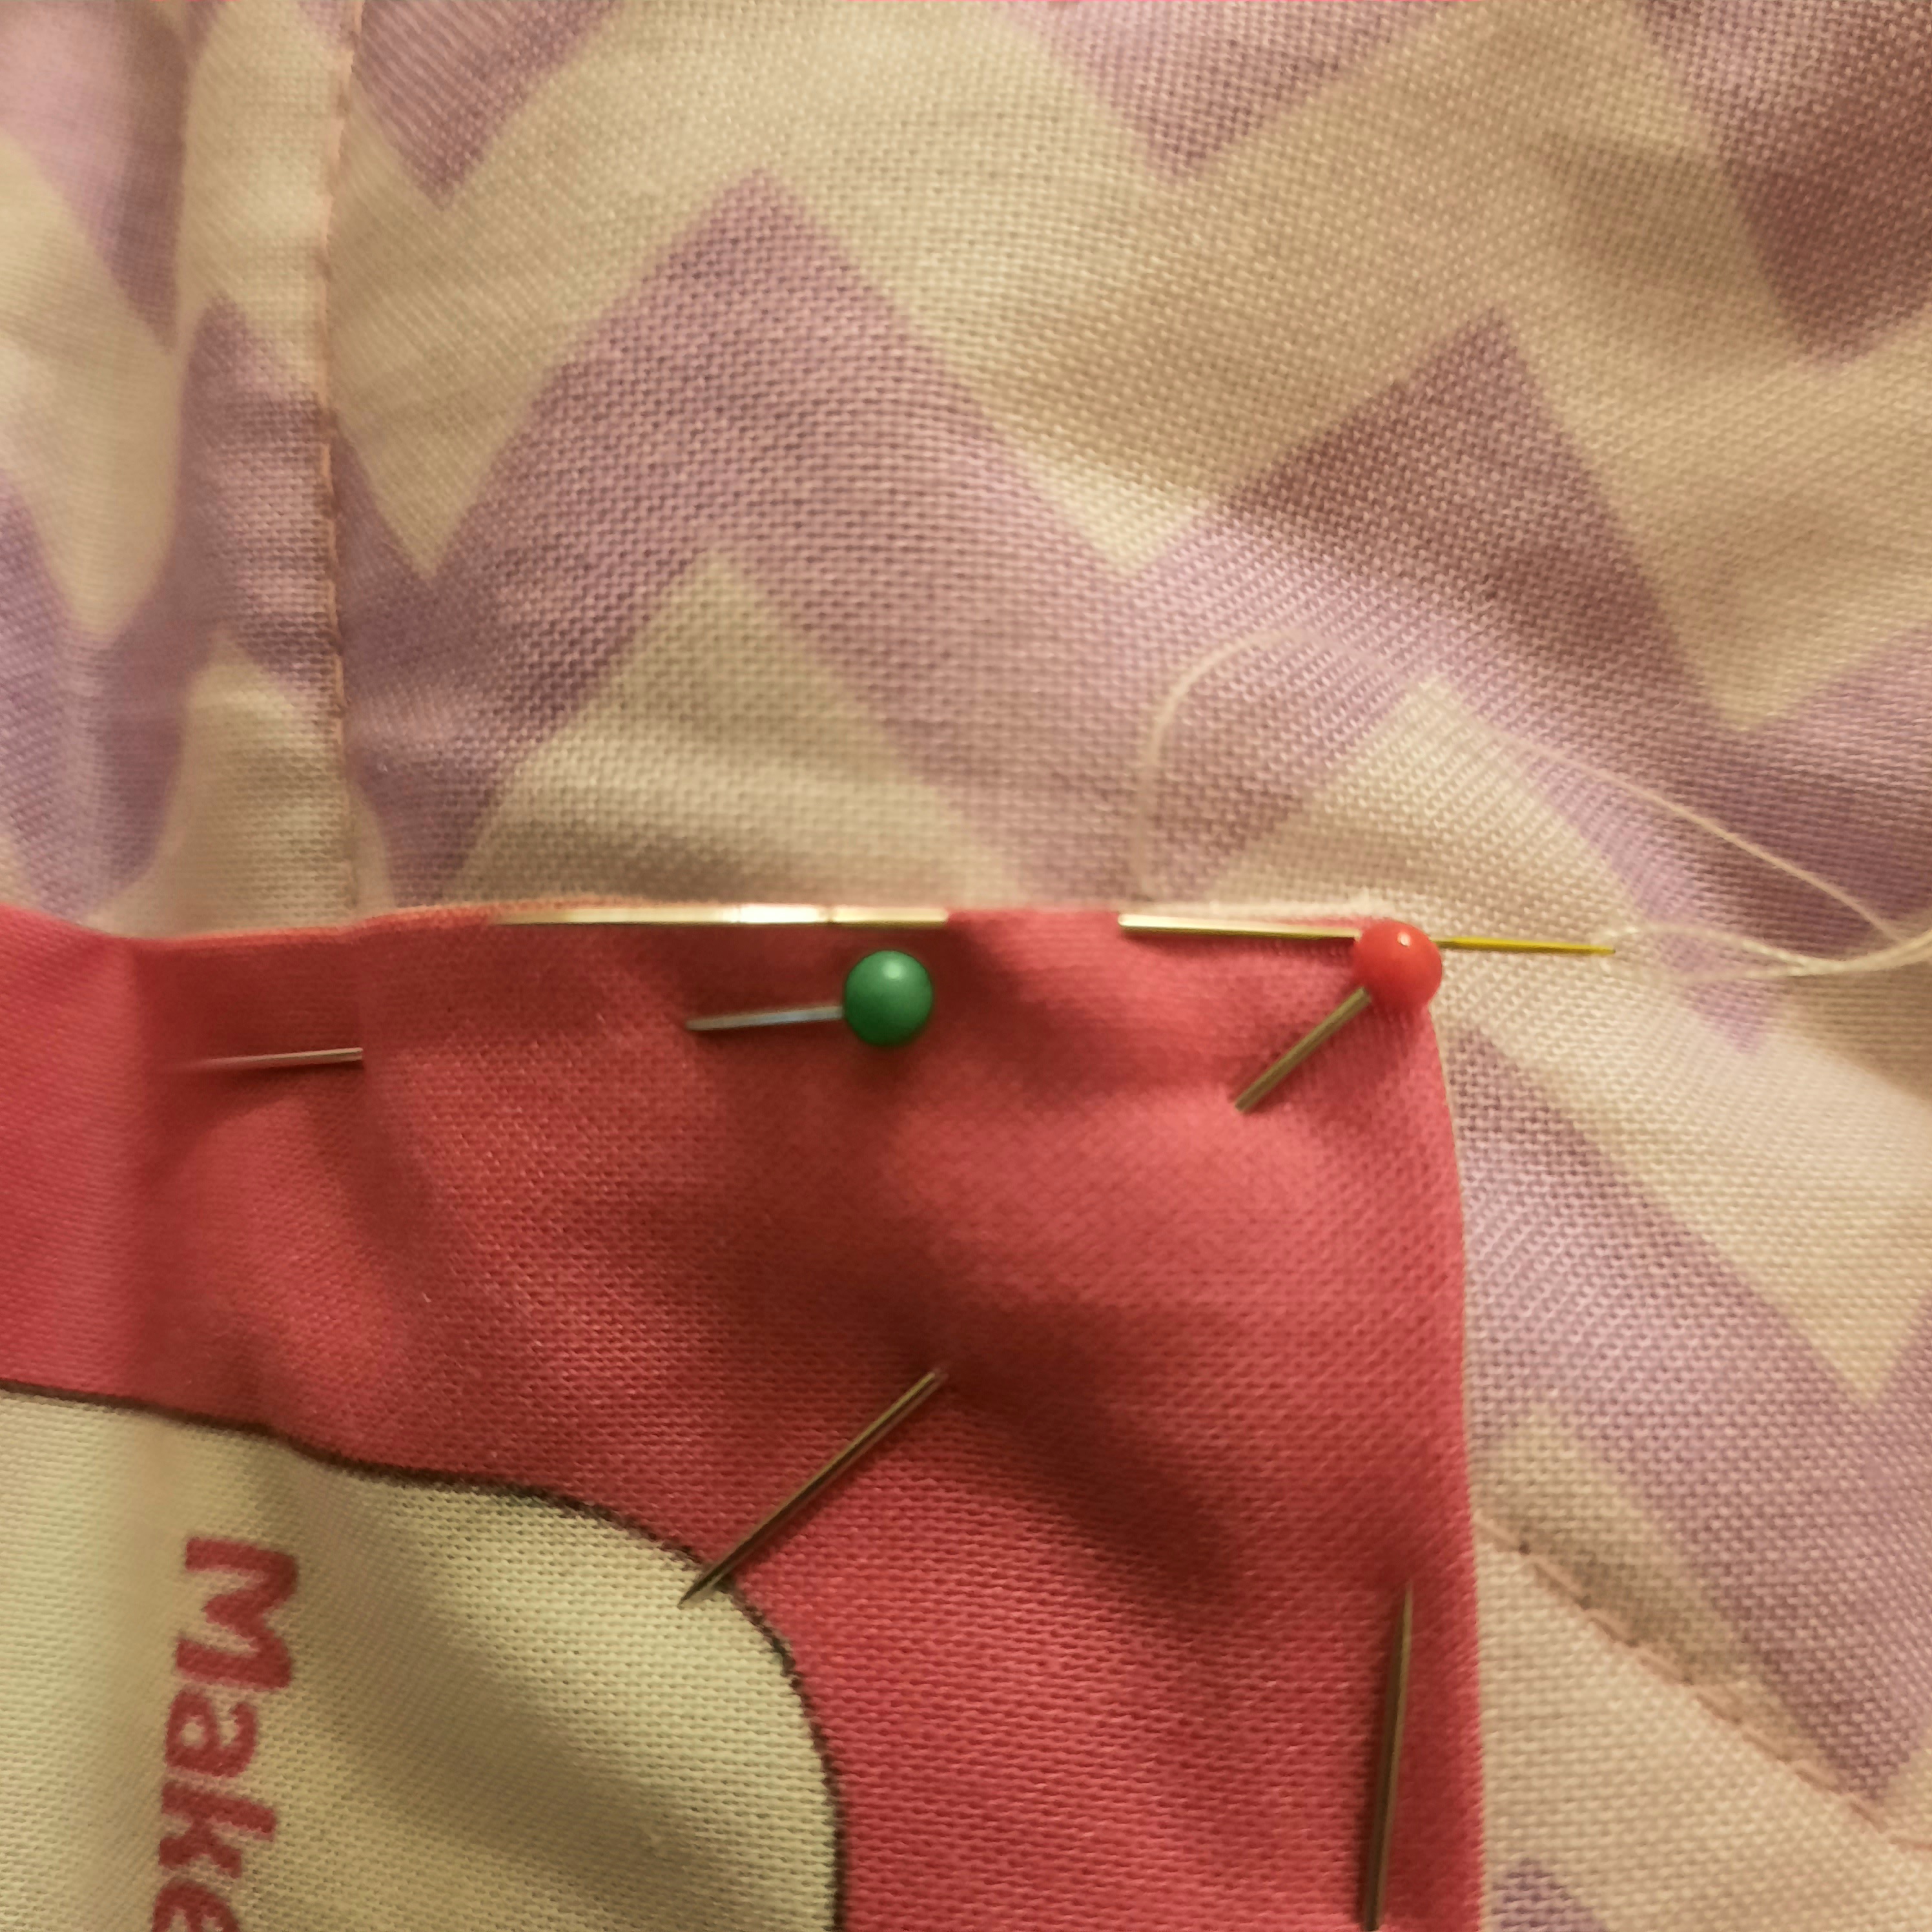
7 Repeat steps 5 and 6 all round the label. Insert a small stitch from the label outwards at each corner to make sure that the shape stays crisp.
If you haven’t yet made the ‘Summer Bouquets’ quilt, don’t worry – you still can. The instructions will remain here on the website and all the links you need are at the top of this post
There are many more quilt patterns available in the Amanda Jane Textiles shop on Etsy here.
According to Etsy: This seller sets a shining example for providing a great customer experience, with a history of 5-star reviews, on-time dispatch, and quick replies to any messages they received.
According to a customer, this is what the patterns are like: I love Amanda Jane patterns. Having purchased another pattern, I knew I would not be disappointed. Amanda Jane patterns are easy to follow and a pleasure to construct.
Happy stitching!
Thank you for reading my blog. Quilt patterns are here, Fabrics are here, Classes are here.
Click the ‘Follow’ button to get a blog-post by email each Monday and click here if you would like the monthly newsletter with design and colour inspiration, etc.
